Free Crochet Stocking Pattern with Fluffy Fur Cuff
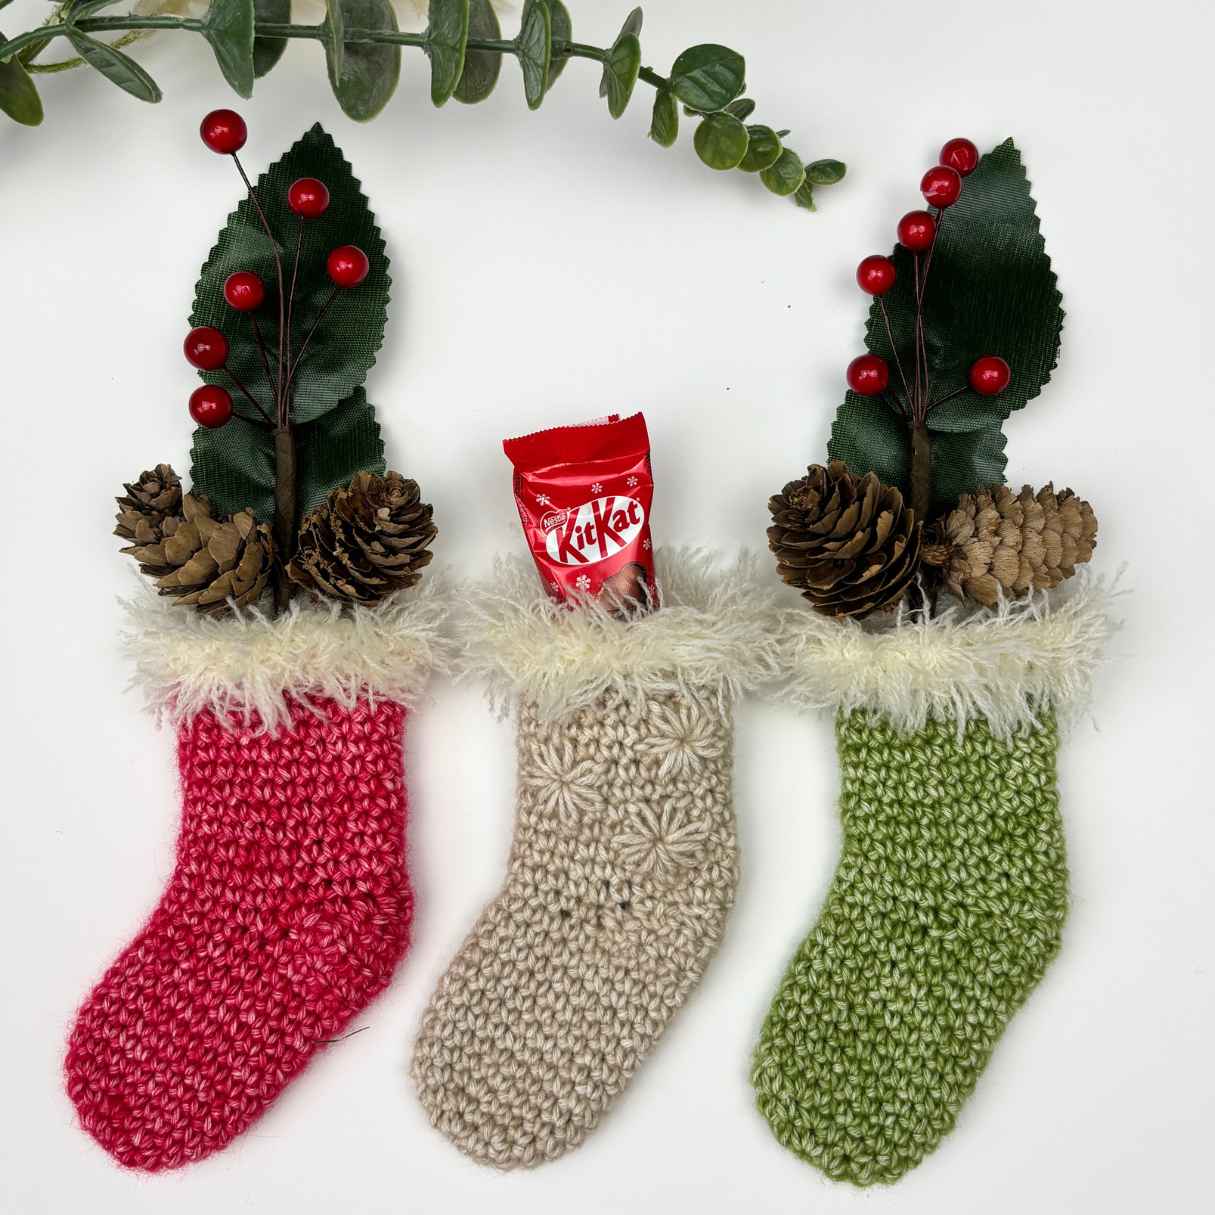
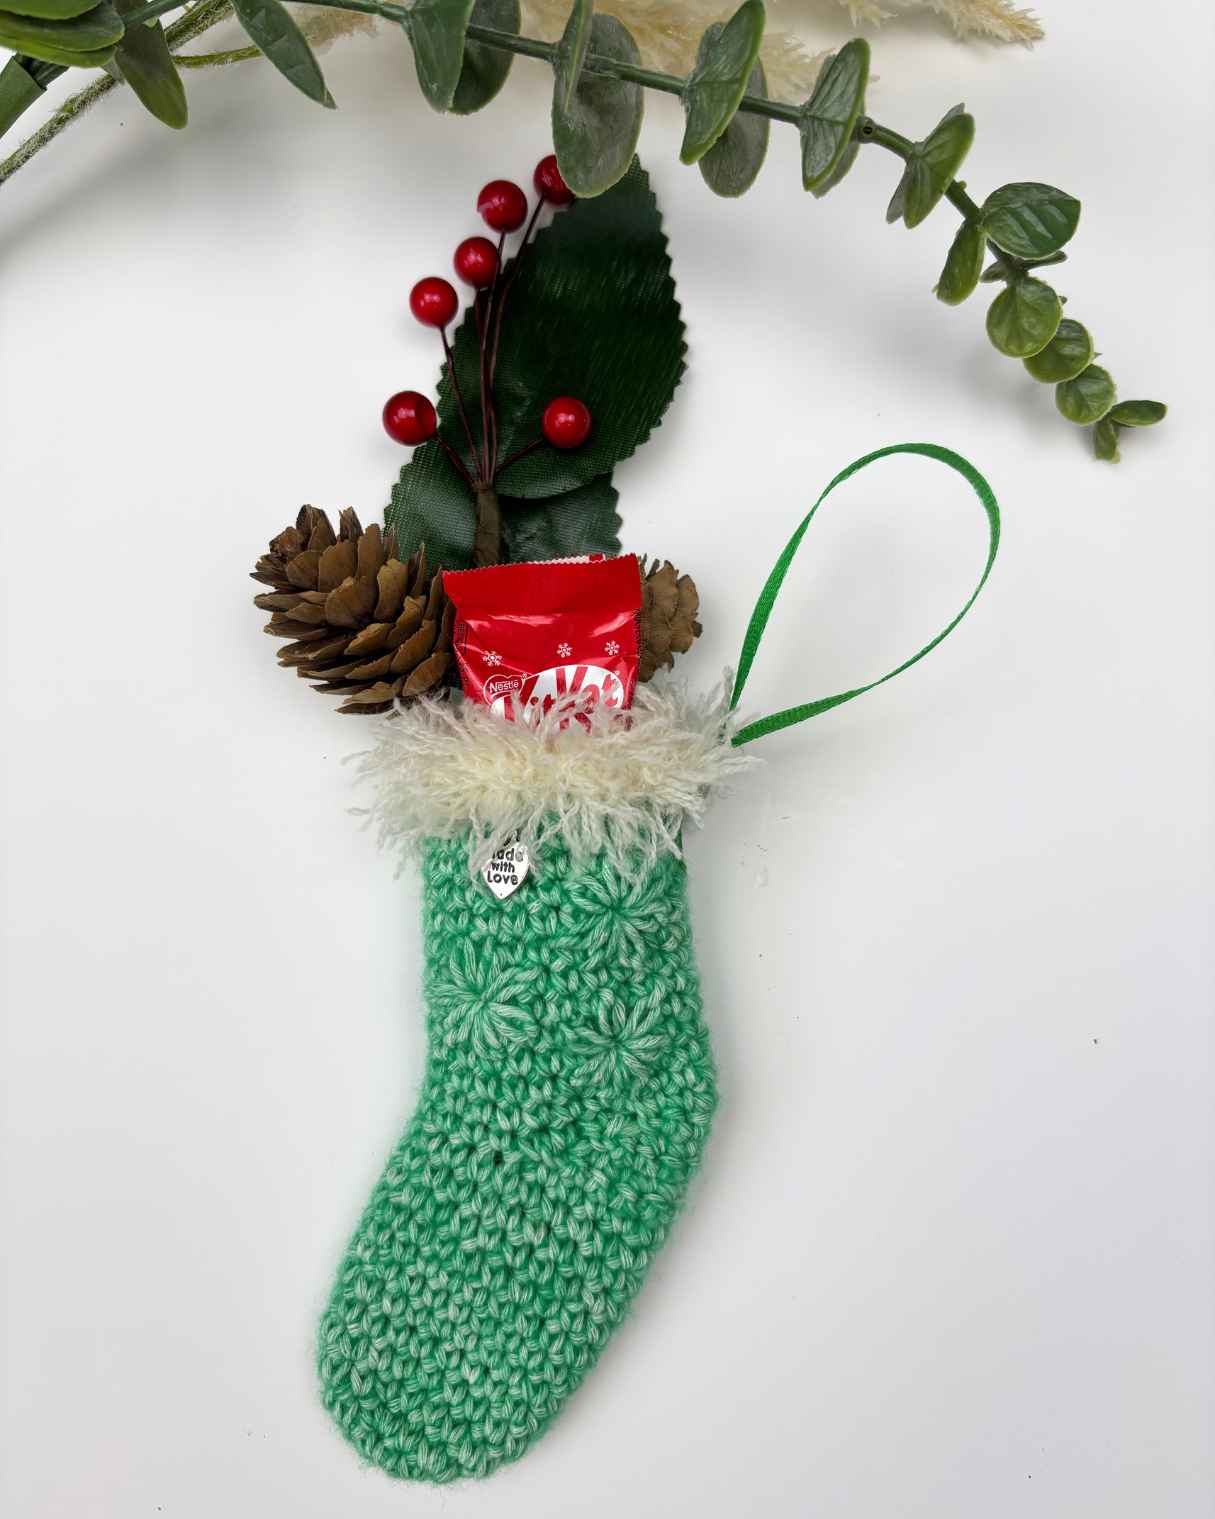
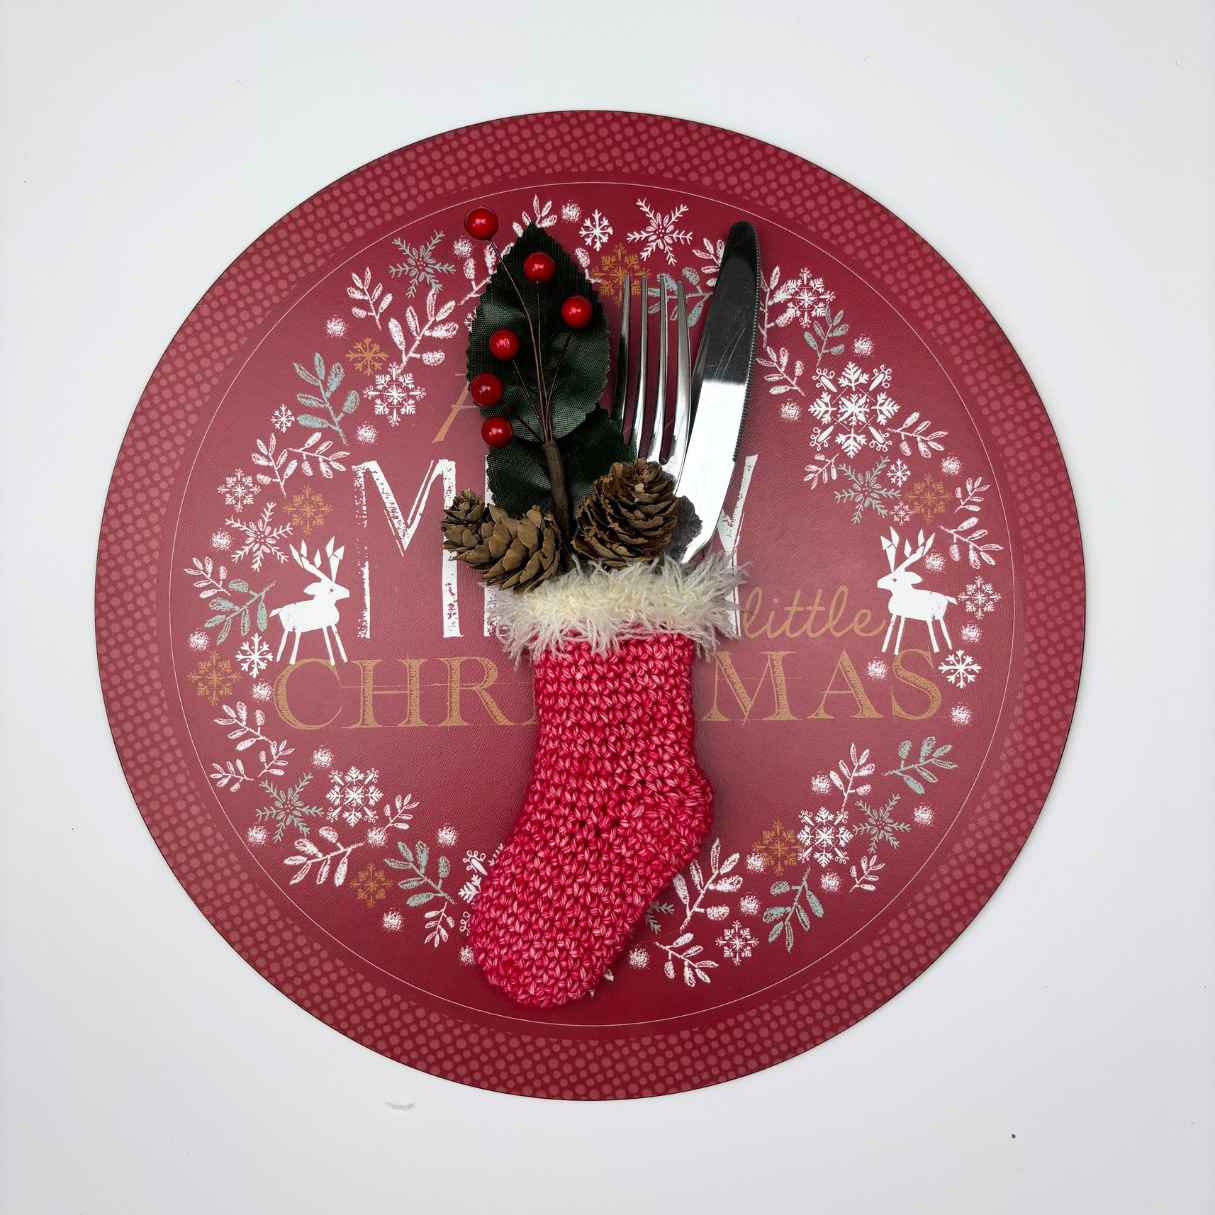
This free crochet Christmas stocking pattern is perfect for advent surprises, place settings at Christmas dinner, or a sweet little surprise tucked into a larger gift. There's nothing more festive than a row of little handmade stockings ready to hang on the tree.
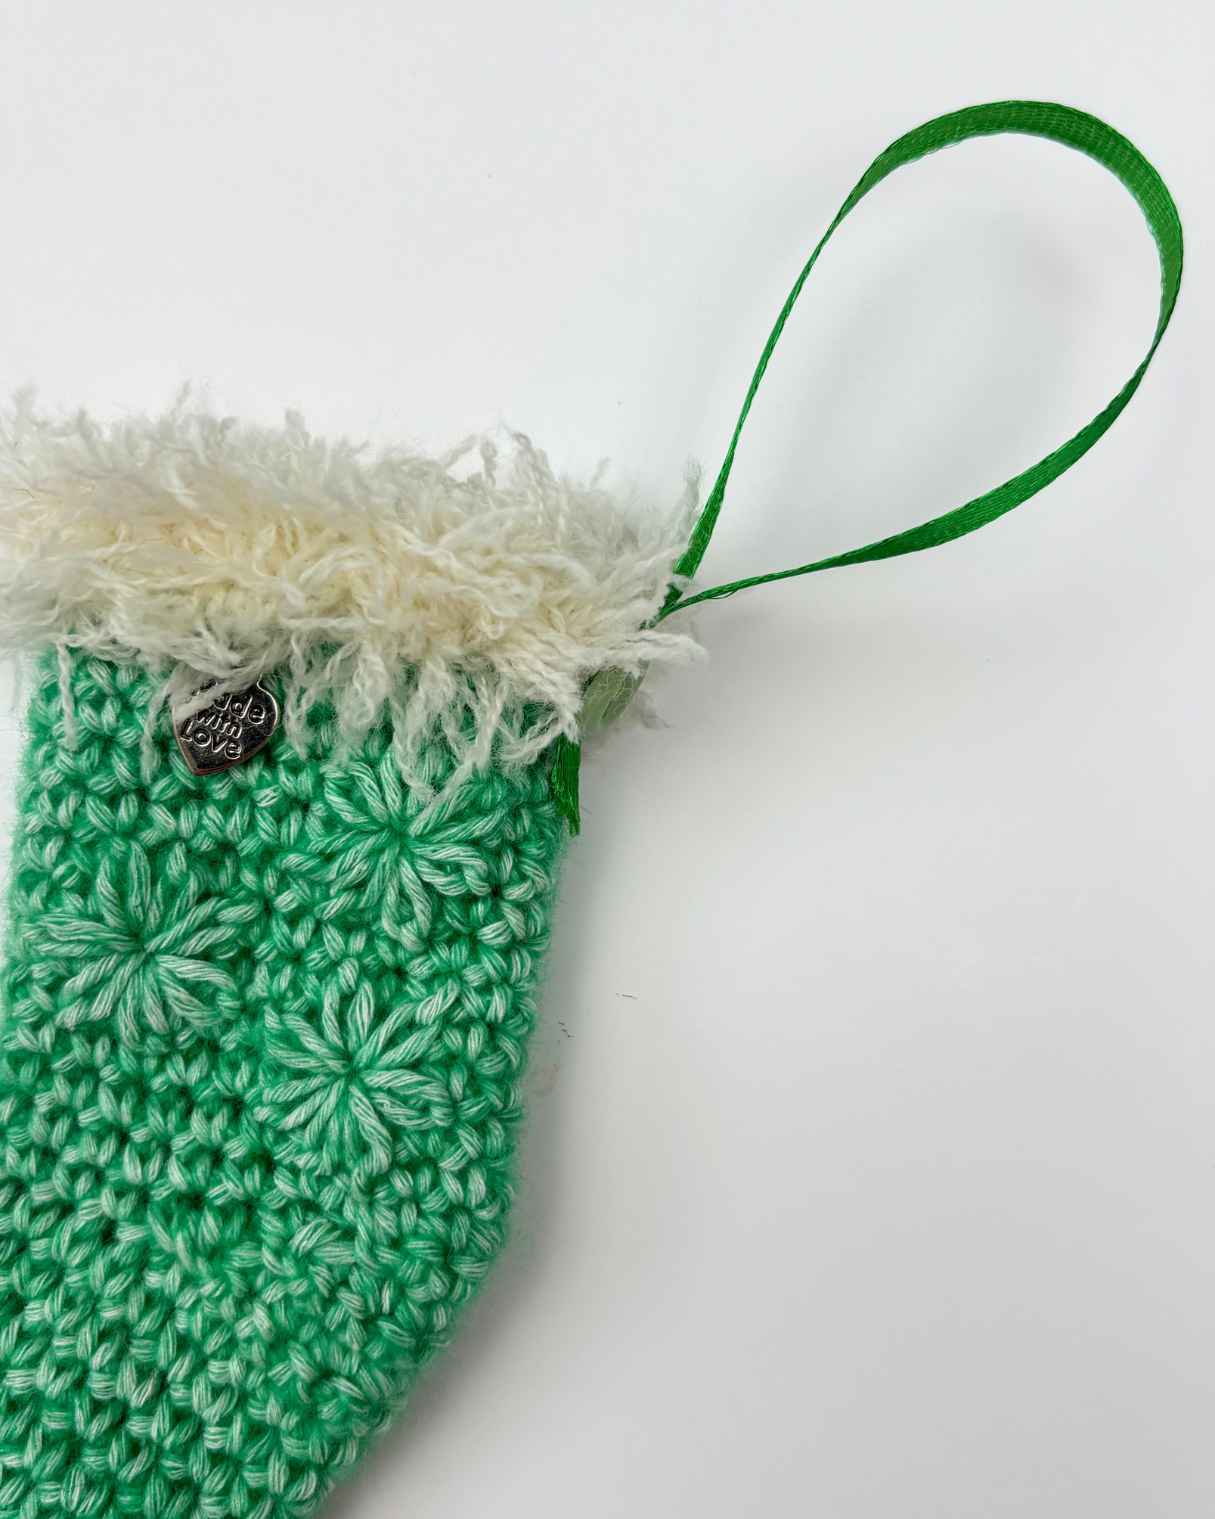
Each little stocking is worked in simple single crochet (US) or double crochet (UK), with a neat shaped heel and a soft, fluffy faux fur cuff that looks like it has just come in from the snow. I therefore couldn't resist calling them Snowtop Stockings. Add a few Lazy Daisy flowers for a pretty finishing touch, then hang them on the tree with a loop of ribbon, or add them to your gift wrapping for a reusable extra treat.
The best part about these cute little crochet stockings is that they only use one stitch throughout, and also they're really easy to remember, once you've made a few.
The Premium Pattern PDF is free until Monday 16th. November 12.30pm UK time. Scroll down beneath the written pattern to get your free pdf to download.
Quick Look: Free Crochet Stocking Pattern
- Skill Level: Next steps; confident beginner.
- Language: English; two separate patterns in both US and UK crochet terms.
- Construction: Worked in rounds from toe to cuff.
- Techniques Used: Magic ring, US sc; UK dc.
- Time To Make: ~ 1 hour per stocking, depending on speed of crochet.
- Yarn: ~ 10g of DK yarn (8-ply; light worsted weight); oddments of a faux fur contrast yarn.
- Extras: Wool needle; thin ribbon, button; sewing needle; thread.
- Hook: 4mm (US G/6) and also 3mm (US D/3)
- Finished Size: ~ 12cm (4¾in) long from cuff to toe, and 5cm (2in) wide across the leg.
- Perfect For: Tree decorations, advent treats, place settings and gift toppers.
Your support helps Google recognise and trust me as a knitting and crochet designer 🌟
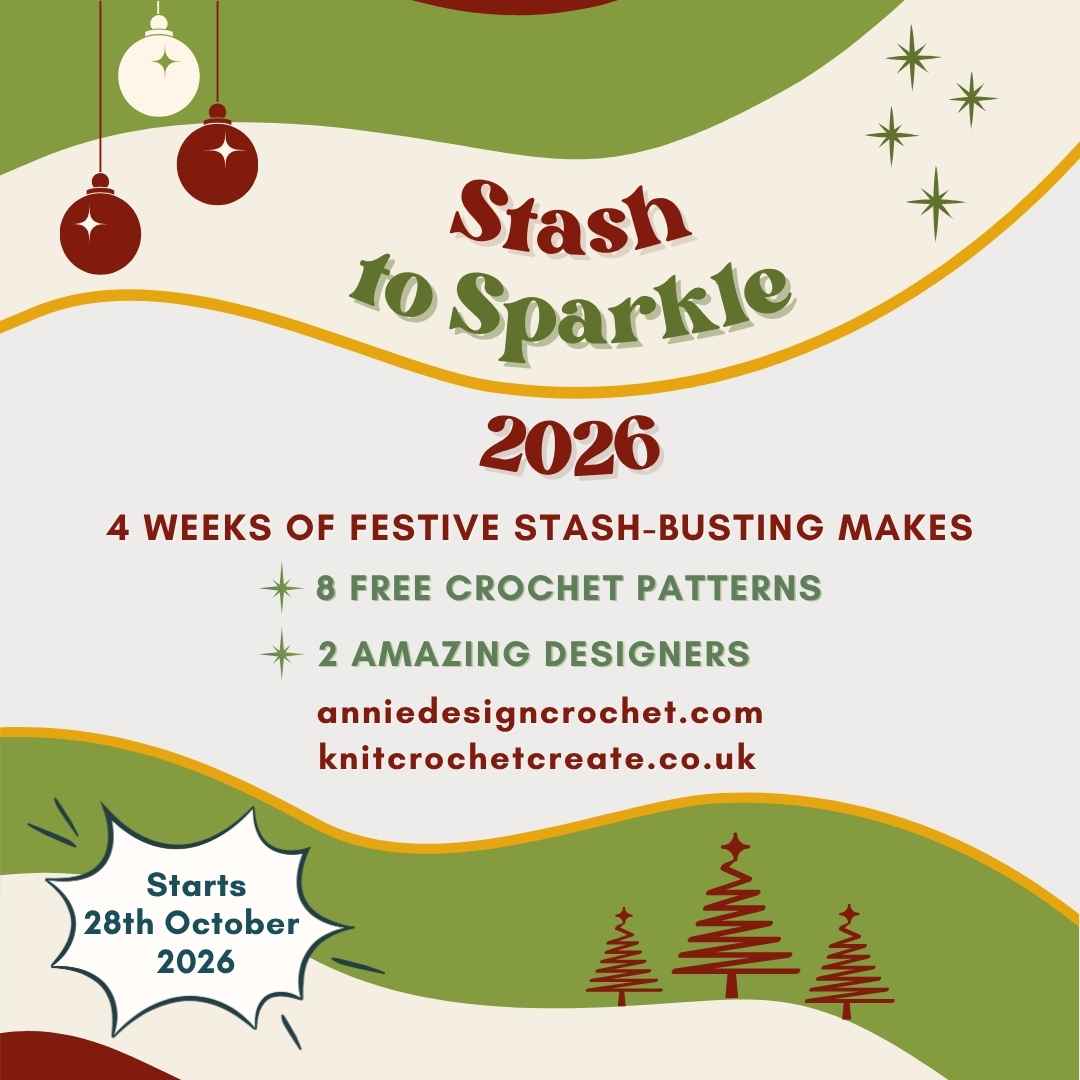
Stash To Sparkle 2026 Blog Hop
The Snowtop Stocking is Pattern 6 of 8 in Stash To Sparkle 2026, the festive stash-busting blog hop I'm running with Carmen from Annie Design Crochet.
Carmen releases a new pattern every Wednesday and I release mine every Saturday, from Wednesday 28th October to Saturday 21st November. Then on Wednesday 25th November, we'll share a round-up of all eight patterns in one place.
You can read all about the hop, and find every pattern as it's released, on my Stash To Sparkle 2026 event post.
Why You'll Love This Free Crochet Stocking Pattern
- Quick to make: Each stocking works up in an evening, so you can make a whole set before Christmas.
- Stash-friendly: One 10g mini ball of DK makes a stocking, and the cuff uses just a small amount of faux fur, so it's the perfect stash-buster for small scraps.
- Just the right size for a treat: A mini chocolate bar or a treat-sized biscuit fits perfectly inside.
- Fluffy and festive: The faux fur cuff adds instant snowy sparkle, or you can use a plain contrast yarn instead.
- Easy to personalise: Add Lazy Daisy flowers, change the colours, or try a different yarn weight to make bigger or smaller stockings.
- Lovely gift idea: Pop a sweet treat inside and hang one on a present, a door handle, or use as table decorations.
Level of Difficulty
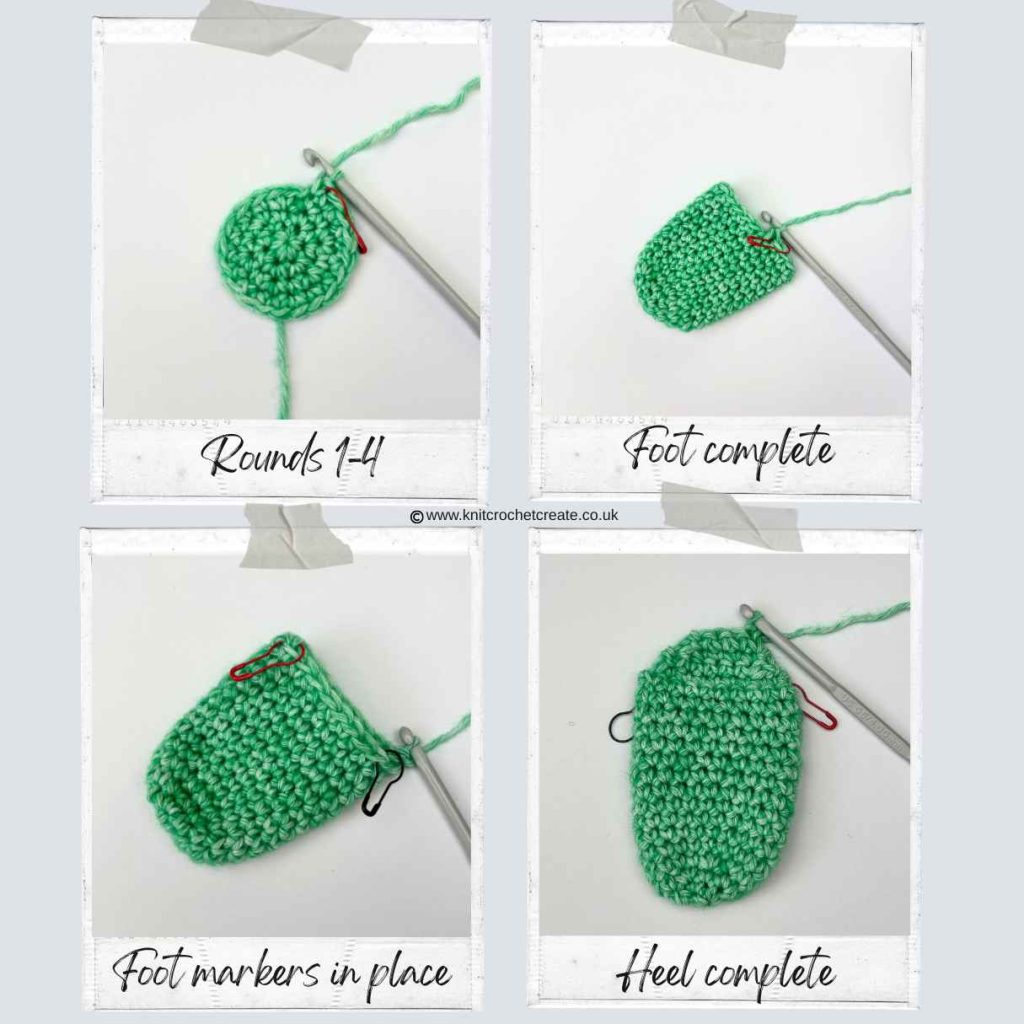
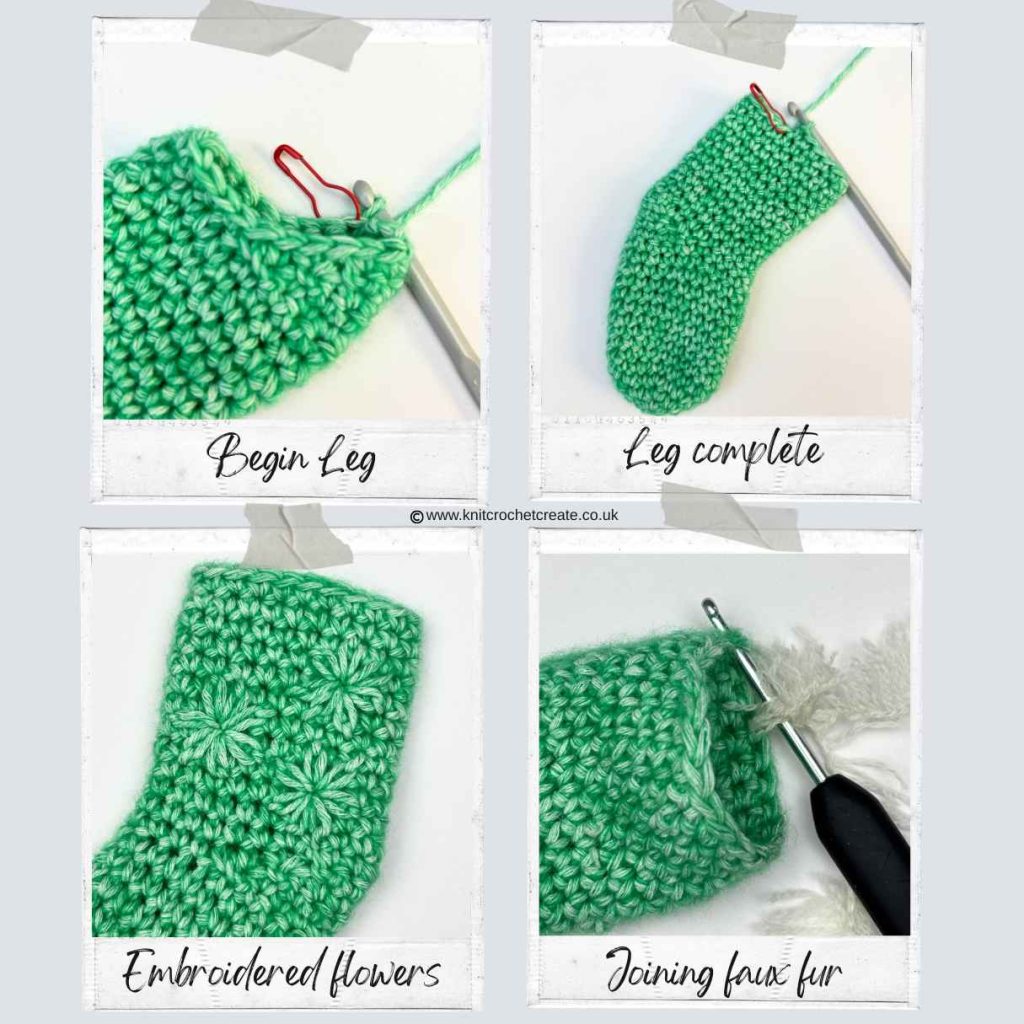
This pattern is next steps project for an advanced beginner. If you can make a magic ring and work US single crochet (UK double crochet) in the round, you'll be fine. The only part that might be new to you is the heel, which is shaped using short rows. Don't worry, though, because it's only six short rows, and every row is written out in full with stitch counts. The step-by-step photos show you how it should look as you go.
How to Get Your Free Crochet Stocking Pattern
The Premium Pattern PDF is free until Monday 16th. November 12.30pm UK time. Scroll down beneath the written pattern to get your free pdf to download.
- Find the full pattern instructions written out below. You don't need to sign up or log in because it's written out free right here on the blog.
- The free pattern is written in both US crochet terms here followed by UK crochet terms here.
- Printable PDF: You can purchase an ad-free PDF pattern if preferred, to save and use as many times as you like. Thank you for your support.
- Purchase your Crochet Stocking Pattern on Ravelry or on Etsy.
Copyright
Please read the copyright terms, which apply globally, before using or downloading your pattern:
The contents of this page, including the pattern instructions and images, are published under copyright to me ©Lynne Rowe 2026 under my brand Knit Crochet Create® and are for your own personal use only.
You are welcome to sell items made from this pattern for charity fundraising purposes, or to gift them to family and friends, but selling small numbers for profit is only allowed with permission.
You can email: lynne@knitcrochetcreate.com for permission.
Free Crochet Stocking Pattern: Materials
For each mini Christmas stocking, you will need:
- Yarn A (for main stocking): Small amounts of double knitting (8-ply; light worsted weight) in any colour of choice.
- I used Scheepjes Stone Washed, 10g (26m; 28.5yds) per stocking, in Red (Carnelian 823); Green (Canada Jade 806; Prehnite 850); Cream (Axinite 831).
- Yarn B (for cuff): Oddments of fluffy yarn. You can use a plain contrast yarn instead and your stocking will look just as good.
- I used a small amount of Rowan Fur, 50g (60m; 66yds), in Cream Polar 090. There are lots of similar faux fur yarns, for example, James C Brett Faux Fur Chunky.
- Hooks: 4mm (US G/6) for the stocking; 3mm (US D/3) for a faux fur cuff.
- Extras: Wool needle; 2 removable stitch markers; thin ribbon; small button; sewing needle and thread.
Gauge or Tension
Tension (gauge) is not critical for this project. It doesn't matter if your stocking turns out slightly larger or slightly smaller than the finished size. Just aim for a firm, close fabric, so that the stocking holds its shape and your treat doesn't peep through the stitches.
Finished Size
Approximately 12cm (4¾in) long from cuff to toe, and 5cm (2in) wide across the leg), using double knitting (8-ply; light worsted weight) yarn and a 4mm (US G/6) hook.
FREE Crochet Stocking Pattern Begins – US terms
Abbreviations
- ch(s) = chain or chain stitches
- RS = right side
- sc = single crochet
- slst = slip stitch
- st(s) = stitch(es)
- WS = wrong side
- [ ] = repeat instructions within brackets as many times as stated
- Prefer UK terms? The UK version is here.
Crochet Stocking Pattern Instructions
With US G/6 (4mm) hook and Yarn A, make a magic ring, or ch4, then slst in the first of these 4 ch to form a ring. Crochet over your tail end of yarn when working Round 1, so you can pull the hole closed.
Toe
- Round 1: Ch1, 6sc in centre of ring. (6 sts)
- Place a stitch marker in the last st of the round then move it up as you complete each round, because this will help you identify the end of the round.
- Round 2: 2sc in each st around. (12 sts)
- Round 3: [2sc in next st, 1sc in next st] around. (18 sts)
- Round 4: [2sc in next st, 1sc in next 8 sts] twice. (20 sts)
- Weave in the starting tail end of yarn.
Foot
- Rounds 5-13: 1sc in each st around.
- Note: For a slightly shorter foot, if preferred, you can work one (or two) rounds less.
Heel
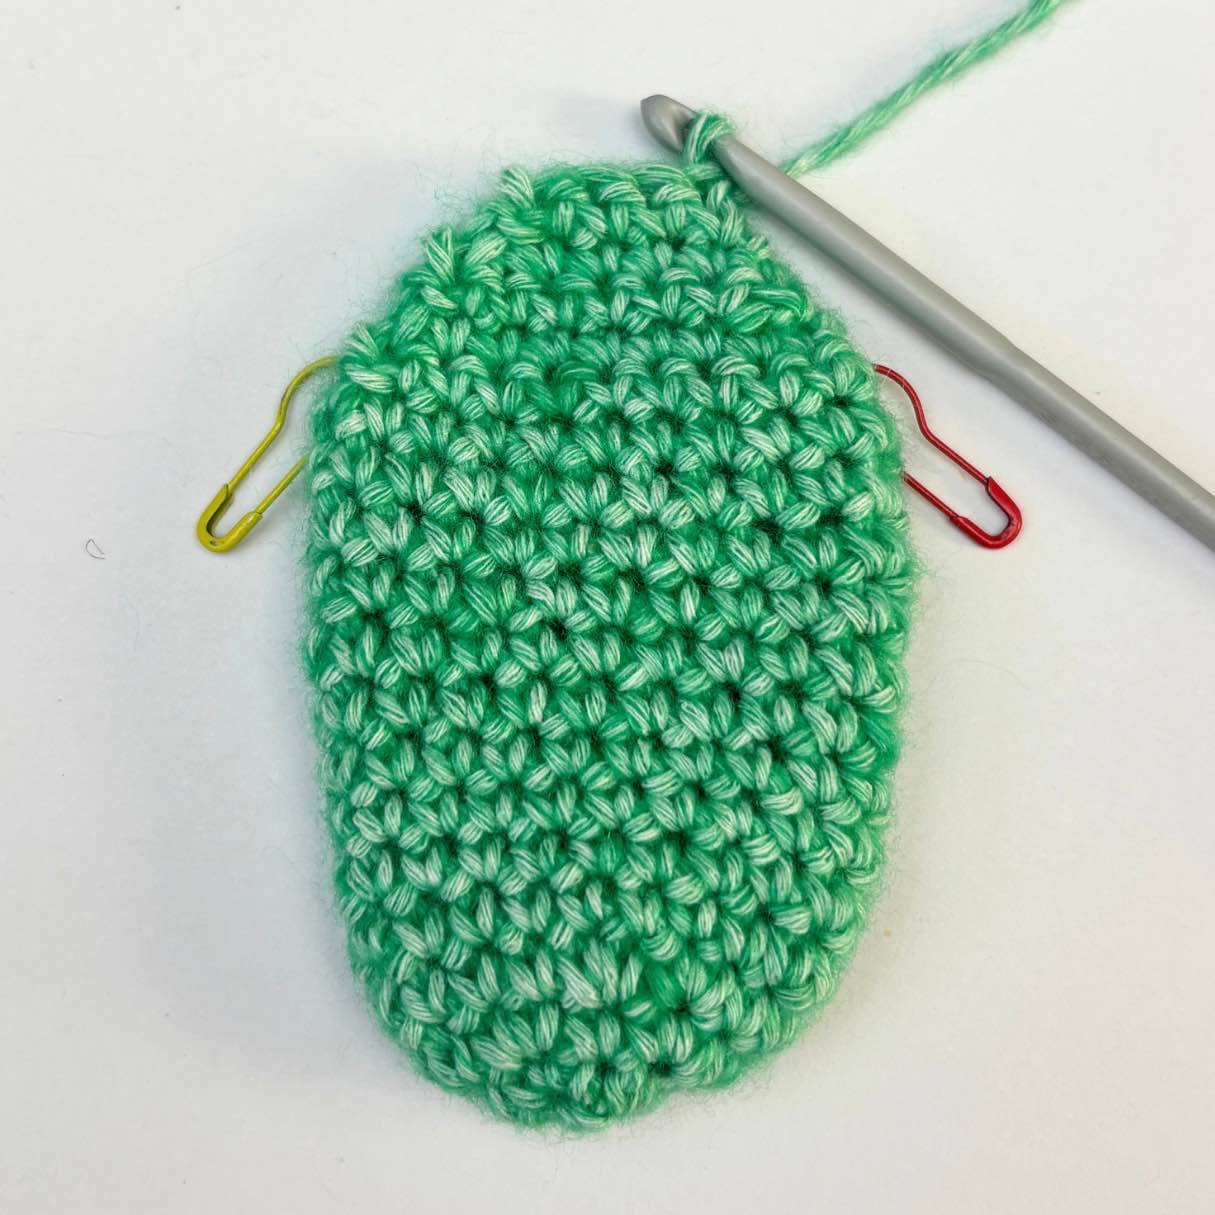
Work in rows for the heel. Do not ch1 at beginning of heel rows. Leave stitch marker in place.
- Row 1 (RS): 1sc in each of next 11 sts, place a second stitch marker in the next st along, then turn. (11 sts)
- Row 2 (WS): Skip st at base of hook, 1sc in each of next 10 sts, then turn. (10 sts)
- Row 3: Skip st at base of hook, 1sc in each of next 9 sts, then turn. (9 sts)
- Row 4: Skip st at base of hook, 1sc in each of next 6 sts, skip next st, 1sc in last st, turn. (7 sts)
- Row 5: Skip st at base of hook, 1sc in each of next 4 sts, skip next st, 1sc in last st, turn. (5 sts)
- Row 6: Skip st at base of hook, 1sc in each of next 4 sts, then turn. (4 sts)
Leg
Worked in rounds.
- Round 1 (RS): Ch1 (does not count as a st), 1sc in each of 4 heel sts, work 4sc evenly across row-ends of heel, now using previous stitch markers as a guide, work 1sc in each of front foot sts (including marked sts) and remove stitch markers, work 4sc evenly across row-ends of heel, place a stitch marker in last st of round (21 sts).
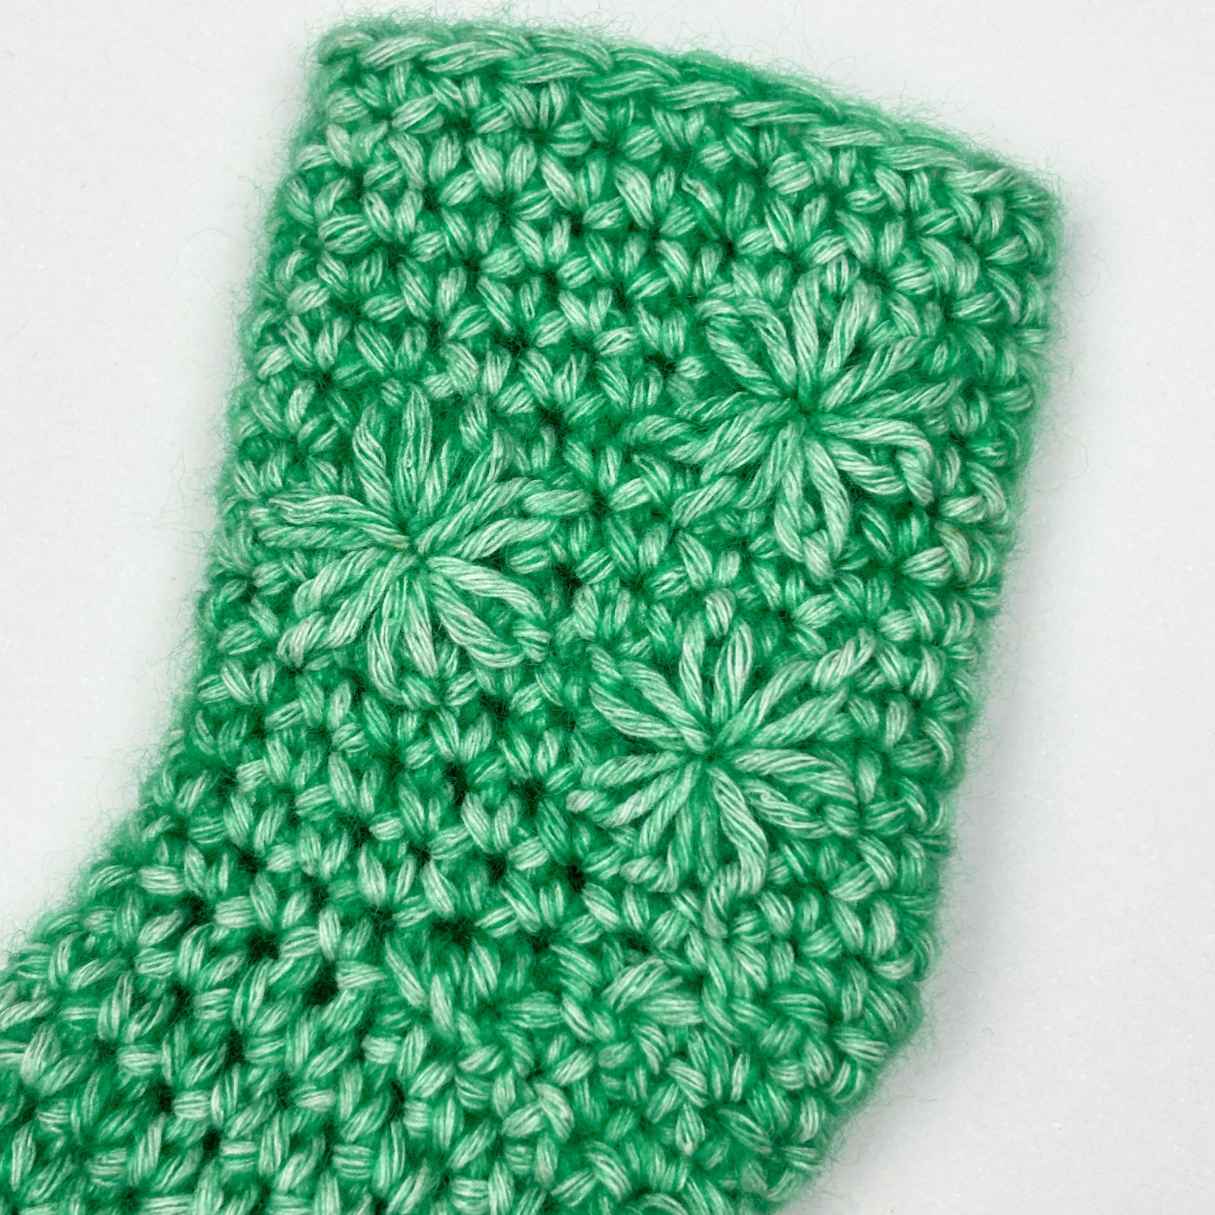
- Rounds 2-13: 1sc in each st around, moving the stitch marker up as you work. At the end of Round 13, remove stitch marker, slst in next st then fasten off. If desired, with same yarn, embroider a few flowers on one side, in Lazy Daisy Stitch (or you could add these at the end instead).
Cuff
- If using faux fur, change to US D/3 (3mm) hook and work from the inside (WS) so that the fur stays on RS. If using regular yarn, use US G/6 (4mm) hook and work from RS.
- Join cuff yarn with slst to any stitch.
- Round 1: Ch1, 1sc in same st, 1sc in each st around. (21 sts)
- Round 2: 1sc in each st around.
- If desired, work Round 2 once more, for a deeper cuff. Slst in next st then fasten off. Weave in all ends.
To Finish Your Crochet Stocking Pattern
- Add a hanging loop to the outside cuff edge, using thin ribbon, then sew a button over the ribbon ends, for a neat finish.
FREE Crochet Stocking Pattern Begins – UK terms
Abbreviations
- ch(s) = chain or chain stitches
- dc = double crochet
- RS = right side
- slst = slip stitch
- st(s) = stitch(es)
- WS = wrong side
- [ ] = repeat instructions within brackets as many times as stated
- Prefer US terms? The US version is here.
Crochet Stocking Pattern Instructions
With 4mm hook and Yarn A, make a magic ring, or ch4, then slst in the first of these 4 ch to form a ring. Crochet over your tail end of yarn when working Round 1, so you can pull the hole closed.
Toe
- Round 1: Ch1, 6dc in centre of ring. (6 sts)
- Place a stitch marker in the last st of the round. Move it up as you complete each round, because this will help you identify the end of the round.
- Round 2: 2dc in each st around. (12 sts)
- Round 3: [2dc in next st, 1dc in next st] around. (18 sts)
- Round 4: [2dc in next st, 1dc in next 8 sts] twice. (20 sts)
- Weave in the starting tail end of yarn.
Foot
- Rounds 5-13: 1dc in each st around.
- Note: For a slightly shorter foot, if preferred, you can work one (or two) rounds less.
Heel
Work in rows for the heel. Do not ch1 at beginning of heel rows. Leave stitch marker in place.
- Row 1 (RS): 1dc in each of next 11 sts, place a second stitch marker in the next st along, then turn. (11 sts)
- Row 2 (WS): Skip st at base of hook, 1dc in each of next 10 sts, then turn. (10 sts)
- Row 3: Skip st at base of hook, 1dc in each of next 9 sts, then turn. (9 sts)
- Row 4: Skip st at base of hook, 1dc in each of next 6 sts, skip next st, 1dc in last st, turn. (7 sts)
- Row 5: Skip st at base of hook, 1dc in each of next 4 sts, skip next st, 1dc in last st, turn. (5 sts)
- Row 6: Skip st at base of hook, 1dc in each of next 4 sts, then turn. (4 sts)
Leg
Worked in rounds.
- Round 1 (RS): Ch1 (does not count as a st), 1dc in each of 4 heel sts, work 4dc evenly across row-ends of heel, now using previous stitch markers as a guide, work 1dc in each of front foot sts (including marked sts) and remove stitch markers, work 4dc evenly across row-ends of heel, place a stitch marker in last st of round (21 sts).
- Rounds 2-13: 1dc in each st around, moving the stitch marker up as you work. At the end of Round 13, remove stitch marker, slst in next st then fasten off. If desired, with same yarn, embroider a few flowers on one side, in Lazy Daisy Stitch (or you could add these at the end instead).
Cuff
- If using faux fur, change to 3mm hook and work from the inside (WS) so that the fur stays on RS. If using regular yarn, use 4mm hook and work from RS.
- Join cuff yarn with slst to any stitch.
- Round 1: Ch1, 1dc in same st, 1dc in each st around. (21 sts)
- Round 2: 1dc in each st around.
- If desired, work Round 2 once more, for a deeper cuff. Slst in next st then fasten off. Weave in all ends.
To Finish Your Crochet Stocking
- Add a hanging loop to the outside cuff edge, using thin ribbon, then sew a button over the ribbon ends, for a neat finish.
Get your FREE Crochet Stocking Pattern PDF!
The PDF is free for the first 48 hours only (until Monday 16th. November 12.30pm UK time). Just choose your chosen pattern in UK or US terms, then pop your details in the relevant form below and I’ll email it straight to you. Already on my email list? You’ll still need to add your email to get the PDF, but don’t worry, you won’t be added twice.
Free Crochet Stocking Pattern: FAQs
Each stocking holds a small treat-sized chocolate bar or biscuit. A few wrapped sweets, a small candy cane, or to hold a knife and fork for table settings.
About 10g of double knitting (8-ply; light worsted weight) yarn per stocking, plus a small amount of faux fur yarn for the cuff. Therefore, a 10g mini ball is just right.
Yes. Any contrast double knitting yarn (8-ply; light worsted weight) works well. Use the 4mm hook and work the cuff from the right side.
It's great for advanced or confident beginners. If you're comfortable working US single crochet (UK double crochet) in the round, the short-row heel is a lovely new skill to try, and every row is written out with stitch counts.
Yes. The crochet stocking pattern is written in UK terms, and the PDF includes both UK and US terms versions
What to Make Next?
If you enjoyed my Crochet Christmas Stockings, you might also like these FREE crochet patterns:
- Crochet Christmas Trees – decorate your home with these quick-to-make trees.
- Mini Stocking Crochet Pattern – smaller stockings that are great for an advent garland.
- Crochet Christmas Stars – great for adding to your festive gift wrapping.
- More Free Crochet Patterns – you're bound to find something you like.
And don't forget to check the Stash To Sparkle 2026 event post each week for the latest patterns from me and Carmen.
Share Your Makes
If you love this pattern, then I'd love to see your finished book sleeves! Tag me on Instagram @knitcrochetcreate and use the hashtag #StashToSparkle2026 so I can admire your creations.
About Lynne from Knit Crochet Create
Lynne Rowe is a UK-based knitting and crochet designer and best-selling author, recognised for her clear, easy-to-follow patterns and also her dedication to making knitting and crochet accessible to everyone. She is the founder of Knit Crochet Create, with a strong focus on stash-busting projects that also promote sustainable, mindful making. Lynne's work encourages the use of your yarn stash, therefore helping you transform small leftovers into joyful creations.
Let's keep in touch!
I'd love to chat more.
Sign up for my newsletter and receive a weekly dose of crafting inspiration, featuring the latest trends, tips, and projects to fuel your creativity.