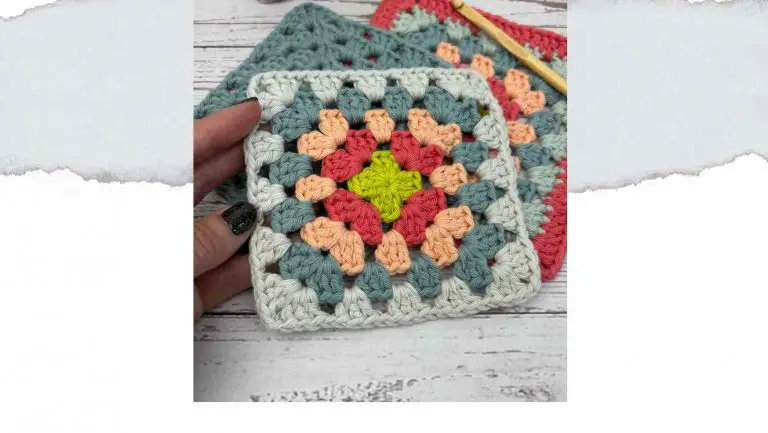
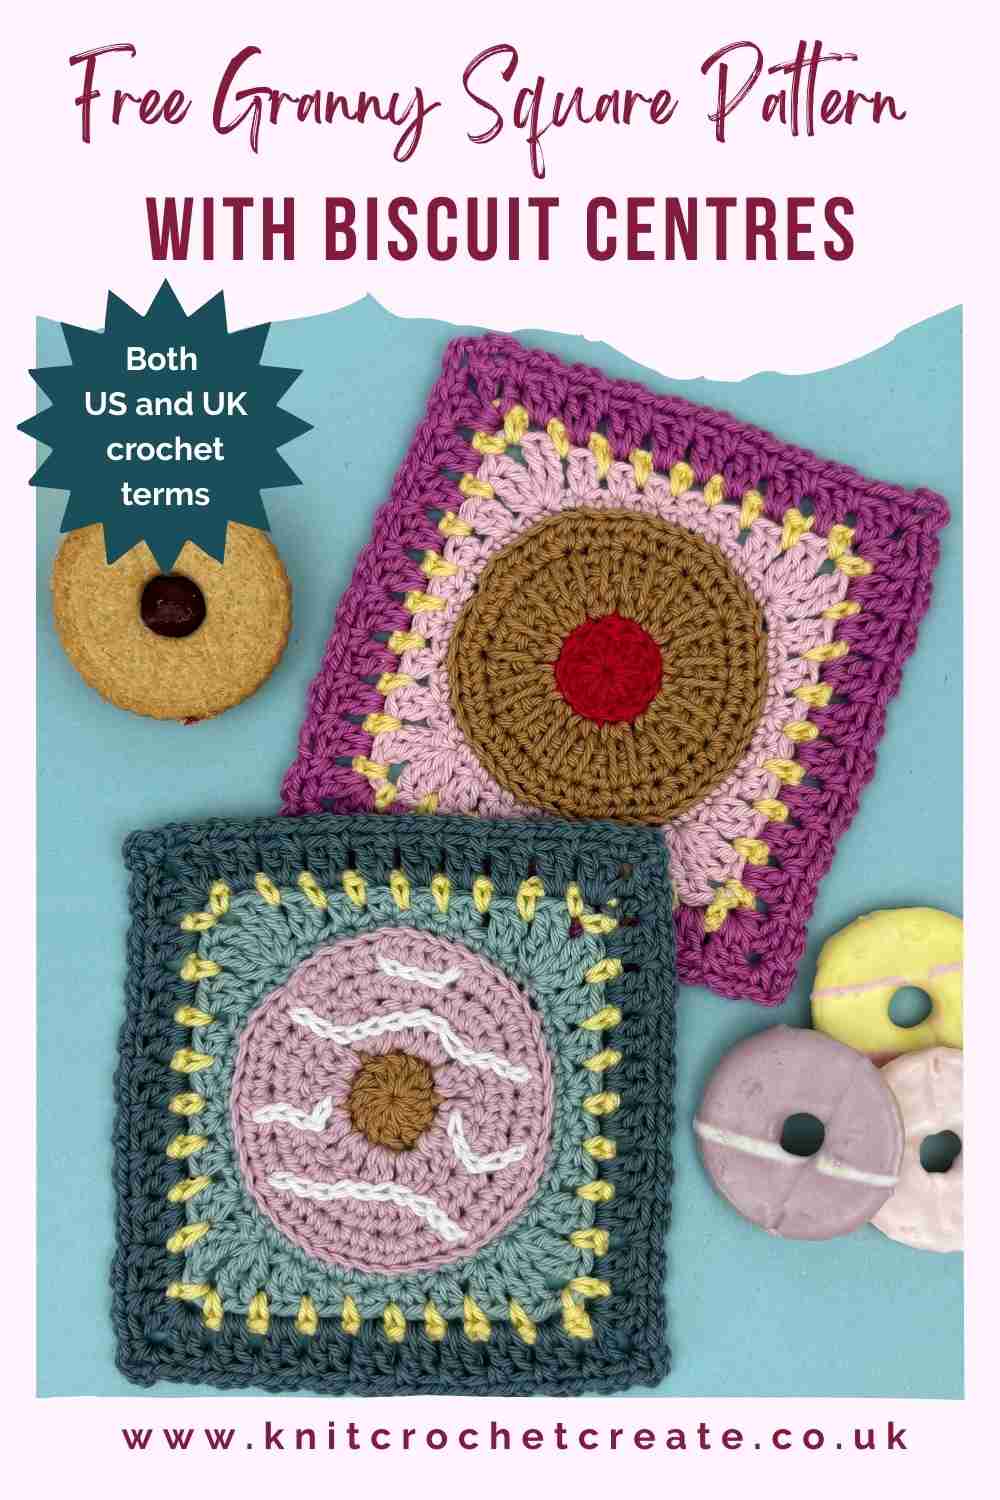
Biscuit Granny Square Pattern (Free) US Crochet Terms
My biscuit granny square pattern is perfect if you love a fun, stash-busting project, that's a joy to crochet. But best of all, it's sure to make you smile, because we all love a biscuit.
Inspired by classic teatime biscuits, this design includes two variations, which are also my childhood favourites:
- A party ring biscuit centre.
- A jammy ring biscuit centre.
They are quick, colourful, and are therefore perfect for using up small amounts of yarn. You can mix and match colours to suit your stash, making each square completely unique.
Note that this post includes the US version of the pattern using US crochet terms. You can find the UK version of the pattern here: Biscuit Granny squares UK crochet terms.
Why You’ll Love My Biscuit Granny Square Pattern
These are the kind of squares you can make in an evening, and before you know it, you’ll have a whole pile ready to join together. They're:
- Great for using up small yarn scraps.
- Quick and satisfying to make.
- Easy to customise with different colours, so you can create your favourite biscuits.
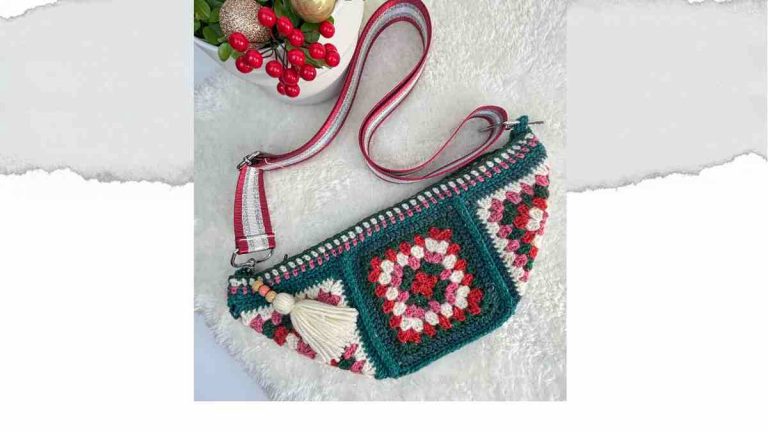
- Perfect for granny square projects, including bags, scarves, or blankets.
Design Inspiration
These biscuit granny squares are based on two much-loved biscuits:
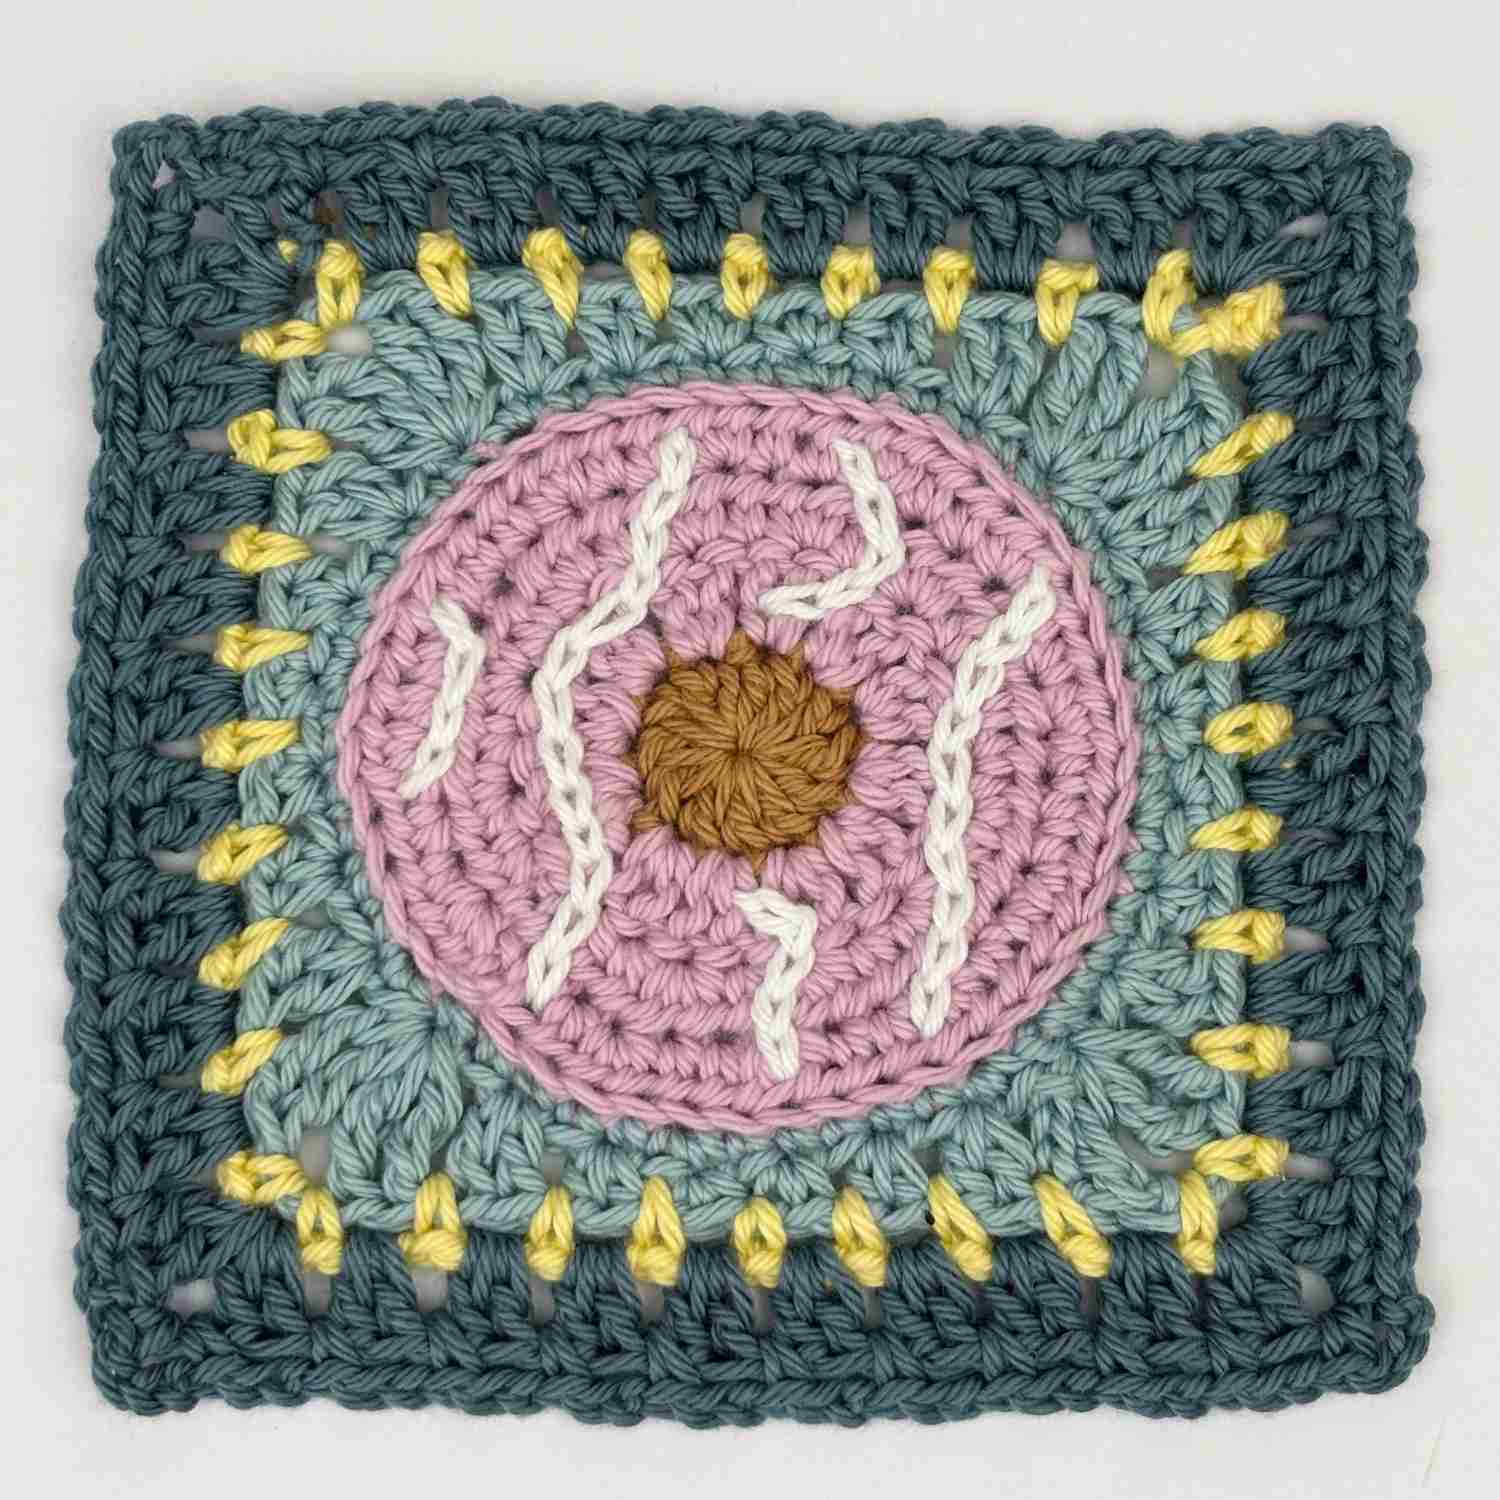
- The party ring version features colourful “icing” rounds, with decorative stitches to give that classic iced look.
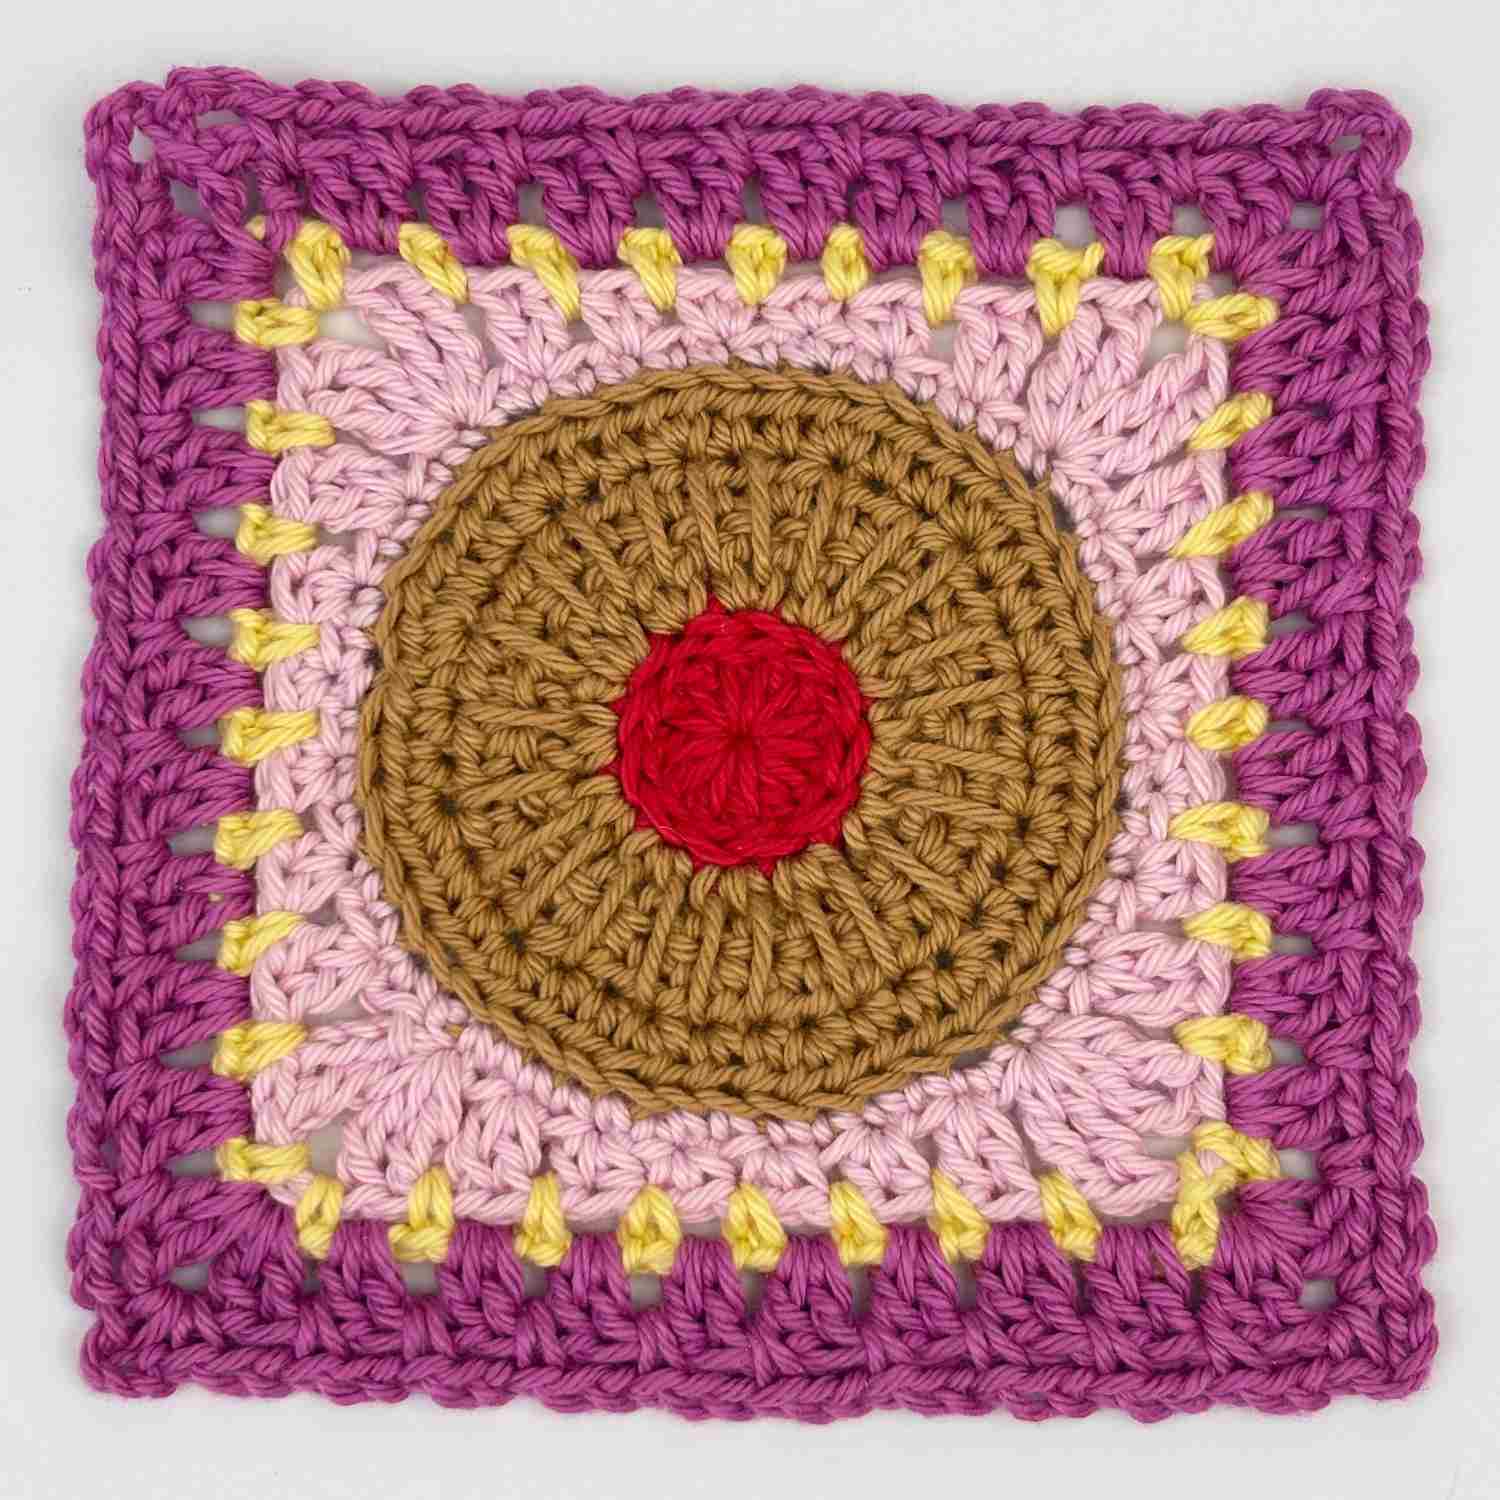
- The jammy ring version has a bold centre to represent the jam, surrounded by biscuit-coloured rounds, and embroidery detail so that it looks realistic.
They are playful, slightly nostalgic, and make a lovely themed set. But best of all, they're great fun to make.
Level of Difficulty and Techniques Used
Intermediate crochet: For crocheters with a good basic crochet knowledge, comfortable with working in the round, in granny square style, and working into back loops of stitches.
How To Get Your Free Biscuit Granny Square Pattern
Find the full pattern instructions written out below. You don’t need to sign up or log in because it’s free right here on the blog. Note that this post includes the US version of the pattern using US crochet terms. You can find the UK version of the pattern here: Biscuit Granny squares UK crochet terms.
Buy the Premium Pattern to download and keep forever
Want to save it to your device or print it out? You can buy the ad-free PDF version to use over and over again.
- Buy on Etsy: Biscuit Granny Square Pattern on Etsy
- Buy on Ravelry: Biscuit Granny Square Pattern on Ravelry
Copyright
Please read the copyright terms, which apply globally, before using or downloading your pattern:
The contents of this page, including the pattern instructions and images, are published under copyright to me ©Lynne Rowe 2025 under my brand Knit Crochet Create® and are for your own personal use only.
You are welcome to sell items made from this pattern for charity fundraising purposes, or to gift them to family and friends, but selling small numbers for profit is only allowed with permission. Please email lynne@knitcrochetcreate.com for permission.
By downloading or using this pattern, you therefore agree to these terms.
Free Biscuit Granny Square Pattern Information
For each biscuit granny square, you will need:
- YARN: Oddments of double knitting (light worsted weight) cotton yarn in various colours.
- I used Sirdar Happy Cotton DK 20g (43m) in the following colours (note that there are TWO colour options to choose from):
Colour Option 1 (Main Colour Pinks)
- MC1 = Dark Pink (Giggle 795)
- MC2 = Pale Pink (Flamingo 760)
- CC1 = White (Shower 762)
- CC2 = Beige (Biscuit 776)
- CC3 = Yellow (Sundae 787)
- CC4 = Lilac (Unicorn 769)
Colour Option 2 (Main Colour Teal/Blues)
- MC1 = Dark Blue (Beach Hut 750)
- MC2 = Light Blue (Splash 767)
- CC1 = White (Shower 762)
- CC2 = Beige (Biscuit 776)
- CC3 = Yellow (Sundae 787)
- CC4 = Lilac (Unicorn 769)
- HOOK: 3.5mm (US E/4).
- EXTRAS: Wool needle; stitch markers; small beads; sewing needle and thread; 2-3m of Red cotton DK for Jammy Ring centre.
Finished Size
12.5cm square, using Sirdar Happy Cotton and 3.5mm (US E/4) hook.
Tension or Gauge
Not critical for this project because it doesn’t matter if your granny square turns out a different size.
Free Biscuit Granny Square Pattern in US Terms
Crochet Abbreviations (US Terms)
- BLO = back loop only
- CC = contrast colour
- ch(s) = chain or chains
- dc = double crochet
- FLO = front loop only
- hdc = half double crochet
- MC = main colour = main colour
- rep = repeat
- RS = right side
- slst = slip stitch
- st(s) = stitch(es)
- sc = single crochet
- tr = treble crochet
- WS = wrong side
PATTERN BEGINS: Party Ring Granny Biscuit Centre
With CC2 (Beige) and US E/4 (3.5mm) hook, make a magic ring, or ch4 and slst into first of these 4ch to form a ring. Crochet over your tail end of yarn when working Round 1, so that you can pull the hole closed.
- Round 1 (RS): Ch2 (does not count as a st), 12dc in ring. Slst in top of first dc to join. (12 sts). Fasten off.
- Turn circle over and work with WS of Round 1 facing you.
- Join either CC3 (Yellow), CC4 (Lilac), or CC1 (White) with slst in any st.
- Round 2 (WS): Ch2 (does not count as a st), 2dc in same st, 2dc in each remaining st around, slst in top of first dc. (24 sts)
- Round 3: Ch1 (does not count as a st), 1hdc in same st, 2hdc in next st, [1hdc in next st, 2hdc in next st] around. Slst in top of first hdc to join. (36 sts)
- Round 4: Ch1 (does not count as a st), 2hdc in same st, 1hdc in each of next 2 sts, [2hdc in next st, 1hdc in each of next 2 sts] around. Slst in top of first hdc to join. (48 sts)
- Fasten off. Turn biscuit over so that RS of Round 1 is facing, then weave in ends on WS and trim.
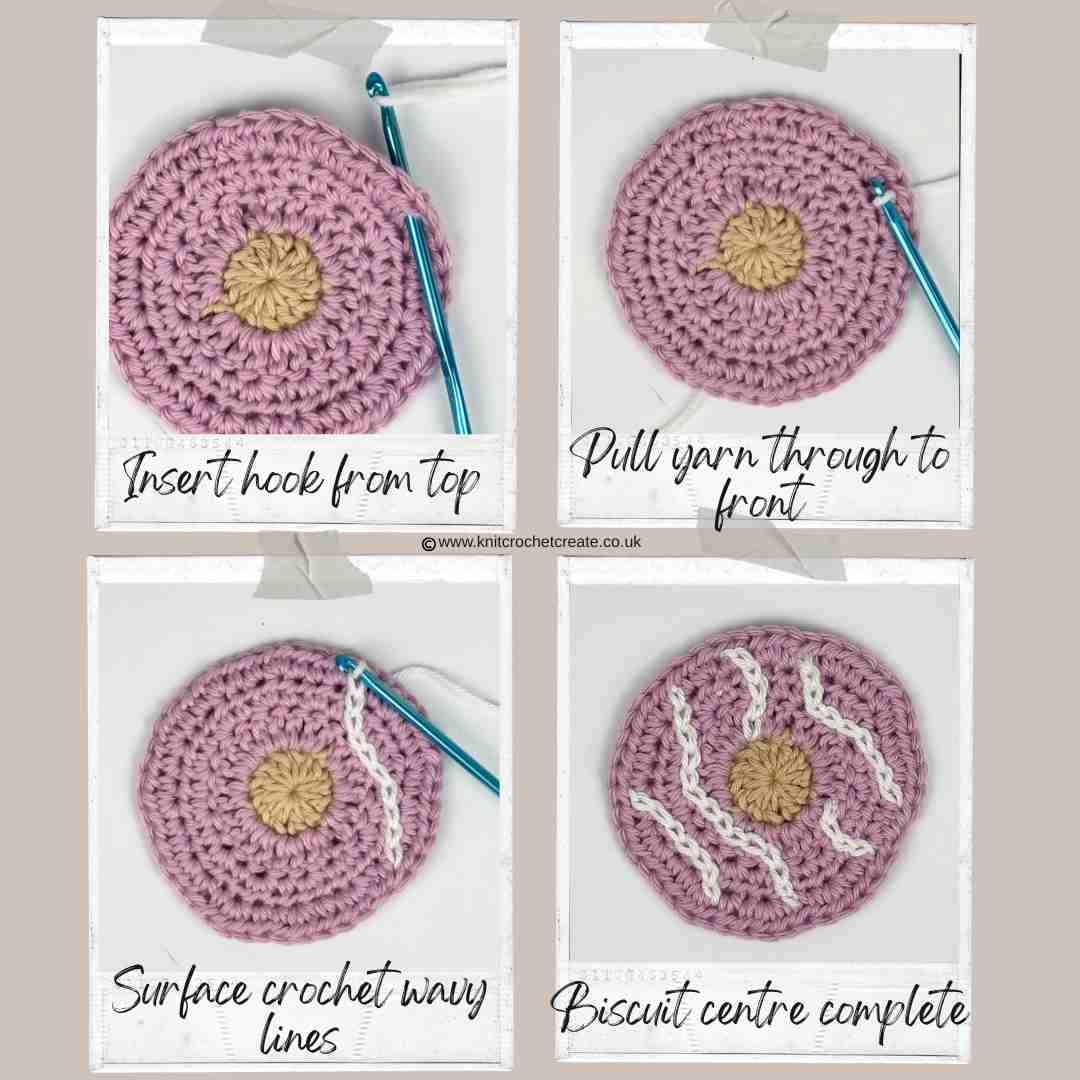
Surface Crochet Slip Stitch (see images below)
With RS of Round 1 facing, and using CC1 (White) or any contrast colour of choice, hold yarn underneath your biscuit. *Insert hook into any space between stitches, wrap yarn over hook underneath biscuit then pull a loop through to front; rep from * as required, to create wavy lines, using images below as a guide to placement. Cut yarn then pull tail-end all the way through to the front. Thread onto wool needle then insert needle into next stitch along and pull through to back. Weave in ends on WS of work then trim. Repeat for as many wavy lines as desired. Go to Granny Square Rounds further down the post, to turn your biscuit into a square.
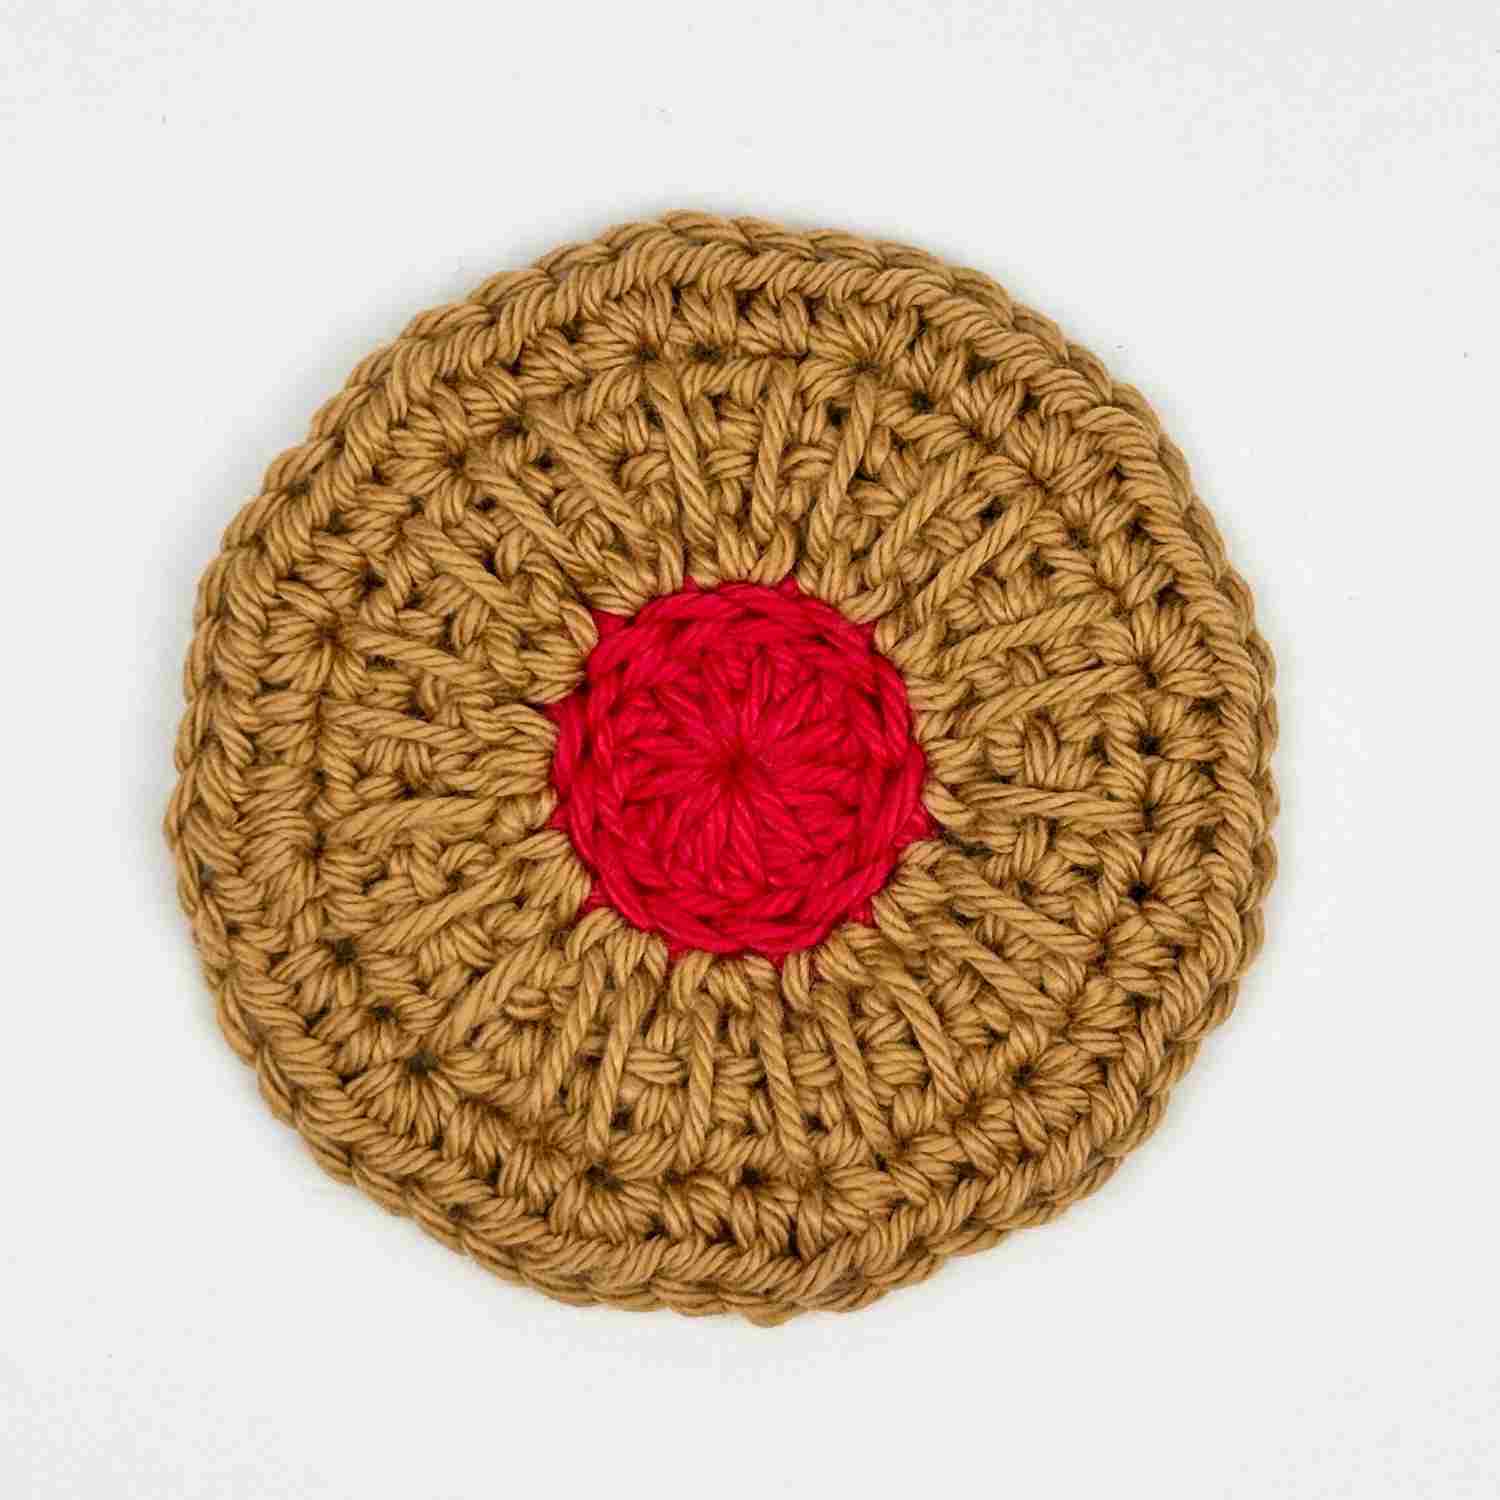
Jammy Ring Granny Square
Work as given for Party Ring Granny Square, using short length of Red cotton (light worsted weight) for Round 1, and CC2 (Beige) for Rounds 2-4. Fasten off. Turn biscuit over so that RS of Round 1 is facing. Weave in ends on WS and trim. Add the details as follows:
- With Red, work Surface Crochet on RS, around the edge of Round 1, using the same Surface Crochet technique as above, to work in a circle. This helps define and outline the jammy centre, and is optional.
- With CC2 (Beige), add long lines over Rounds 2-4, to add detail. This is also optional but it adds a realistic feel to the biscuit.
- Follow Granny Square Rounds below, to complete the Granny Square.
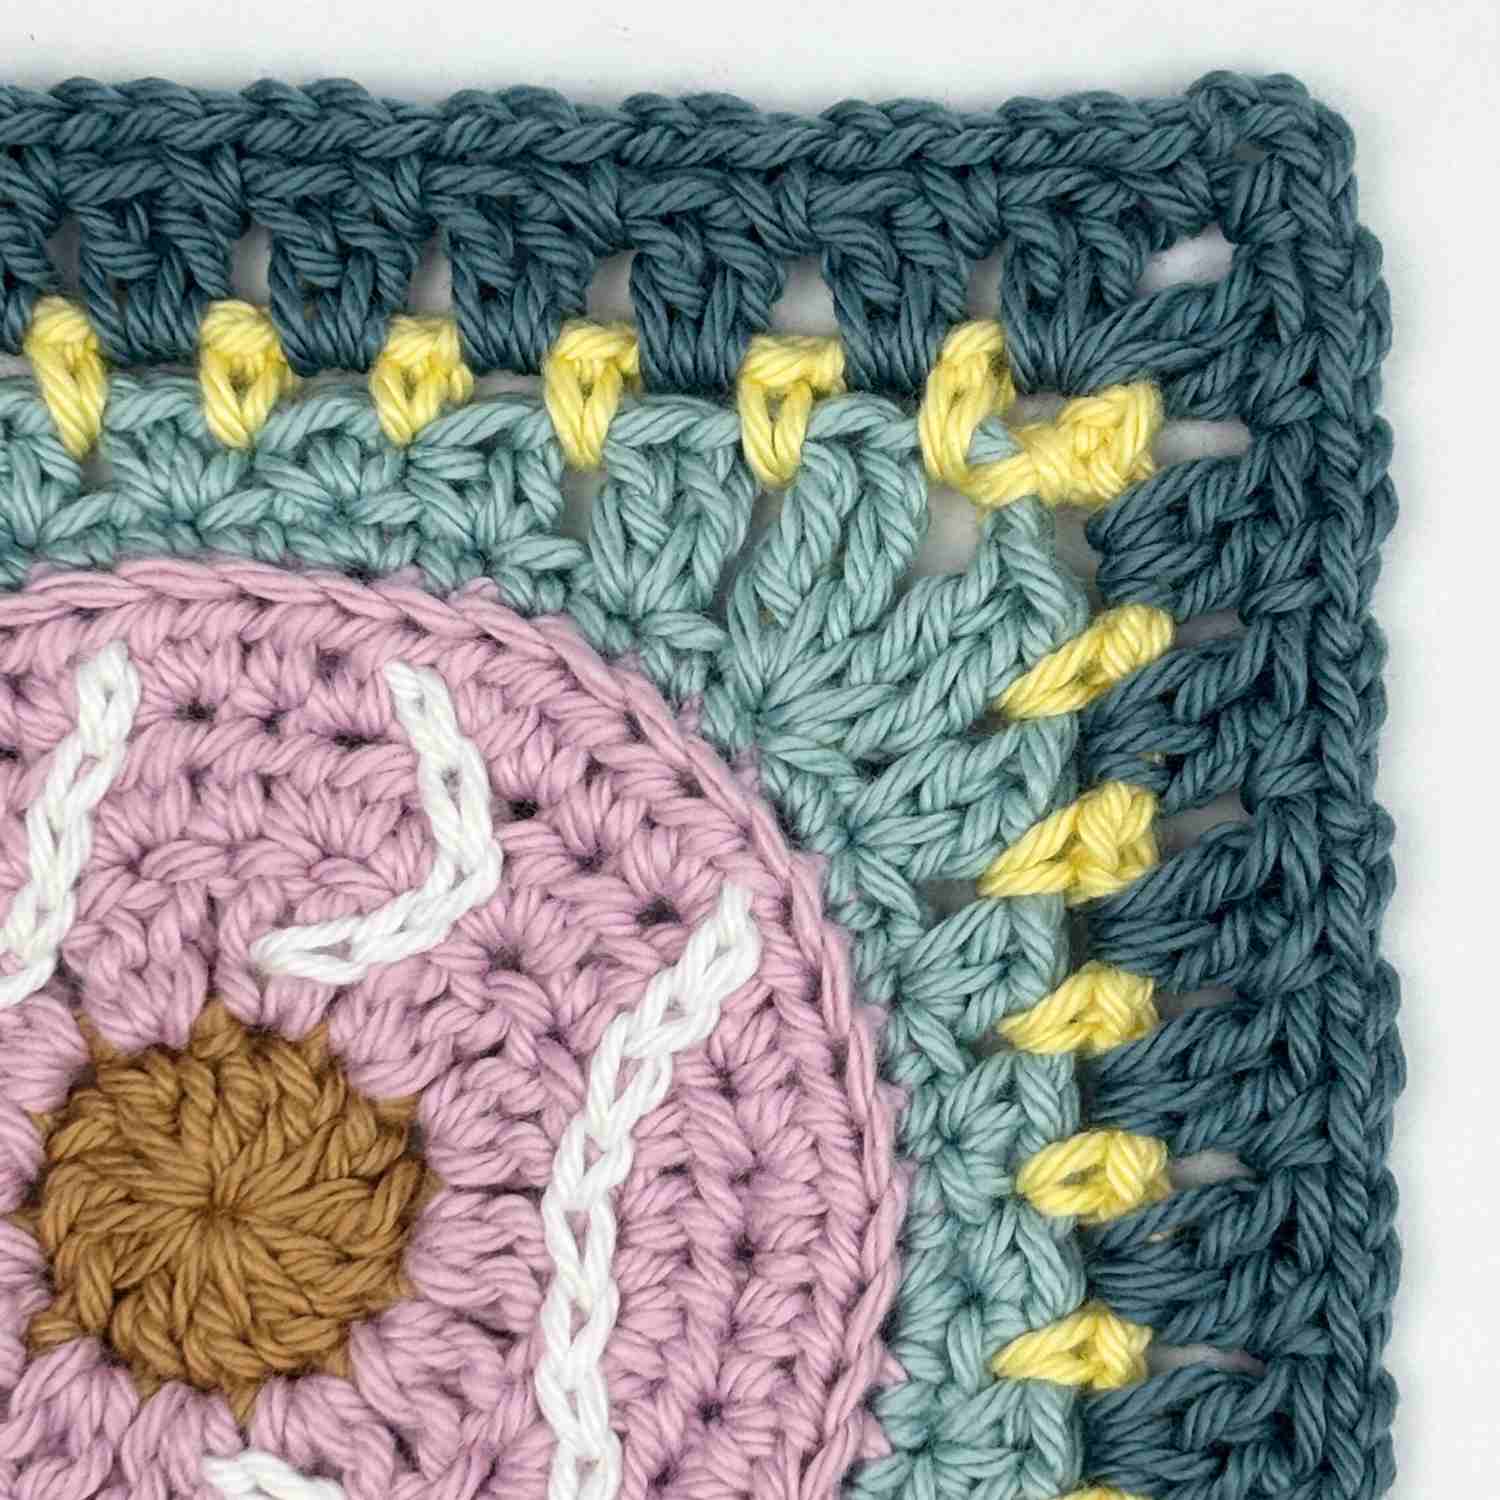
Granny Square Rounds
- Round 1: With RS of biscuit centre facing, join MC2 with slst to BLO of any st of last round. Ch1 (does not count as a st throughout), 1scBLO in same st, 1scBLO in each of next 4 sts, 2scBLO in next st, [1scBLO in next 5 sts, 2scBLO in next st] to end, slst in first sc. (56 sts)
- Round 2: Ch4 (counts as 1tr), [1tr, ch2, 2tr] in same st, *skip 1 st, 2dc in next st, skip 1 st, 2hdc in next st, [skip 1 st, 2sc in next st] twice, skip 1 st, 2hdc in next st, skip 1 st, 2dc in next st, skip 1 st, [2tr, ch2, 2tr] in next st; rep from * around, omitting final corner. Slst in top of beginning ch4, then fasten off. (16 sts along each side, plus corner ch2-sp)
- Round 3: Join CC3 (Yellow) with slst to any corner sp. Ch4 (counts as 1sc and ch3), 1sc in same corner sp, *[ch2, skip 2 sts, 1sc in next sp between sts] 7 times, ch2, skip 2 sts, [1sc, ch3, 1sc] in corner sp; rep from * around, omitting last corner. Slst in first ch of beginning ch4, then fasten off.
- Round 4: Join MC1 with slst to any corner sp. Ch3 (counts as 1dc), [1dc, ch2, 2dc] in same sp, *2dc in each ch2-sp to next corner, [2dc, ch2, 2dc] in corner sp; rep from * around, omitting final corner. Slst in top of beginning ch3, slst in next dc then slst into corner sp. (20 sts along each side plus corner ch2-sp)
Round 5 for first square only:
- Work Round 5 for first square only. For all subsequent squares that you make, follow the join-as-you-go-round instead, to join your squares whilst you crochet the final round.
- Ch4 (counts as 1sc and ch3), 1sc in same corner sp, *[ch2, skip 2 sts, 1sc in next sp between sts] 9 times, ch2, skip 2 sts, [1sc, ch3, 1sc] in corner sp; rep from * around, omitting last corner. Slst in first ch of beginning ch4, then fasten off. Weave in all ends on WS then trim. (11 sc and 11 ch2-sps along each side)
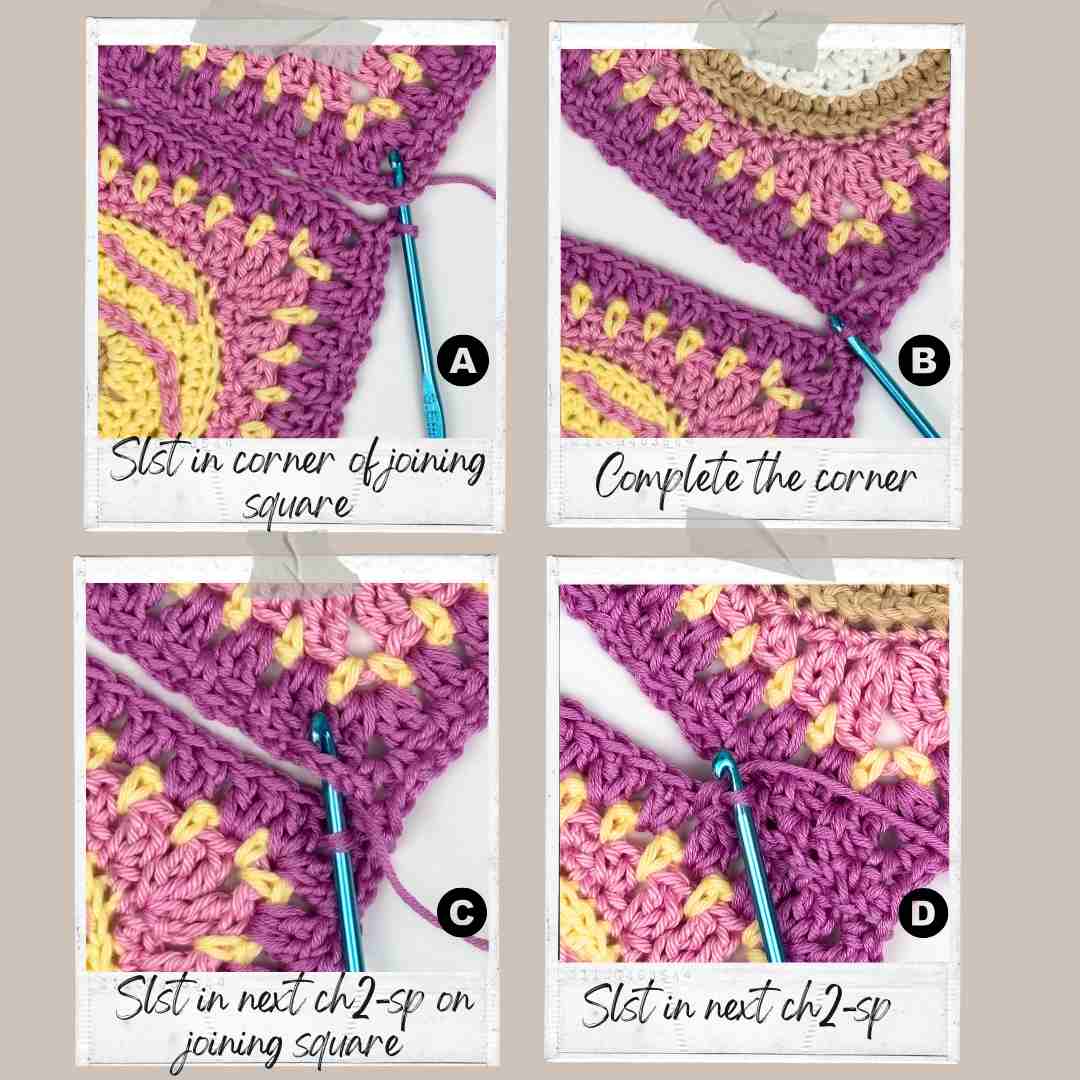
Join-as-you-go round for subsequent squares:
- Join squares as desired, depending on the project you are making. Also, depending on positioning of squares, you may need to join along one, two or even three sides, as follows:
- Ch1, 1sc in corner sp, ch1, start to join as follows: Insert hook from bottom to top, through the corresponding corner of the joining motif (see image A), make a slst. The two squares are now joined at the corner.
- Ch1, 1sc in corner of working square to complete the corner (see image B).
- Slst in next ch2-sp on joining square (see image C).
- Ch1, **on working square, skip next 2 sts, 1sc in next sp between sts, slst in next ch2-sp on joining square, ch1**.
- Rep from ** to ** to join stitches along the side of square (see image D) until next corner sp, 1sc in corner of working square, ch1, slst in corner of joining square, ch1, 1sc in corner of working square to complete this corner.
- Continue in this way to join more sides as required, then complete edging round as given for Round 5 of Granny Square Rounds, without joining any more sides.
- After joining at end of round, fasten off, then weave in all ends on WS and trim.
NOTE:
If you need to join your working square to TWO granny square corners, all you do is slst into the corner sp of first joining motif as given above, then slst into corner sp of second joining motif, then continue to complete the corner as before, and continue to join the sides.
Prefer to sew your squares together?
If you prefer to sew your squares together instead of using my join-as-you-go method above, use the following alternative option for Round 5 on all squares:
- Ch1 (does not count as a st), work [1sc, ch2, 1sc] in each corner space, and 1sc in each st around, slst in first sc then fasten off.
- You can then join squares, using your preferred method, through the single crochet stitches of this final round.
- You could either whip stitch through back loops of final round, or slip stitch with a crochet hook (or use any preferred method of joining).
What Next?
If you loved my biscuit granny square patterns, then check out my other stash-busting projects like the Granny Rectangle Cosy Reads Crochet Bookmark Pattern – or my Easy Scarf Crochet Pattern – all of which are free on the blog.
Share your makes from my Biscuit Granny Square Pattern
If you love this pattern and make lots of fun granny squares, then I’d love to see your finished projects! Tag me on Instagram [@knitcrochetcreate] so I can admire your colour combinations and see what you make with them.
Let's keep in touch!
I'd love to chat more.
Sign up for my newsletter and receive a weekly dose of crafting inspiration, featuring the latest trends, tips, and projects to fuel your creativity.