Crochet Book Sleeve Pattern (Free) – Winter Sun Granny Squares
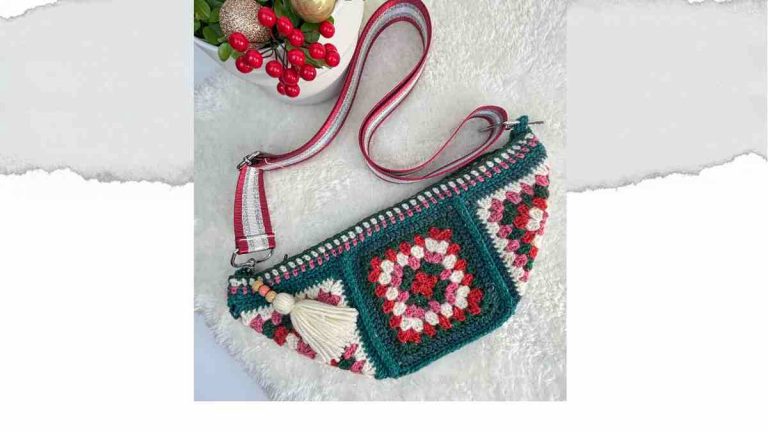
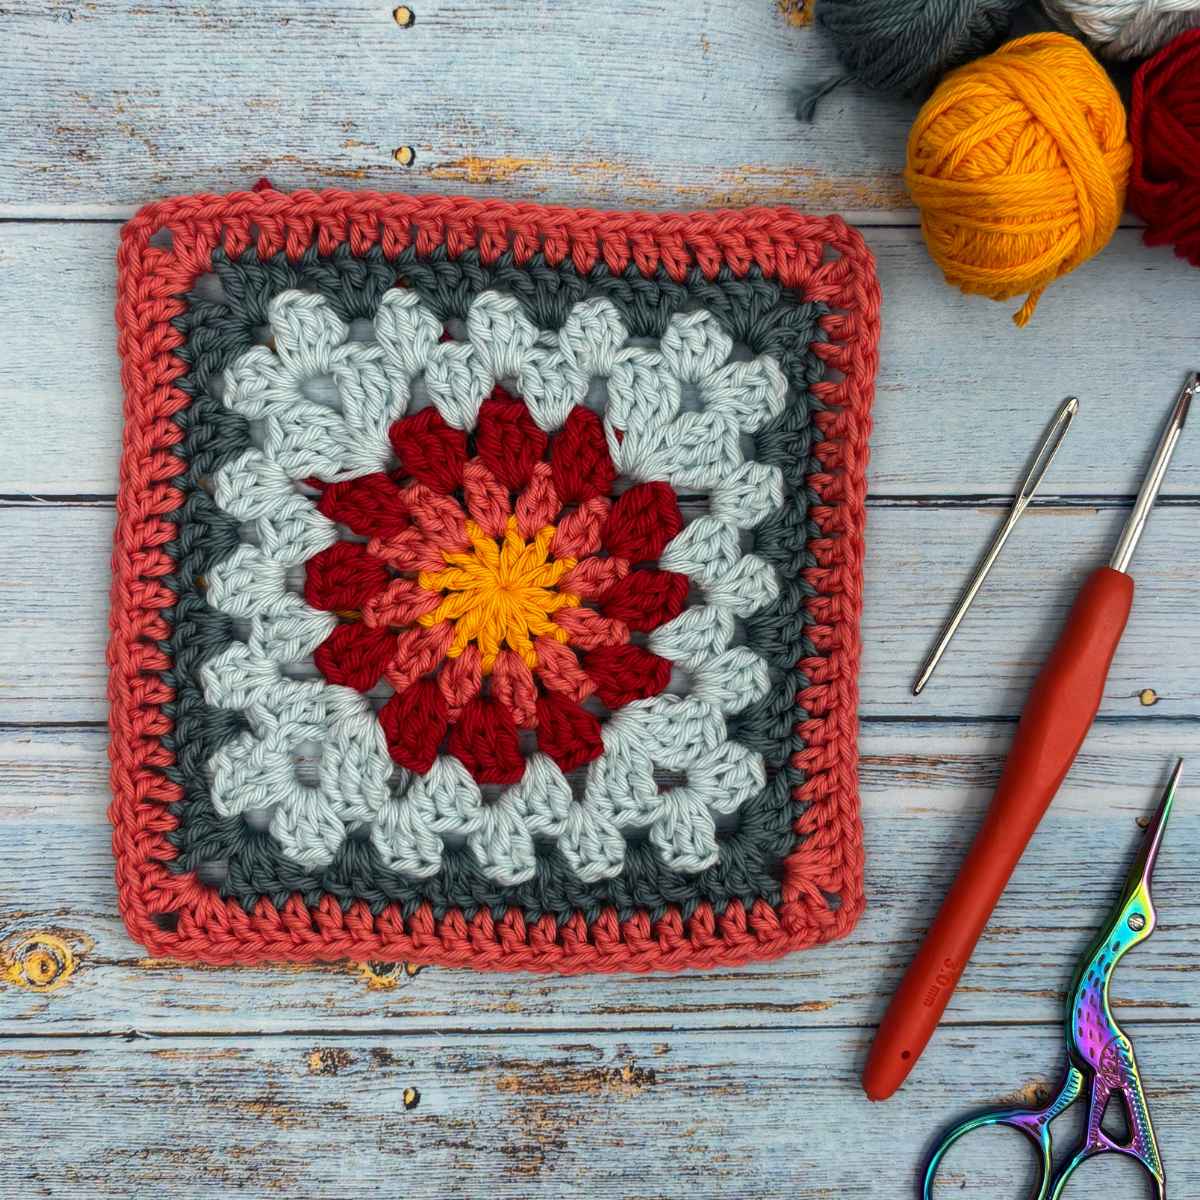
My free crochet book sleeve pattern is one of my favourite makes this year. With colours inspired by a beautiful piece of fabric, I joined six simple granny squares to make a pretty book sleeve (or book cover) that keeps your favourite novel, notebook or journal safe in your bag.
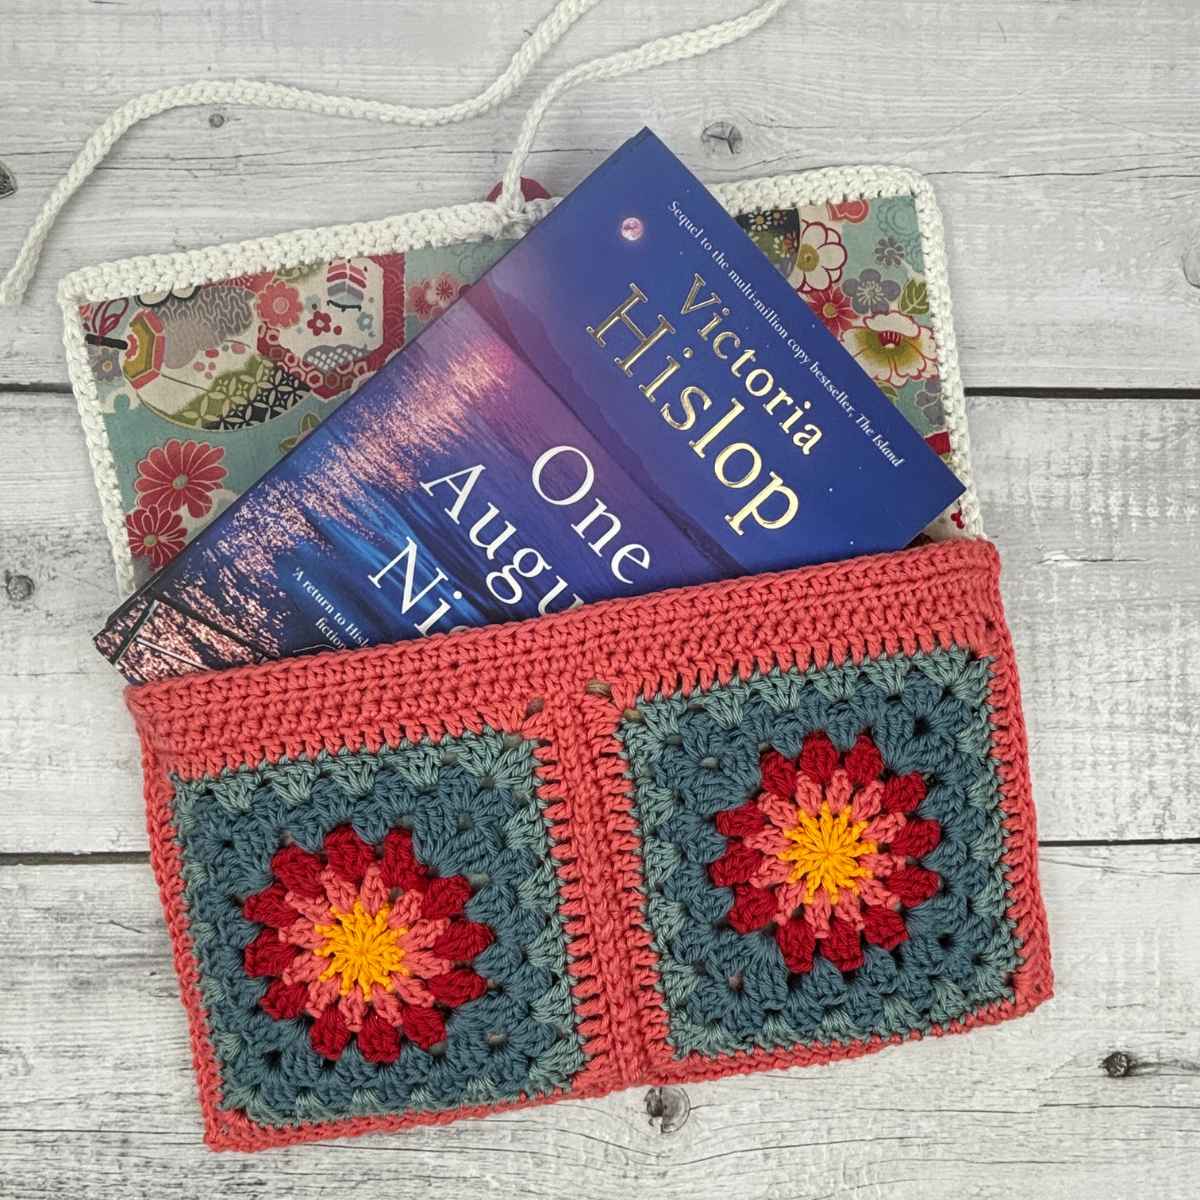
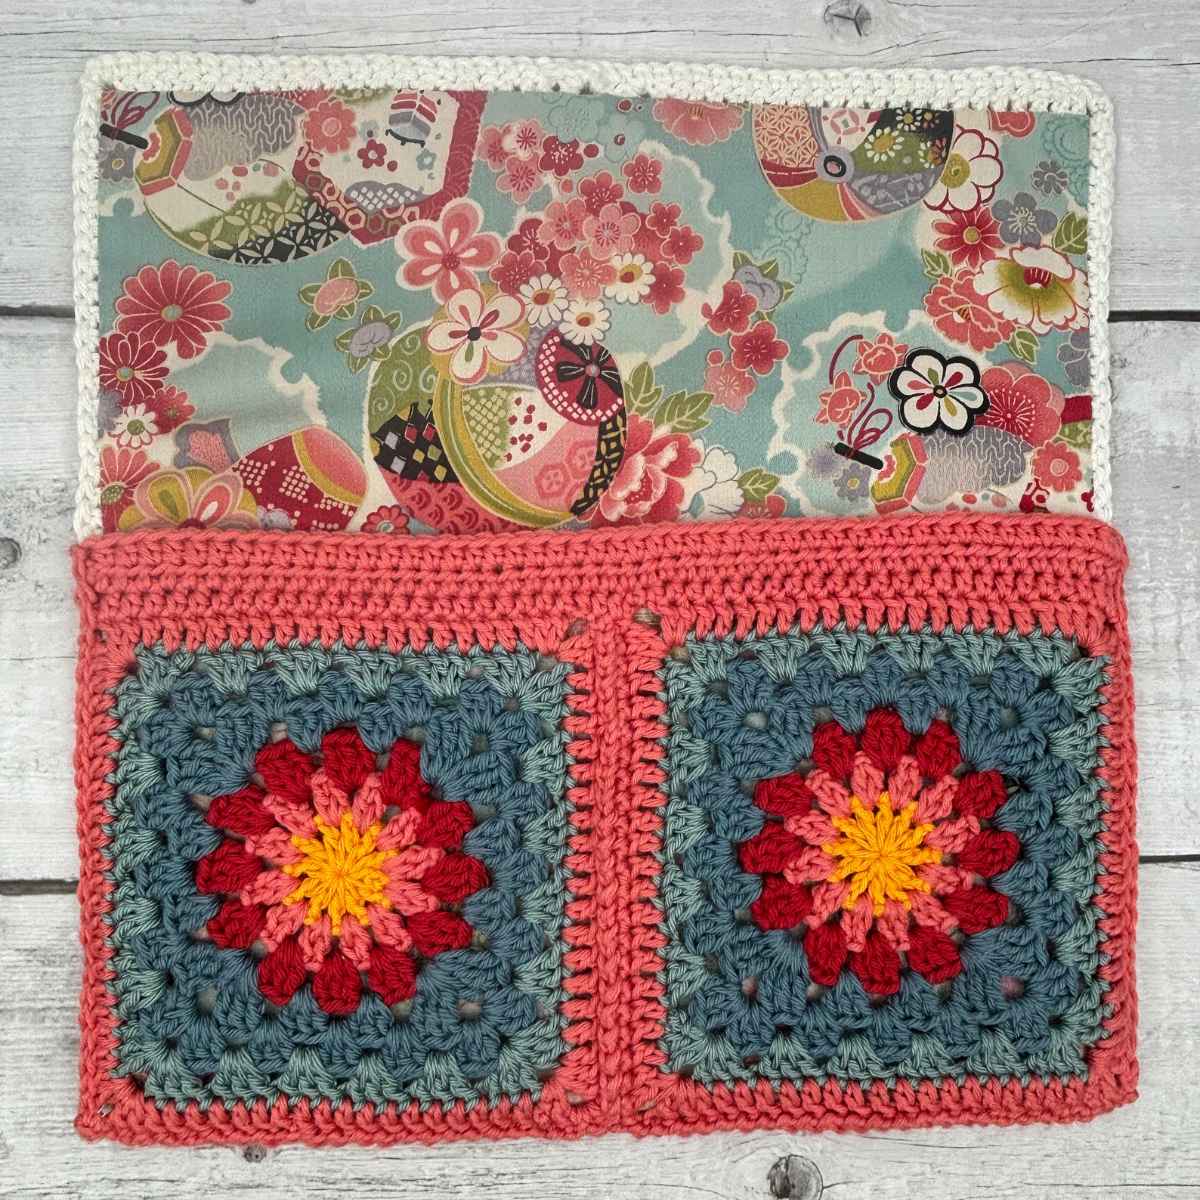
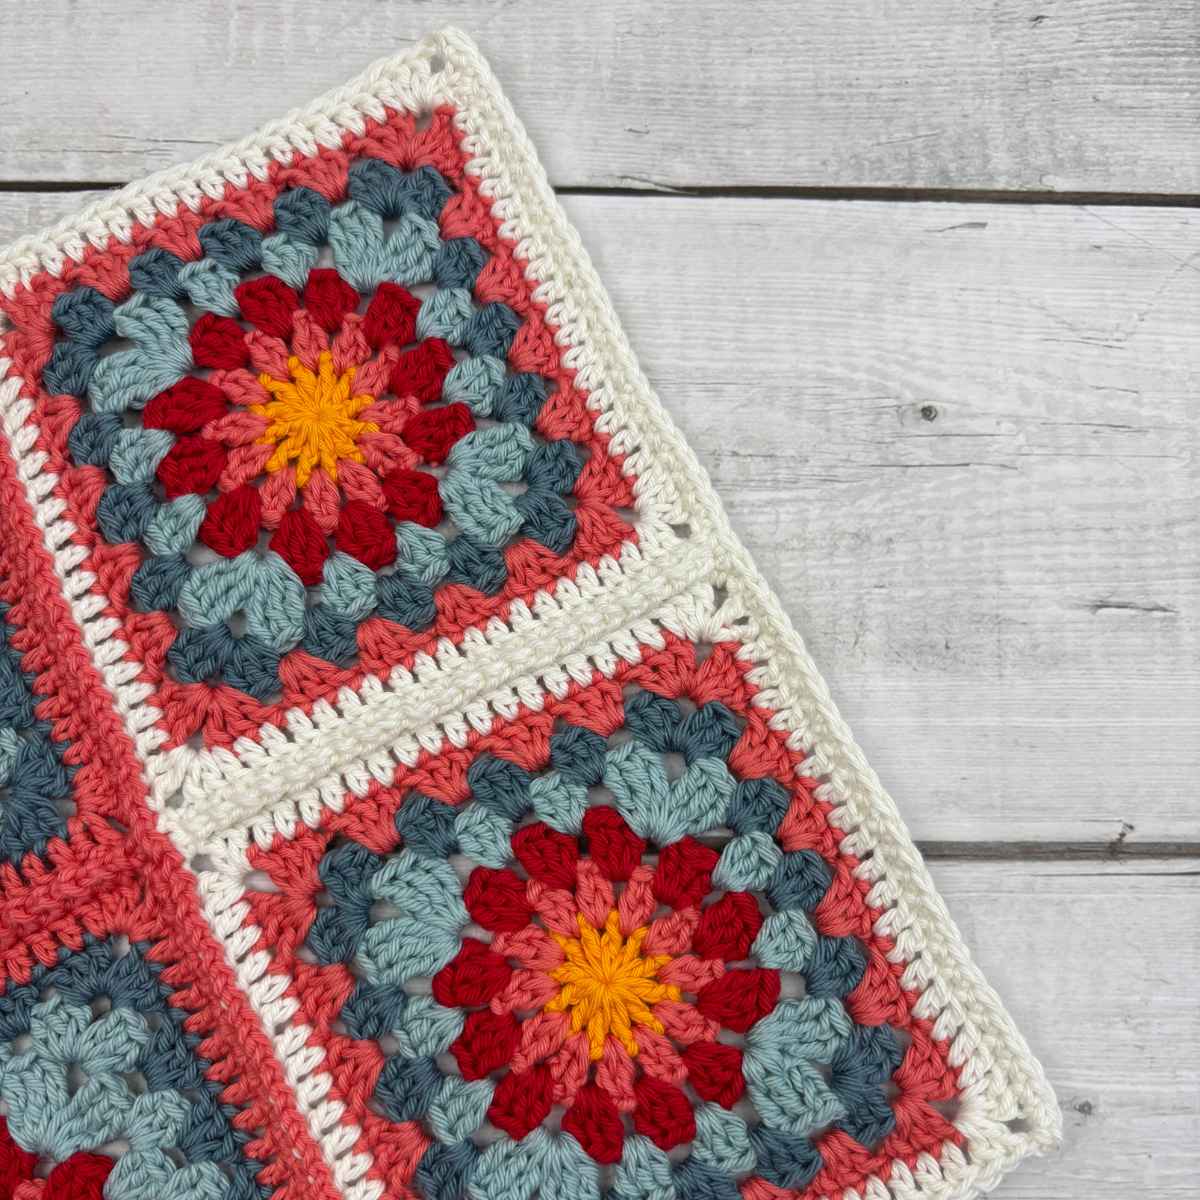
After joining the six granny squares, you fold up the bottom two squares to make a pocket, then add a long tie cord and a button to keep everything safely closed. And the best thing? The squares don't need to be identical, so it's perfect for using up oddments of yarn, which means it won't cost a penny.
It would make the perfect gift for your book-loving friends. Pair it with a new novel and choose yarn to match the book's colours for an extra-special personal touch. You could even crochet a Granny Stitch Bookmark from my free pattern to make a fabulous gift set of a book, matching crochet book sleeve and bookmark.
There's a FREE PDF download for 48 hours only, so make sure you grab this one while you can. Scroll down the page for your free PDF!
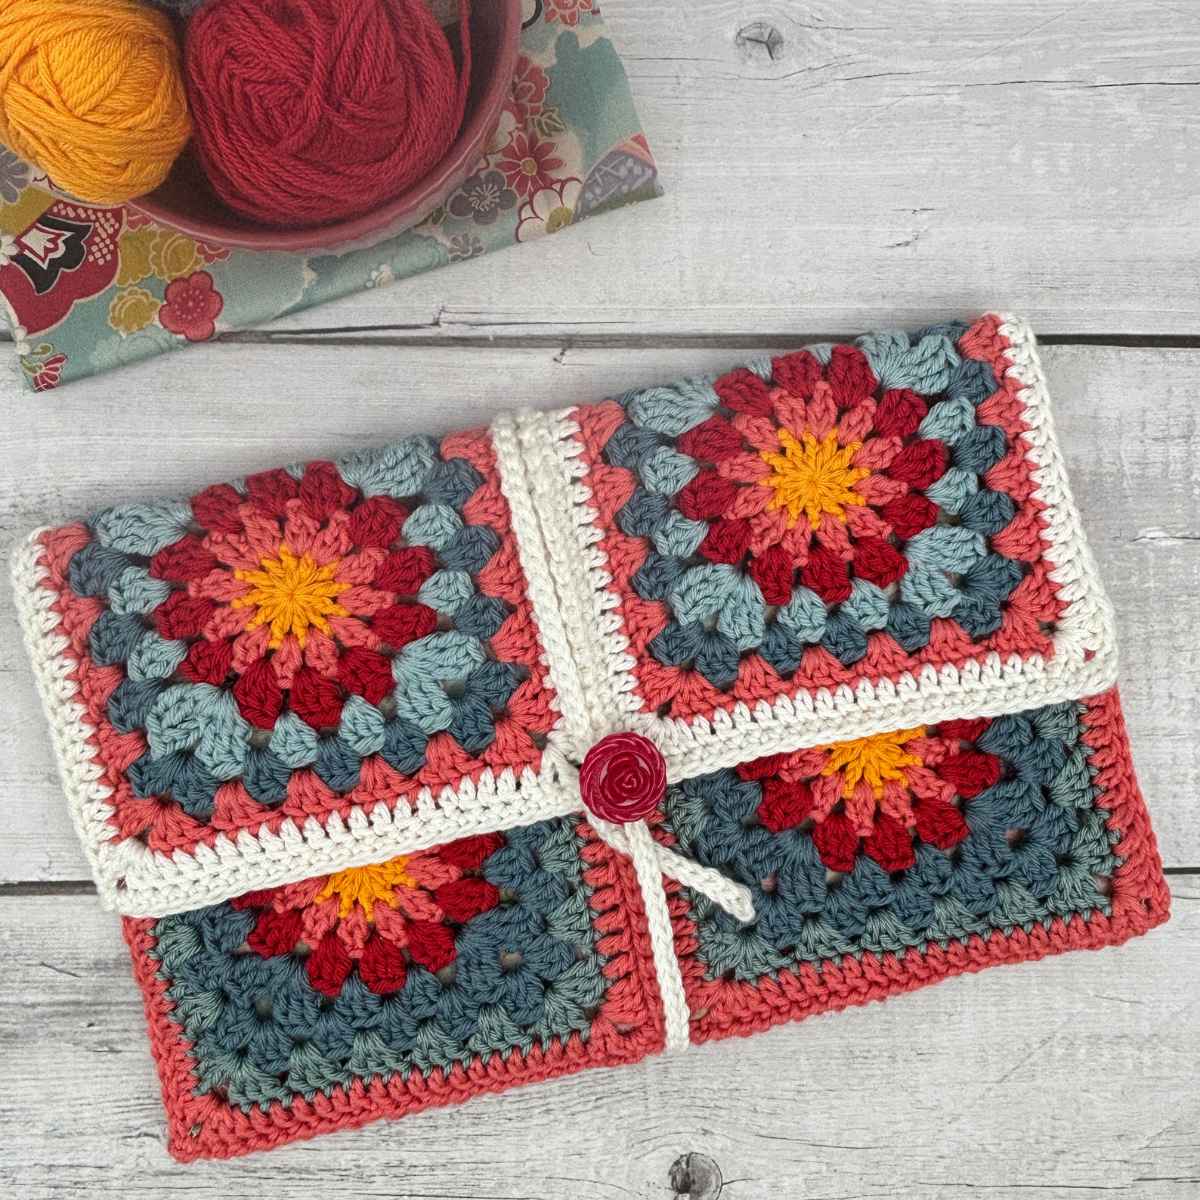
Quick Look: Free Crochet Book Sleeve Pattern
- Skill Level: Next steps – confident beginner.
- Language: English; two separate patterns in both US and UK crochet terms.
- Construction: Six granny squares worked in joined rounds, joined into a rectangle, then folded up and seamed to make a pocket.
- Techniques Used: Chains; UK dc + htr + tr + dtr / US sc + dc + hdc + tr; joining squares.
- Time To Make: ~ 40-50 minutes per square, plus making up.
- Yarn: Oddments of DK cotton (8-ply; light worsted weight) in 6 colours.
- Extras: Wool needle; button; sewing needle; thread.
- Optional Extras: Lining fabric, pins and iron.
- Hook: 3mm (US D/3).
- Finished Size: ~ Approx 25cm (10in) wide x 15–17cm (6–6¾in) deep when closed.
- Pattern Type: Flat crochet granny squares, joined.
- Perfect For: Christmas gifts; book lovers; journals and diaries; using up cotton scraps.
Your support helps Google recognise and trust me as a knitting and crochet designer 🌟
Stash To Sparkle 2026 Blog Hop
The Winter Sun Book Cover is Pattern 2 of 8 in Stash To Sparkle 2026, the festive stash-busting blog hop I'm running with Carmen from Annie Design Crochet.
Carmen releases a new pattern every Wednesday and I release mine every Saturday, from Wednesday 28th October to Saturday 21st November. Then on Wednesday 25th November, we'll share a round-up of all eight patterns in one place.
You can read all about the hop, and find every pattern as it's released, on my Stash To Sparkle 2026 event post.
Every pattern will have a FREE PDF download for 48 hours only, so make sure you grab this one while you can. Just scroll further down the page for your free PDF!
Why You'll Love This Free Crochet Book Sleeve Pattern
- Six little suns: A bright sunburst centre in every square brings a splash of colour to a winter's day.
- Stash-friendly: Each round uses only a little yarn, so it's ideal for your DK cotton leftovers.
- Confidence-building: Basic stitches, with stitch counts at the end of every round so you stay on track.
- Easy to make up: Simply join the squares, add an edging, fold up the pocket and seam the sides.
- Lining is optional: The sleeve is sturdy on its own, but a fabric lining adds a lovely finishing touch.
- The perfect gift: Slip a new notebook or a favourite novel inside for a thoughtful, handmade present.
How to Get Your Free Crochet Book Sleeve Pattern
- Find the full pattern instructions written out below. You don't need to sign up or log in because it's written out free right here on the blog.
- The free pattern is written in both US crochet terms here followed by UK crochet terms here.
- Printable PDF: You can purchase an ad-free PDF pattern if preferred, to save and use as many times as you like. Thank you for your support.
There's a FREE PDF download for 48 hours only, so make sure you grab this one while you can. Scroll down the page for your free PDF!
Copyright
Please read the copyright terms, which apply globally, before using or downloading your pattern:
The contents of this page, including the pattern instructions and images, are published under copyright to me ©Lynne Rowe 2026 under my brand Knit Crochet Create® and are for your own personal use only.
You are welcome to sell items made from this pattern for charity fundraising purposes, or to gift them to family and friends, but selling small numbers for profit is only allowed with permission.
You can email: lynne@knitcrochetcreate.com for permission.
Materials You Will Need
- Yarn: Oddments of double knitting (DK) cotton (8-ply; light worsted weight) in 6 colours. I used leftovers of Sirdar Happy Cotton DK 20g (43m) in the shades below, but you can use any DK yarn in any colours you like:
- Golden Yellow (Juicy 792).
- Coral (Sorbet 793).
- Red (Lippy 789).
- Pale Blue (Splash 767).
- Teal (Beach Hut 750).
- Off White (Dolly 761).
- Hook: 3mm (US D/3).
- Extras: Wool needle; button; sewing needle; thread.
- Optional Extras: Lining fabric 30 x 45cm (12 x 17¾in); pins; iron.
Gauge or Tension
Each granny square measures approximately 12.5cm (5in) square, using Sirdar Happy Cotton DK and a 3mm (US D/3) hook.
Finished Size Of Crochet Book Sleeve
Approximately 25cm (10in) wide by 15–17cm (6–6¾in) deep when closed (depending on book size), using DK (light worsted weight) yarn and a 3mm (US D/3) hook. To fit up to an A5 book.
FREE Crochet Book Sleeve Pattern Begins – US terms
- beg = beginning
- ch(s) = chain or chains
- ch-sp(s) = chain space(s)
- dc = double crochet
- hdc = half double crochet
- rep = repeat
- RS = right side
- sc = single crochet
- slst = slip stitch
- sp(s) = space(s)
- st(s) = stitch(es)
- tr = treble crochet
- WS = wrong side
Pattern Notes
- Ch3 at beginning of a round counts as 1dc (unless stated otherwise).
- Ch1 at beginning of edging rows does not count as a st.
- Pattern below is in US crochet terms. Go here for UK crochet terms.
Granny Square (make 6)
Center Circle
- With first color and US D/3 (3mm) hook, make a magic ring. Or ch5 then slst into first of these 5 ch to form a ring.
- Crochet over your tail end of yarn when working Round 1, so you can pull the hole closed.
- Squares do not all need to be identical in color, but for a cohesive look, try using the same three colors for Rounds 1–3 on all squares and, if yarn allows, use similar colors for Round 7.
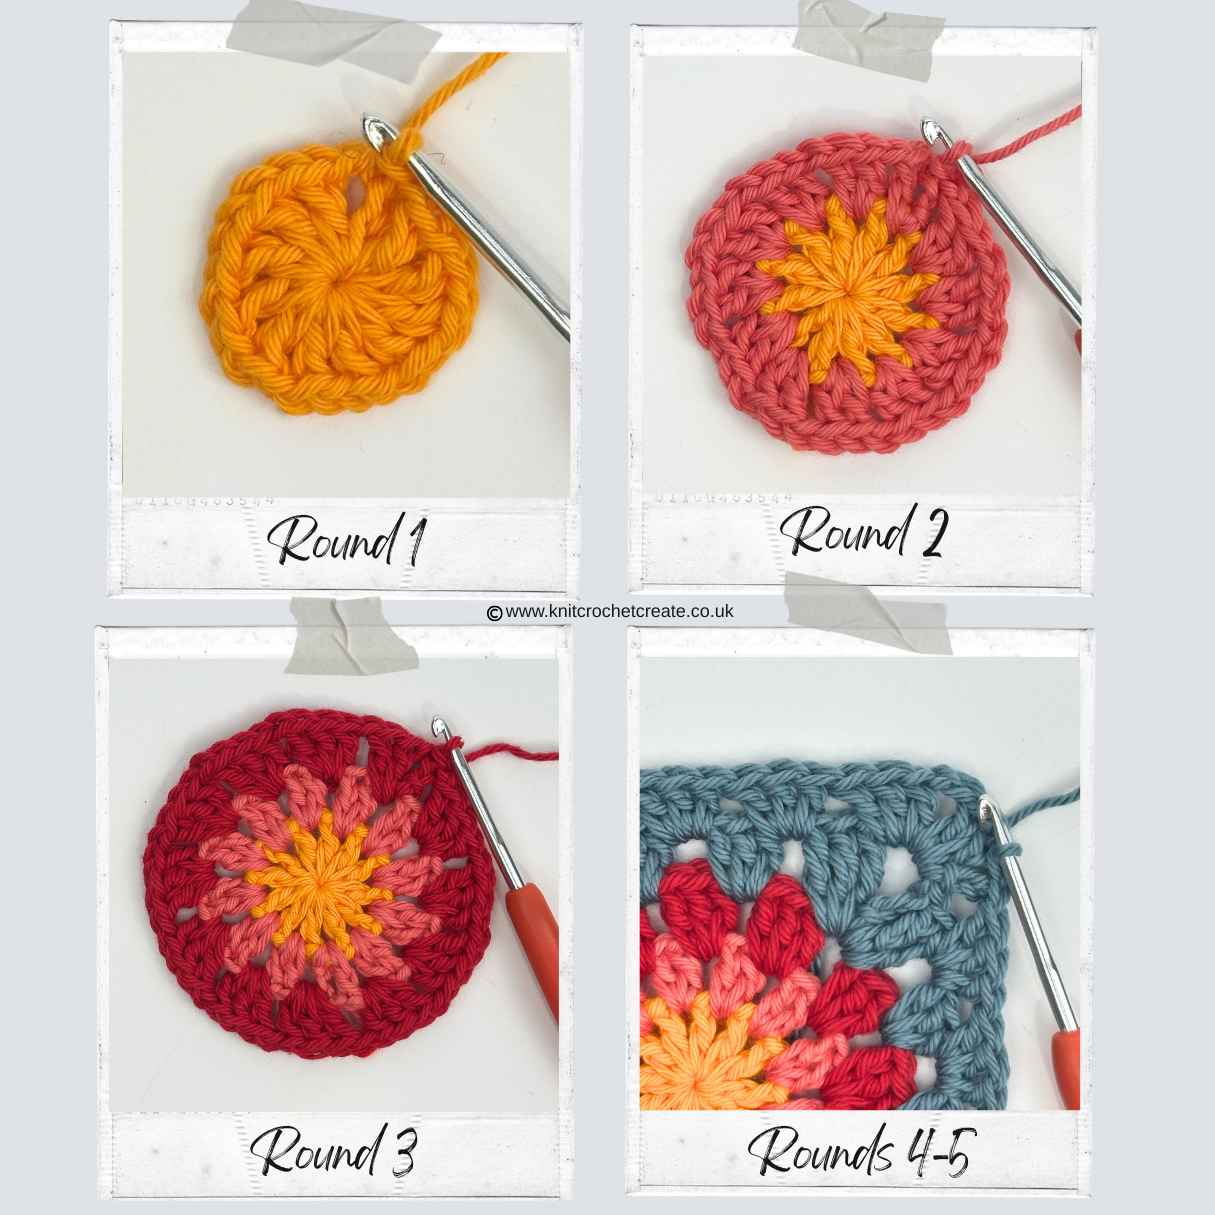
- Round 1 (RS): Ch4 (counts as 1dc, ch1), [1dc in ring, ch1] 11 times, slst in third of beg ch4 to join, then fasten off. (12 dc, 12 ch1-sps)
- Round 2: Join next color with slst to any ch1-sp. Ch3 (counts as 1dc), 1dc in same sp, ch1, [2dc in next ch1-sp, ch1] around, slst in top of beg ch3, then fasten off. (12 2dc-groups, 12 ch1-sps)
- Round 3: Join next color with slst to any ch1-sp. Ch3 (counts as 1dc), 2dc in same sp, ch1, [3dc in next ch1-sp, ch1] around, slst in top of beg ch3, then fasten off. (12 3dc-groups, 12 ch1-sps)
Turn The Circle Into A Square
- Round 4: Join next color with slst to any ch1-sp. Ch6 (counts as 1tr and ch2), 3tr in same sp, [3dc in next ch1-sp] twice, *[3tr, ch2, 3tr] in next ch1-sp, [3dc in next ch1-sp] twice; rep from * twice more, 2tr in same sp as beg ch6, slst in fourth ch of beg ch6, then slst into corner ch2-sp. (8 3tr-groups, 8 3dc-groups and 4 ch2-sps)
- Round 5: Continue with same color. Ch3 (counts as 1dc), [2dc, ch2, 3dc] in same sp, [skip 3 sts, 3dc in next sp between groups of sts] 3 times, skip 3 sts, *[3dc, ch2, 3dc] in next ch2-sp, [skip 3 sts, 3dc in next sp between groups of sts] 3 times, skip 3 sts; rep from * twice more, slst in top of beg ch3, then fasten off. (5 3dc-groups along each side of square, and 4 corner ch2-sps.
Continue to work into the spaces between 3dc-groups and into corner ch2-sps:
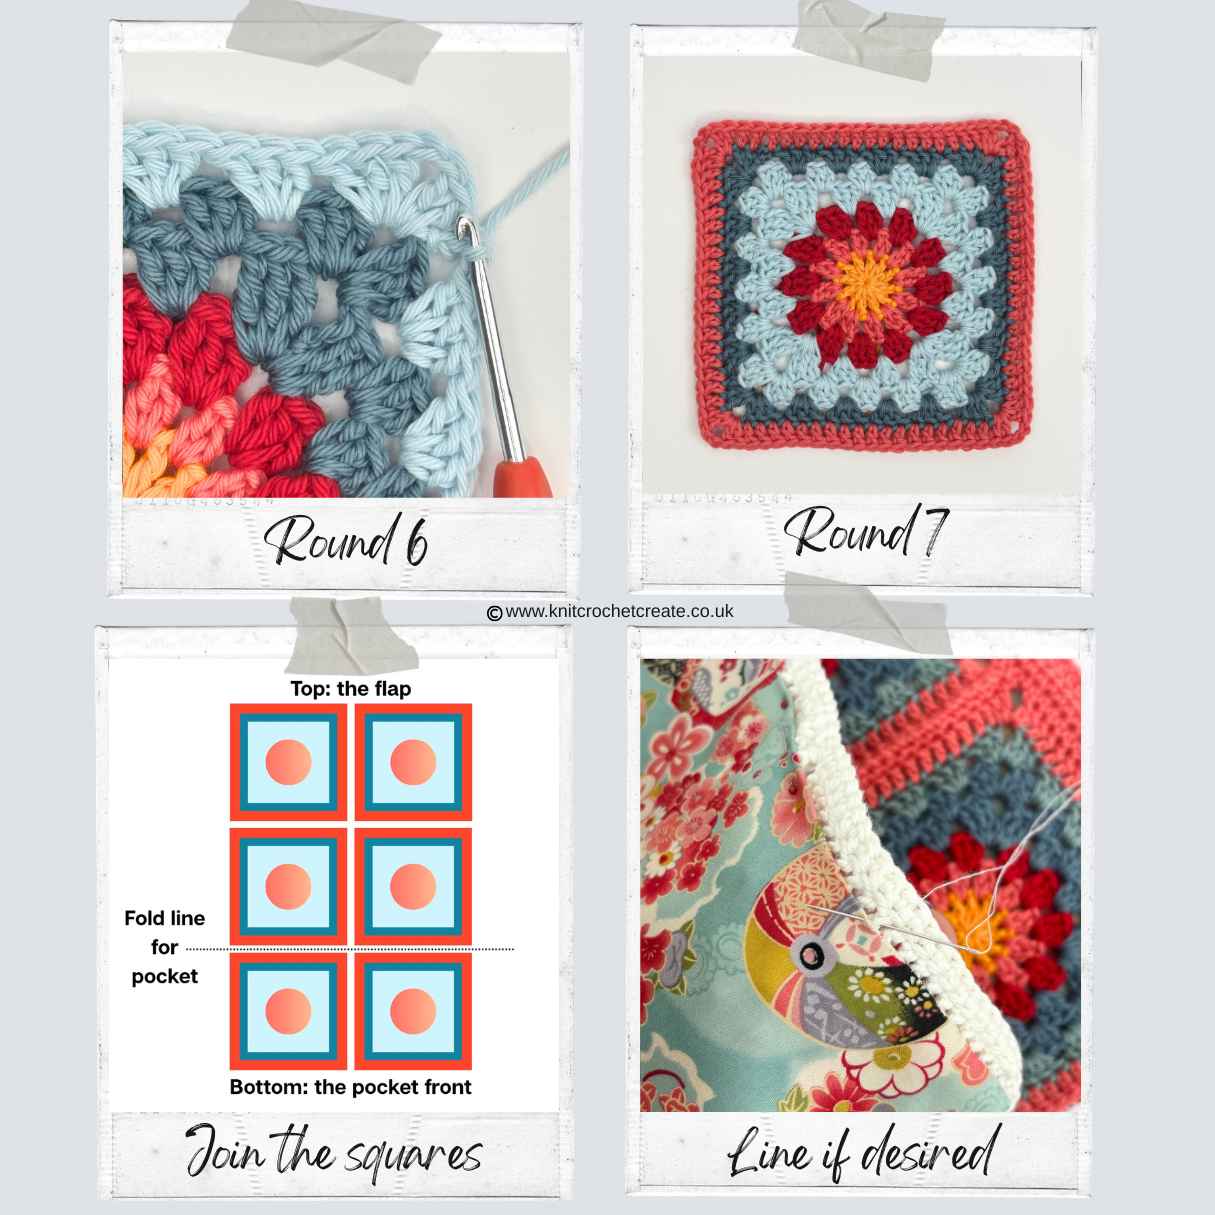
- Round 6: Join next color with slst to any corner ch2-sp. Ch3 (counts as 1dc), [2dc, ch2, 3dc] in same sp, [3dc in next sp between 3dc-groups] 4 times, *[3dc, ch2, 3dc] in next ch2-sp, [3dc in next sp between 3dc-groups] 4 times; rep from * twice more, slst in top of beg ch3, then fasten off. (6 3dc-groups along each side of square, and 4 corner ch2-sps)
- Round 7: Join next color with slst to any corner ch2-sp. Ch3 (counts as 1dc), [1dc, ch2, 2dc] in same sp, 1dc in each st to next corner, *[2dc, ch2, 2dc] in corner ch2-sp, 1dc in each st to next corner; rep from * twice more, slst in top of beg ch3, then fasten off. (22 dc along each side of square, and 4 corner ch2-sps)
- If needed, block your square flat to 5in (12.5cm).
Join 6 Squares To Form Your Crochet Book Sleeve
- Place 6 squares in 3 rows of 2 with RS uppermost (see diagram above).
- First join each set of two squares together along their vertical seams, then join the horizontal seams.
- Use a color that matches or tones with Round 7 of squares.
- Join squares with your preferred method. This can be slip stitch through back loops with yarn and needle, or use a crochet hook to slip stitch or single crochet through back loops.
Next, add an edging to the top and bottom of the rectangle.
Top Edge (the flap)
- With RS facing, join matching color with slst to top right-hand corner sp, ch1 (does not count as a st), 1sc in same sp, 1sc in each st to next corner sp of square, 2sc in corner sp, 1sc in joining seam, 2sc in corner sp of next square, 1sc in each st to next corner sp, 1sc in corner sp then fasten off. (51 sts)
Bottom Edge (the pocket front)
- Row 1: With RS facing, place rectangle flat with bottom edge now at top. Join matching color with slst to top right-hand corner sp, ch1 (does not count as a st), 1hdc in same sp, 1hdc in each st to next corner sp of square, 2hdc in corner sp, 1hdc in joining seam, 2hdc in corner sp of next square, 1hdc in each st to next corner sp, 1hdc in corner sp, then turn. (51 sts)
- Row 2: Ch1 (does not count as a st), 1sc in each st to end, then turn.
- Row 3: Ch1 (does not count as a st), 1hdc in each st to end, then fasten off.
FINISHING
Add Optional Lining
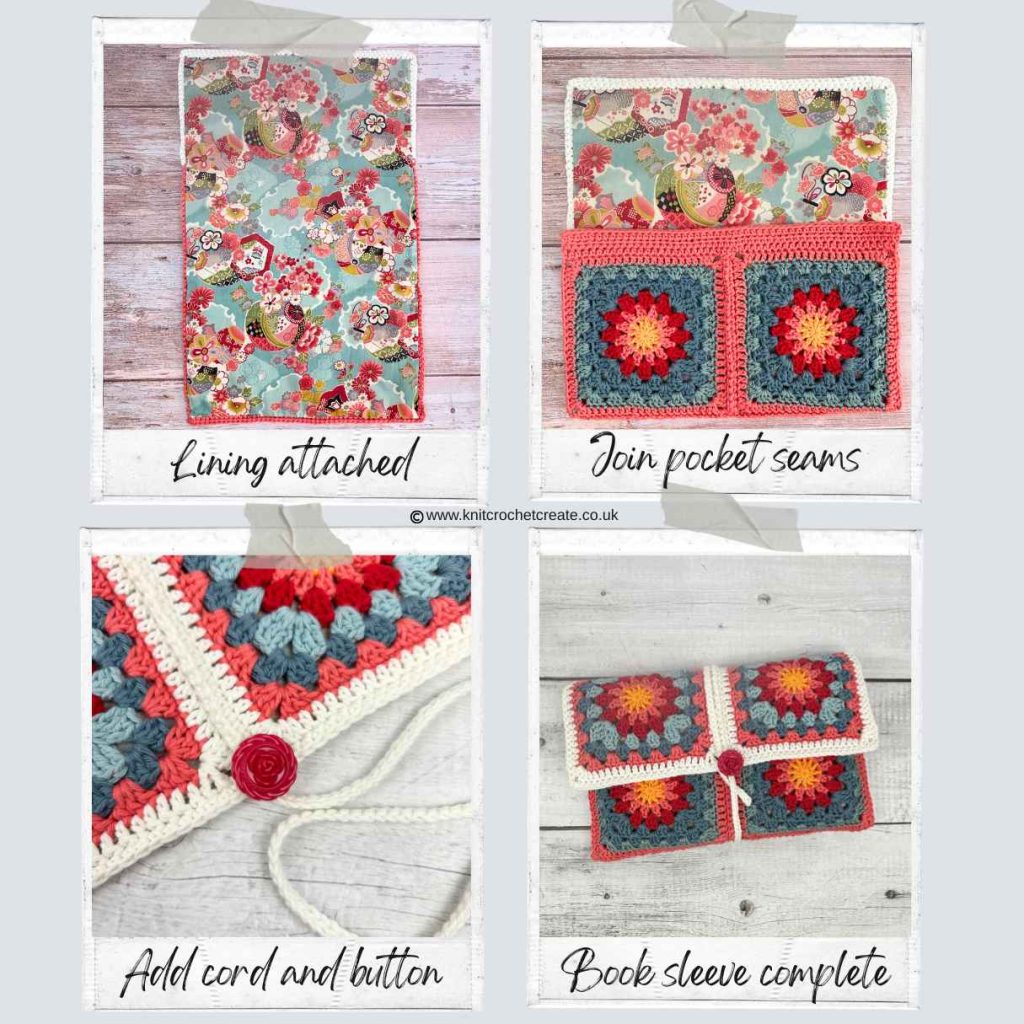
The book cover is sturdy on its own, so a lining is not essential. I'm not a seamstress, so this is an easy method that I use to line bags and purses. You can also use any preferred method of lining.
- Lay the crochet rectangle flat on the fabric then use it as a guide to cut the fabric slightly bigger (only around 0.5cm extra is needed).
- Fold a 1cm hem to the WS on all four edges, then press with an iron if needed.
- Place the lining RS up, on the WS of the crochet rectangle (WS of the fabric facing WS of crochet).
- Pin in place so the folded edges sit just inside the crochet edges, so that the edge stitches remain free for joining the seams later.
- Using matching thread, slip stitch the lining to the crochet all the way around, catching the back of the crochet stitches so the thread doesn't show on the RS.
Join Sides Of Pocket Section
- With the lining uppermost, fold bottom two squares up so they sit on top of the middle two squares.
- With front of pocket facing, and working through both layers, join each side seam with slst. Either slip stitch with a crochet hook, or slip stitch with a wool needle.
- Along one side you will work from the bottom of the pocket up to the top. On the opposite side you will work from the top of the pocket down to the bottom.
- Fasten off then weave in ends.
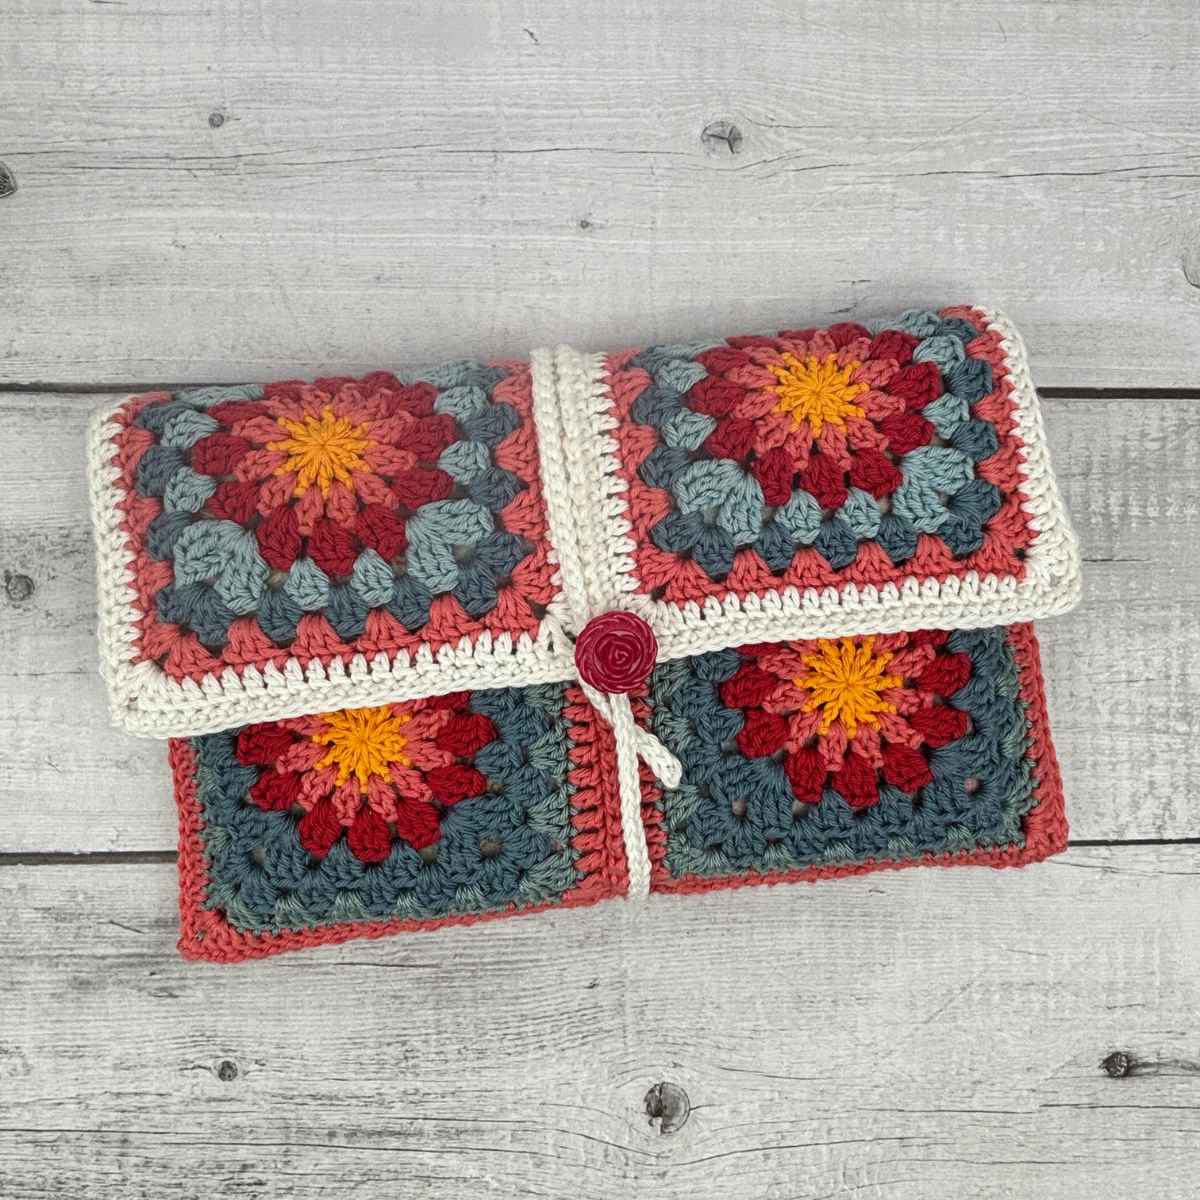
Add The Cord And Button
- Using any color, join yarn with slst to center front of flap.
- Crochet 101 chains, slst in second ch from hook, then slst in each ch to end. Fasten off.
- Sew a button to center front of flap, just above the cord.
- Wrap the cord around the cover, then around the button, and tuck the end under the cord to secure.
FREE Crochet Book Sleeve Pattern Begins – UK terms
- beg = beginning
- ch(s) = chain or chains
- ch-sp(s) = chain space(s)
- dc = double crochet
- dtr = double treble crochet
- htr = half treble crochet
- rep = repeat
- RS = right side
- slst = slip stitch
- sp(s) = space(s)
- st(s) = stitch(es)
- tr = treble crochet
- WS = wrong side
Pattern Notes
- Ch3 at beginning of a round counts as 1tr (unless stated otherwise).
- Ch1 at beginning of edging rows does not count as a st.
- Pattern is in UK crochet terms.
Granny Square (make 6)
Center Circle
- With first colour and 3mm hook, make a magic ring. Or ch5 then slst into first of these 5 ch to form a ring.
- Crochet over your tail end of yarn when working Round 1, so that you can pull the hole closed.
- Squares do not all need to be identical in colour, but for a cohesive look, try using the same colours for Rounds 1–3 on all squares and, if yarn allows, similar colours for Round 7.
- Round 1 (RS): Ch4 (counts as 1tr, ch1), [1tr in ring, ch1] 11 times. Slst in third of beg ch4 to join, then fasten off. (12 tr, 12 ch1-sps)
- Round 2: Join next colour with slst to any ch1-sp. Ch3 (counts as 1tr), 1tr in same sp, ch1, [2tr in next ch1-sp, ch1] around, slst in top of beg ch3, then fasten off. (12 2tr-groups, 12 ch1-sps)
- Round 3: Join next colour with slst to any ch1-sp. Ch3 (counts as 1tr), 2tr in same sp, ch1, [3tr in next ch1-sp, ch1] around, slst in top of beg ch3, then fasten off. (12 3tr-groups, 12 ch1-sps)
Turn The Circle Into A Square
- Round 4: Join next colour with slst to any ch1-sp. Ch6 (counts as 1dtr and ch2), 3dtr in same sp, [3tr in next ch1-sp] twice, *[3dtr, ch2, 3dtr] in next ch1-sp, [3tr in next ch1-sp] twice; rep from * twice more, 2dtr in same sp as beg ch6, slst in fourth ch of beg ch6, then slst into corner ch2-sp. (8 3dtr-groups, 8 3tr-groups and 4 ch2-sps)
- Round 5: Continue with same colour. Ch3 (counts as 1tr), [2tr, ch2, 3tr] in same sp, [skip 3 sts, 3tr in next sp between groups of sts] 3 times, skip 3 sts, *[3tr, ch2, 3tr] in next ch2-sp, [skip 3 sts, 3tr in next sp between groups of sts] 3 times, skip 3 sts; rep from * twice more, slst in top of beg ch3, then fasten off. (5 3tr-groups along each side of square, and 4 corner ch2-sps)
Continue to work into the spaces between 3tr-groups and into corner ch2-sps:
- Round 6: Join next colour with slst to any corner ch2-sp. Ch3 (counts as 1tr), [2tr, ch2, 3tr] in same sp, [3tr in next sp between 3tr-groups] 4 times, *[3tr, ch2, 3tr] in next ch2-sp, [3tr in next sp between 3tr-groups] 4 times; rep from * twice more, slst in top of beg ch3, then fasten off. (6 3tr-groups along each side of square, and 4 corner ch2-sps)
- Round 7: Join next colour with slst to any corner ch2-sp. Ch3 (counts as 1tr), [1tr, ch2, 2tr] in same sp, 1tr in each st to next corner, *[2tr, ch2, 2tr] in corner ch2-sp, 1tr in each st to next corner; rep from * twice more, slst in top of beg ch3, then fasten off. (22 tr along each side of square, and 4 corner ch2-sps)
- If needed, block your square flat to 5in (12.5cm).
Join 6 Squares To Form Your Crochet Book Sleeve
- Place 6 squares in 3 rows of 2 with RS uppermost.
- First join each set of two squares together along their vertical seams, then join the horizontal seams.
- Use a colour that matches or tones with Round 7 of squares.
- Join squares with your preferred method. This can be slip stitch through back loops with yarn and needle, or use a crochet hook to slip stitch or single crochet through back loops.
Next, add an edging to the top and bottom of the rectangle.
Top Edge (the flap)
- With RS facing, join matching colour with slst to top right-hand corner sp, ch1 (does not count as a st), 1dc in same sp, 1dc in each st to next corner sp of square, 2dc in corner sp, 1dc in joining seam, 2dc in corner sp of next square, 1dc in each st to next corner sp, 1dc in corner sp then fasten off. (51 sts)
Bottom Edge (the pocket front)
- Row 1: With RS facing, place rectangle flat with bottom edge now at top. Join matching colour with slst to top right-hand corner sp, ch1 (does not count as a st), 1htr in same sp, 1htr in each st to next corner sp of square, 2htr in corner sp, 1htr in joining seam, 2htr in corner sp of next square, 1htr in each st to next corner sp, 1htr in corner sp, then turn. (51 sts)
- Row 2: Ch1 (does not count as a st), 1dc in each st to end, then turn.
- Row 3: Ch1 (does not count as a st), 1htr in each st to end, then fasten off.
To finish your crochet book sleeve follow the same instructions as given for the US version. Scroll up the page or click here to jump to the finishing section.
Get your FREE Crochet Book Sleeve Pattern PDF!
The PDF is free for the first 48 hours only (until Monday 2nd. November 12.30pm UK time). Just choose your chosen pattern in UK or US terms, then pop your details in the relevant form below and I’ll email it straight to you. Already on my email list? You’ll still need to add your email to get the PDF, but don’t worry, you won’t be added twice.
FAQs: Winter Sun Crochet Book Sleeve Pattern
It fits books up to A5 size, including most paperbacks, notebooks and journals. The finished sleeve is approximately 25cm (10in) wide by 15–17cm (6–6¾in) deep when closed.
Yes. This pattern is designed for books up to A5 in size, but you could try a thicker yarn and larger hook for a slightly bigger sleeve.
No. The sleeve is sturdy on its own, but a fabric lining gives it a neat finish and helps it hold its shape.
Yes, any DK (8-ply; light worsted weight) yarn will work. Cotton gives a firm, crisp finish, but acrylic or wool blends are fine too. Just check your squares measure about 12.5cm (5in).
Only small amounts of each colour, so it’s ideal for leftover yarn. I used leftovers of six colours of Sirdar Happy Cotton DK (20g balls). The 6 squares do not need to be identical, so don't worry if you run out of yarn - you can just use a similar colour.
Yes, the full pattern is free on the blog in both UK and US terms. The ad-free PDF is free for the first 48 hours, then it’s available to buy on Ravelry and Etsy so that you can save it on your own device and use as often as you wish.
What to Make Next?
If you enjoyed my Winter Sun Book Cover, you might also like these FREE crochet patterns:
- Cosy Reads Bookmark – a quick granny stitch bookmark to tuck inside your new book sleeve.
- Starlight Dishcloth – another great gift you can pair with a handmade soap.
- More Free Crochet Patterns
And don't forget to check the Stash To Sparkle 2026 event post each week for the latest patterns from me and Carmen.
Share Your Makes
If you love this pattern, then I'd love to see your finished book sleeves! Tag me on Instagram @knitcrochetcreate and use the hashtag #StashToSparkle2026 so I can admire your creations.
About Lynne from Knit Crochet Create
Lynne Rowe is a UK-based knitting and crochet designer and best-selling author, recognised for her clear, easy-to-follow patterns and also her dedication to making knitting and crochet accessible to everyone. She is the founder of Knit Crochet Create, with a strong focus on stash-busting projects that promote sustainable, mindful making. Lynne's work encourages the use of your yarn stash, therefore helping you transform small leftovers into joyful creations.
Let's keep in touch!
I'd love to chat more.
Sign up for my newsletter and receive a weekly dose of crafting inspiration, featuring the latest trends, tips, and projects to fuel your creativity.