Free Crochet Pumpkin Pattern — Easy Appliqué Motif
Nothing says autumn or fall quite like pumpkins! My free crochet pumpkin motif pattern is a quick and easy appliqué that also uses up the tiniest scraps of yarn from your stash. You can crochet them on their own for table decorations, or attach them to a small hoop for a simple seasonal decoration, or use them as card embellishments. I can't think of a better way to use up your yarn stash, so let's get started.
This free crochet pumpkin motif pattern is written in both US and UK crochet terms, so you can choose your preferred option.
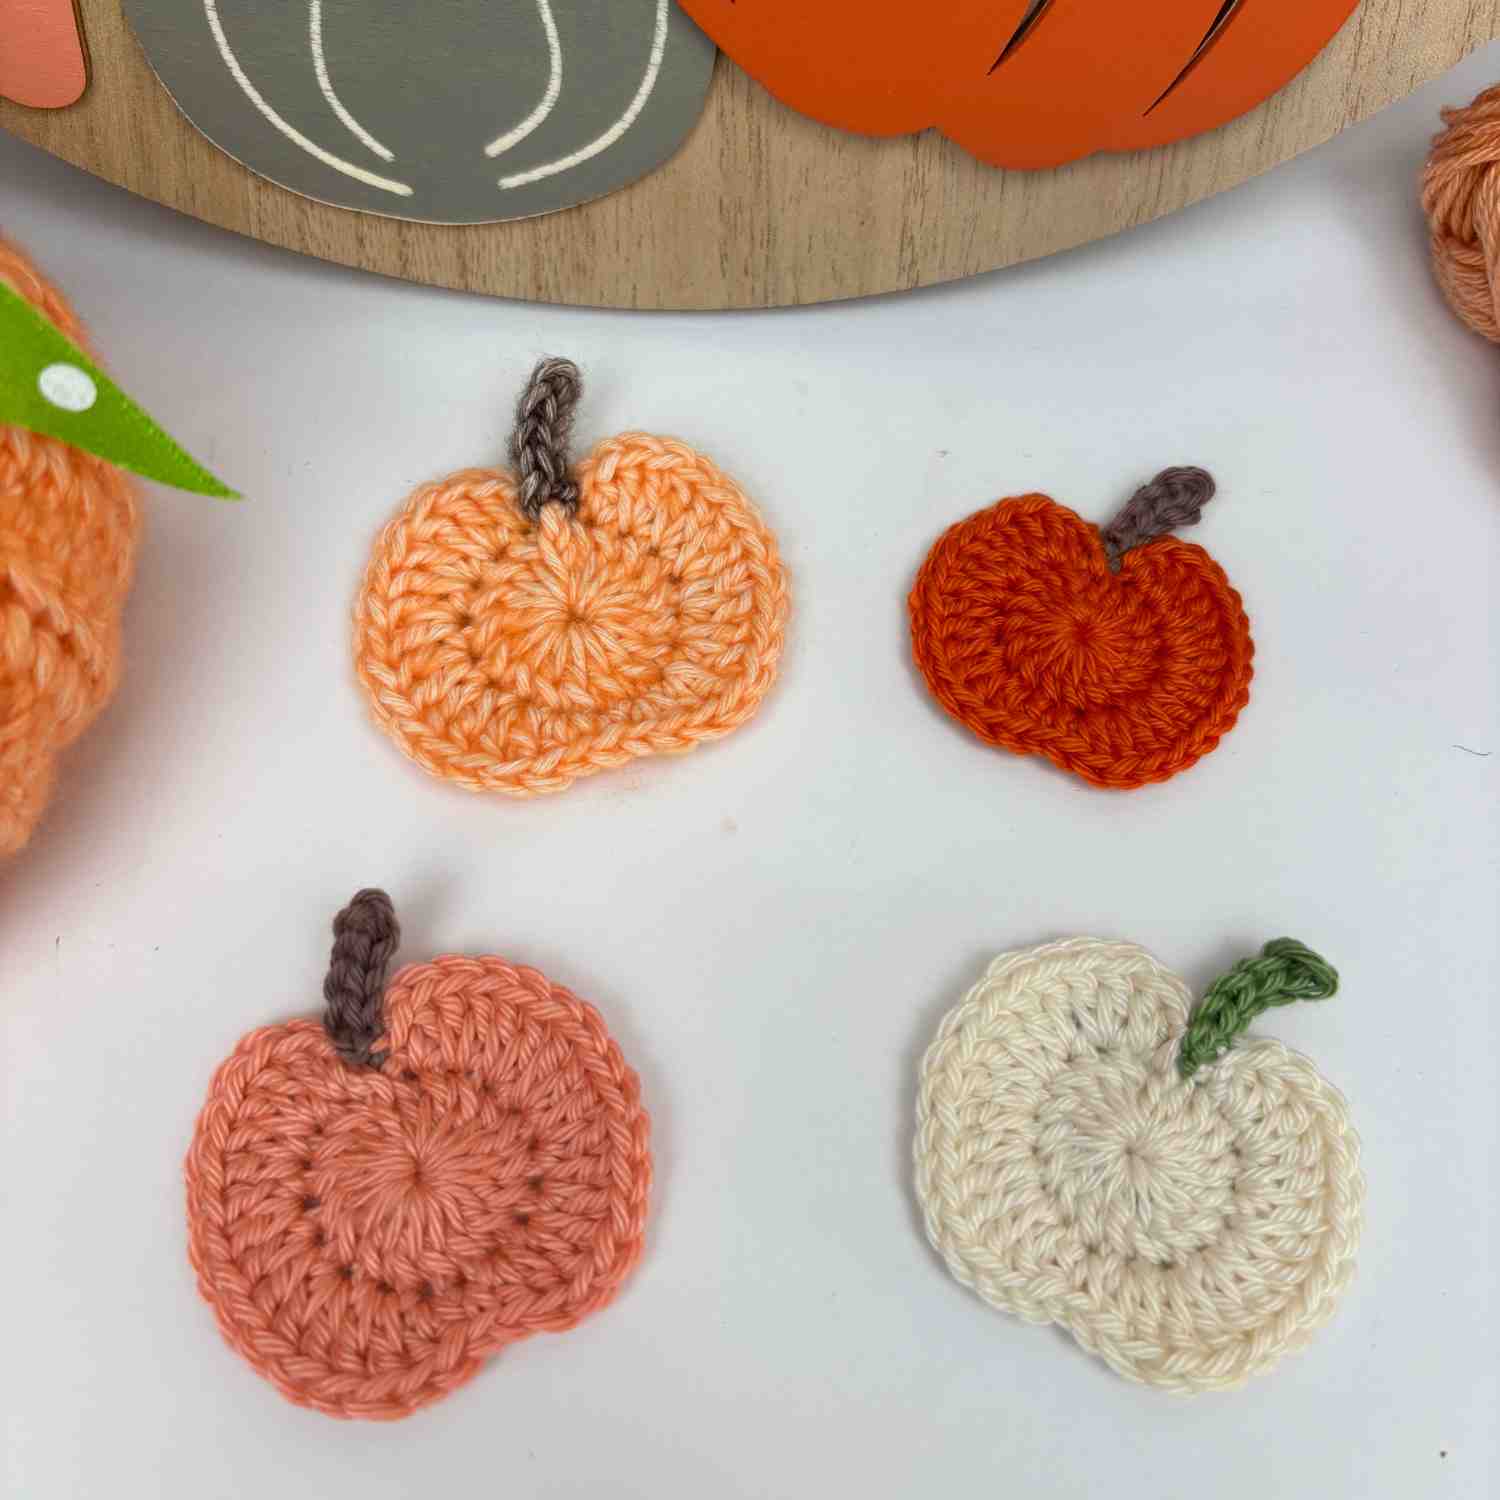
🎃 Quick Look: Free Crochet Pumpkin Appliqué Pattern
- Skill Level: 😊 Beginner‑friendly.
- Construction: ✂️ Worked in rounds, changing colour for Stalk.
- Techniques Used: ➡️ Magic ring, chains, UK dc + htr + tr / US sc + hdc + dc.
- Time to Make: ⏱️ 10-15 minutes.
- Yarn: 🧶 Tiny scraps of 4-ply cotton (any shade of Orange or Cream + Brown).
- Extras: ✨ Wool needle.
- Hook: 🪝 2.5mm, 3mm, or 3.5mm hook, depending on yarn used.
- Finished Size: 📏 ~ 4-5cm across, depending on yarn and hook used.
- Pattern Type: 🧵 Flat crochet motif.
- Perfect For: 🌼 Wreaths, appliqué, junk journalling, embellishments, hair clips.
Your support helps Google recognise and trust me as a knitting and crochet designer 🌟
How to Get Your Free Crochet Pumpkin Pattern
The free pattern is written out in full in both US and UK crochet terms.
Scroll down to the pattern section to find the step-by-step instructions. You don’t need to sign up or log in because it’s free right here on the blog.
Buy the Premium Pattern to download and keep forever
Want to save it to your device or print it out? Then you can buy the ad-free PDF version to use over and over again. There is also a helpful chart in the paid-for version, to help with placement of stitches.
- Buy on Etsy here: Pumpkin Motif Applique Pattern on Etsy
- Buy on Ravelry here: Pumpkin Motif Applique Pattern on Ravelry
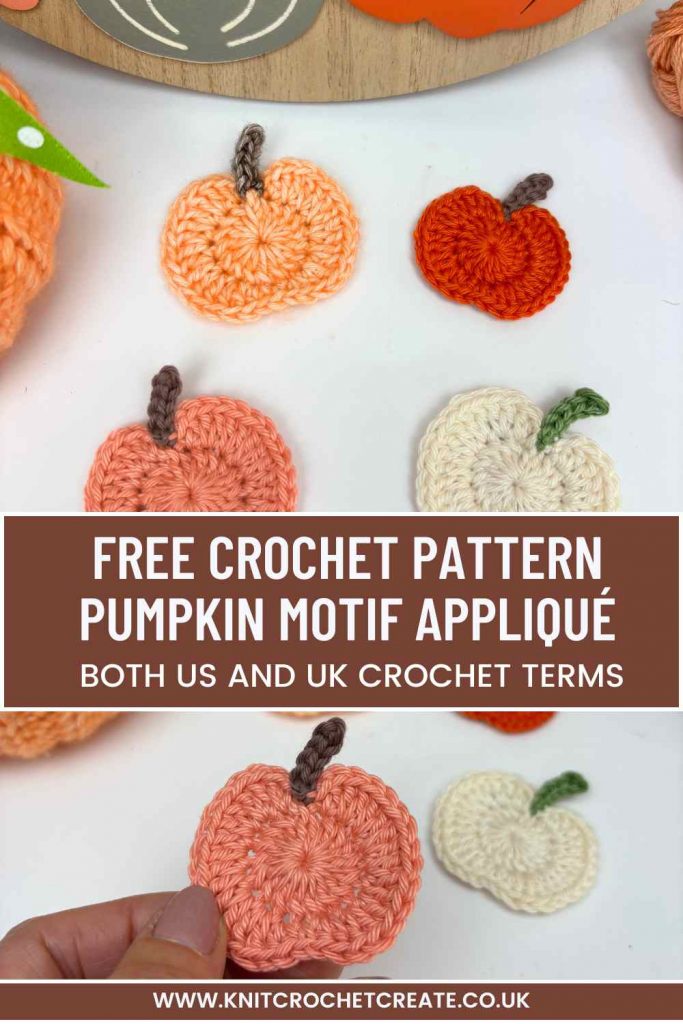
Why You’ll Love This Pumpkin Appliqué Pattern
- It’s stash-friendly – because you only need a few grams of yarn.
- Each motif takes less than 20 minutes to make.
- Perfect for autumn decorating, Halloween, or Thanksgiving.
- A fun way to use up leftover yarn from other projects, so you can stop your stash from growing.
How to Use Your Free Crochet Pumpkin Pattern
These little pumpkin motifs are so versatile. Here are some ideas:
- Add one as an embellishment to a gift tag or card.
- Make several and string them together as a garland.
- Stitch a few as appliqué onto a tote bag for a seasonal update.
- Use thicker yarn for a larger pumpkin to make a set of rustic pumpkin coasters.
- Attach to a small hoop so you can hang as a decoration.
Copyright
Please read the copyright terms, which apply globally, before using or downloading your pattern:
The contents of this page, including the pattern instructions and images, are published under copyright to me ©Lynne Rowe 2025 under my brand Knit Crochet Create® and are for your own personal use only.
You are welcome to sell items made from this pattern for charity fundraising purposes, or to gift them to family and friends, but selling small numbers for profit is only allowed with permission. Please email lynne@knitcrochetcreate.com for permission.
By downloading or using this pattern, you therefore agree to these terms.
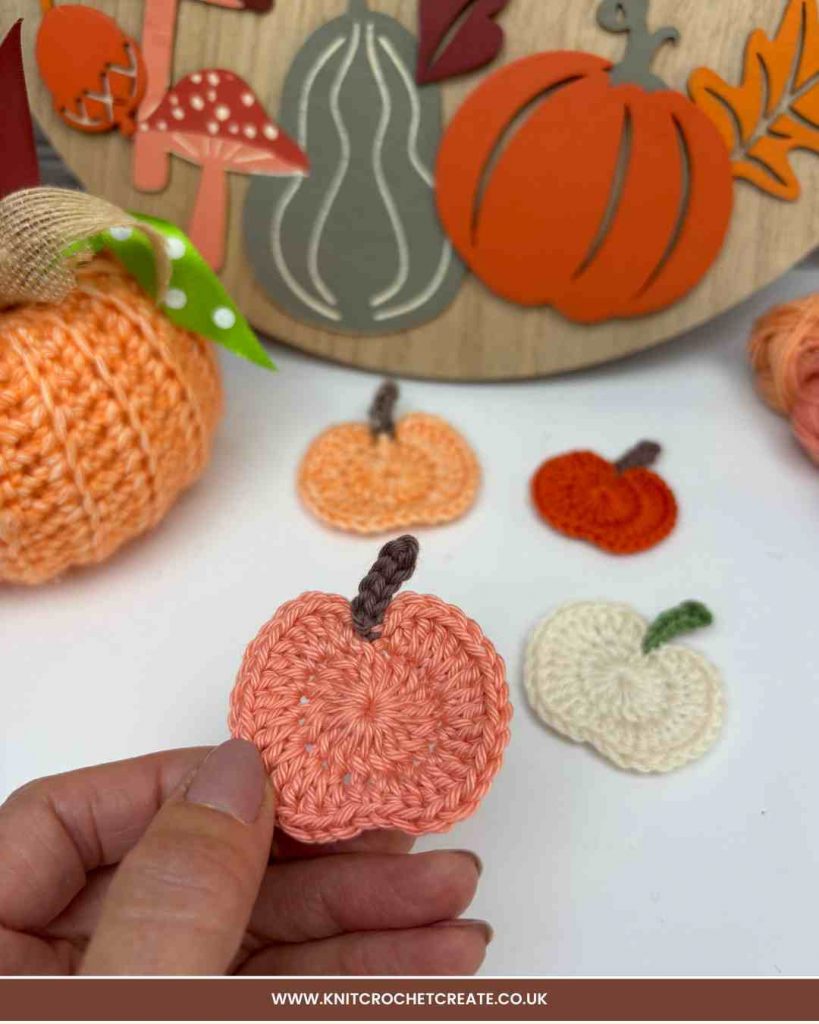
FREE Crochet Pumpkin Pattern (appliqué motif)
Materials
- Small amounts of 4ply or double knitting (light worsted weight) yarn in
- Orange (or different shades of orange) for the pumpkin.
- Brown for the pumpkin stem (stalk).
- Choose from a 2.5mm (US C/2), 3mm (US D/3), or 3.5mm crochet hook (see finished sizes for measurements with each size of hook).
- Tapestry needle (wool needle).
- Stitch marker.
Tension
Is not critical for this project, because it doesn't matter if your pumpkin motif turns out a different size.
Finished Size
- With 4ply yarn and 2.5mm (US C/2) hook: approximately 4cm (1.5in) across the body of the pumpkin.
- With 4ply yarn and 3mm (US D/3) hook: approximately 4.5cm (1.75in) across.
- With double knitting (8ply/light worsted weight yarn) and 3.5mm hook: approximately 5cm (2in) across.
Free Crochet Pumpkin Pattern begins (US terms)
Abbreviations Used (US terms)
- ch = chain
- sc = single crochet
- hdc = half double crochet
- dc = double crochet
- slst = slip stitch
Instructions (US terms)
With chosen hook and yarn, make an adjustable ring (also called a magic ring).
Round 1 (RS): 3ch (counts as first dc), 17dc into the centre of the ring. Pull yarn tail gently to close the hole, then slst in third of beginning 3ch to join. (18 sts)
See images A to D below for guidance on this first round.
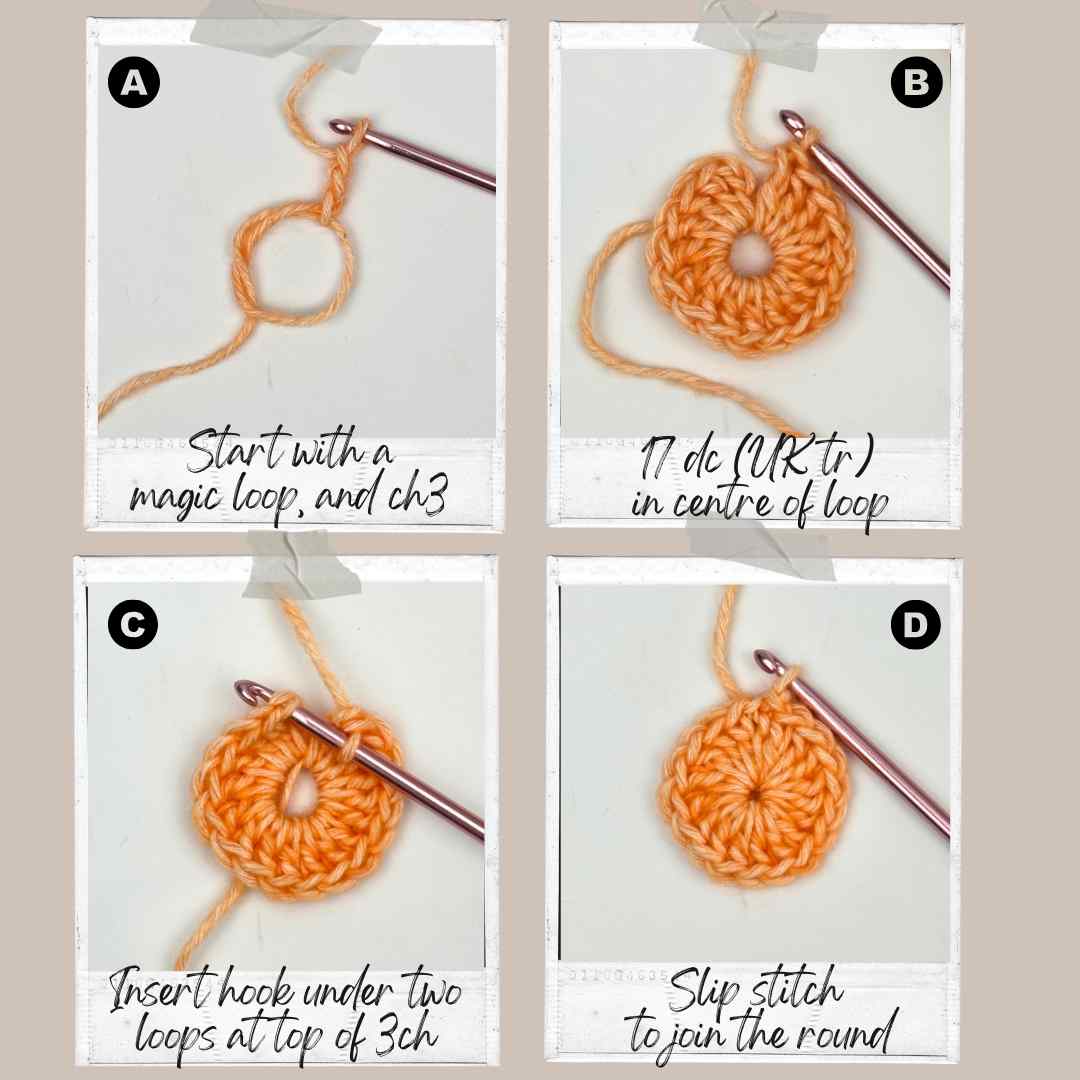
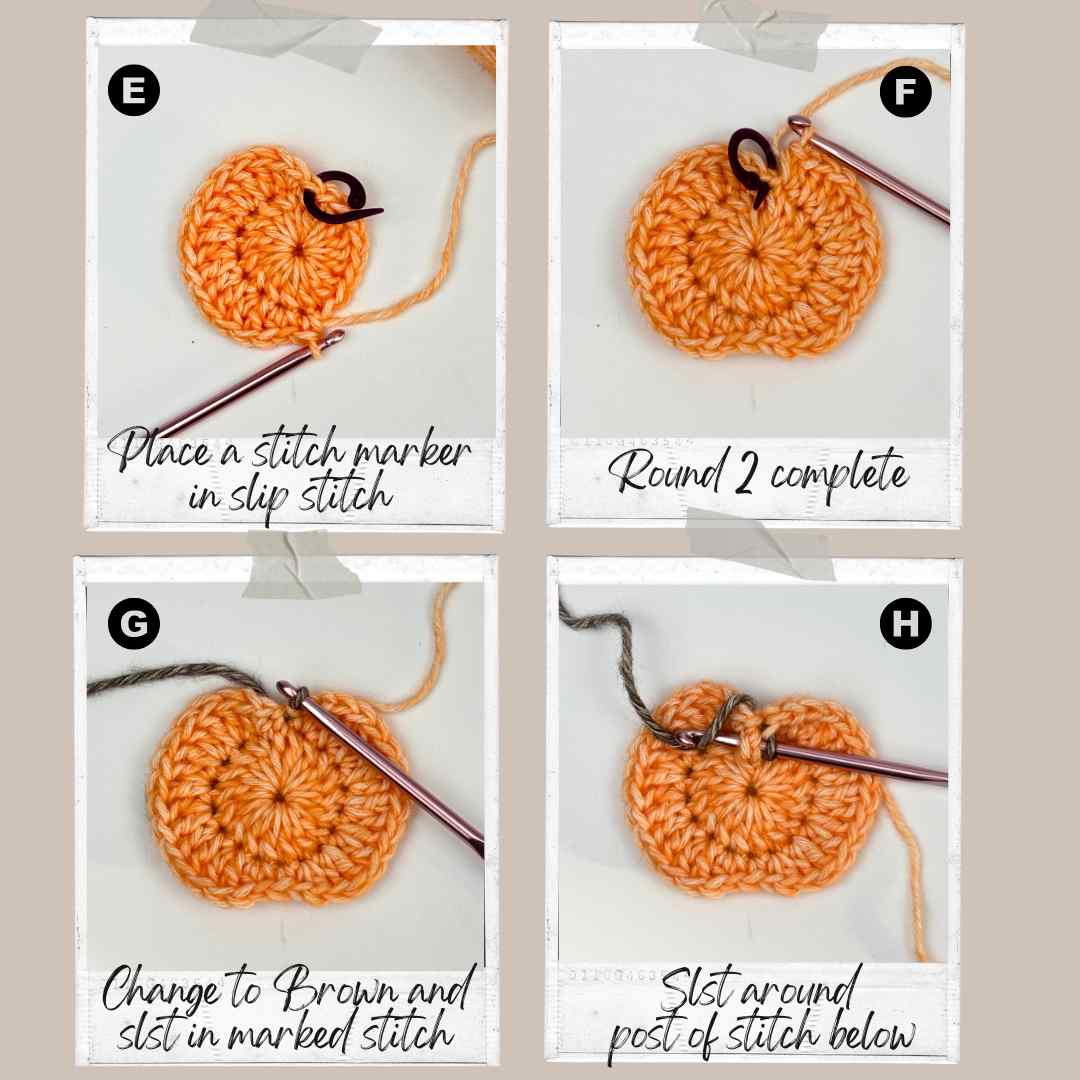
Place a stitch marker in the slst of the last round, to mark the end of round.
Round 2: [1sc, 1hdc] in next st, 2dc in each of the next 6 sts, [1dc, 1hdc] in next st, 1sc in next st, [1hdc, 1dc] in next st, 2dc in each of the next 6 sts, [1dc, 1hdc] in next st, 1sc in last st, change to Brown yarn and slst in last slst of previous round (this is the marked stitch), then finally, slst around post of the double crochet stitch below in Round 1 - sliding hook under the post, from front to back, to front again, then work the slst. (34 sts)
See images E to H below for guidance on this second round.
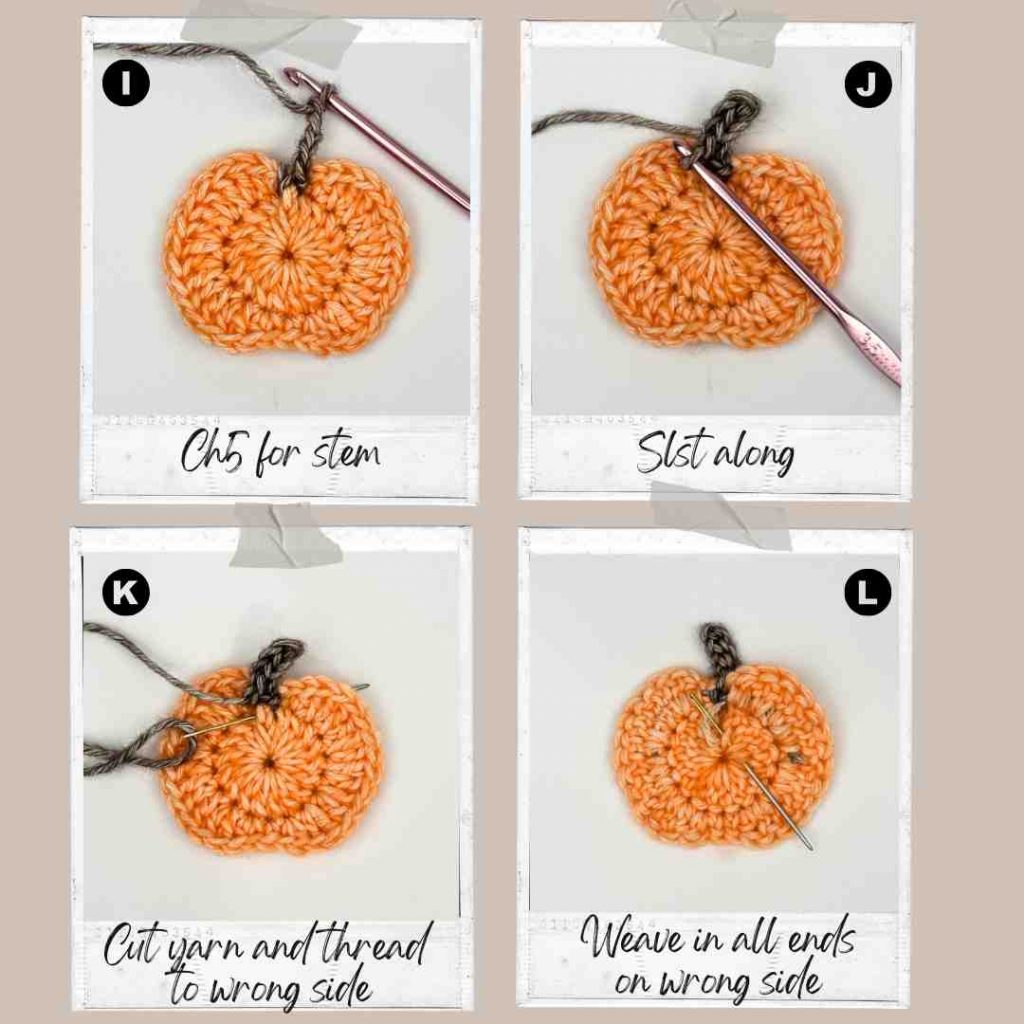
Stalk: Ch5, slst in second ch from hook, slst in each of the next 3 ch then fasten off. Weave in ends neatly on the wrong side, then trim.
See images I to L below for stem and finishing.
Free Crochet Pumpkin Pattern begins (UK terms)
Abbreviations Used (UK Terms)
- ch – chain
- dc – double crochet
- htr – half treble crochet
- tr – treble crochet
- slst – slip stitch
Instructions (UK terms)
With chosen hook and yarn, make an adjustable ring (also called a magic ring).
Round 1 (RS): 3ch (counts as first tr), 17tr into the centre of the ring. Pull yarn tail gently to close the hole then slst in third of beginning 3ch to join. (18 sts)
See images A to D above for this first round.
Place a stitch marker in the slst of the last round, to help mark end of round.
Round 2: [1dc, 1htr] in next st, 2tr in each of the next 6 sts, [1tr, 1htr] in next st, 1dc in next st, [1htr, 1tr] in next st, 2tr in each of the next 6 sts, [1tr, 1htr] in next st, 1dc in last st, change to Brown yarn and slst in last slst of previous round (this is the marked stitch), then finally, slst around post of the treble crochet stitch below in Round 1 - sliding hook under the post, from front to back, to front again, then work the slst. (34 sts)
See images E to H above for this second round.
Stalk: Ch5, slst in second ch from hook, slst in each of the next 3 ch then fasten off. Weave in ends neatly on the wrong side, then trim.
See images I to L above for stem and finishing.
Making Up
If desired, pin your pumpkin motifs flat and spray with water (or spray starch). Leave to dry completely.
Either:
- Add a hanging loop.
- String lots of pumpkins together to create a garland so you can decorate your home.
- Use them separately as table decorations.
- Attach the pumpkin to a small hoop for hanging.
- Make seasonal cards, so you can wish everyone Happy Halloween.
Most makers use cotton yarn in either 4-ply or double knitting (light worsted) thickness, for crisp stitch definition and easy blocking, but acrylic and other fibres work just as well.
Size varies depending on which yarn thickness you are using, but as a guide, between 4-5cm across, for a small, card‑friendly appliqué.
They’re perfect for cards, garlands, journalling, gift tags, bags, blankets, and also autumn décor.
A simple whip stitch or running stitch around the edge works well, either using matching yarn, or a similar colour of sewing thread.
Absolutely — just change yarn weight or hook size for different sizes.
Yes — it’s small, safe, and great for autumn classroom projects.
Share your creations
If you love this free crochet pattern and make lots of adorable pumpkins, I’d love to see your finished decorations! Tag me on Instagram [@knitcrochetcreate] so I can admire your colour combinations and see what you make with them. Happy Crocheting!
If you enjoyed this easy pumpkin motif, check out my other stash-busting projects like the Easy Crochet Pumpkin Pattern (a stuffed pumpkin) or my Easy Crochet Cross Bookmark Pattern – both free on the blog.
Explore more yarn stash ideas over on my Pinterest board here.
Let's keep in touch!
I'd love to chat more.
Sign up for my newsletter and receive a weekly dose of crafting inspiration, featuring the latest trends, tips, and projects to fuel your creativity.