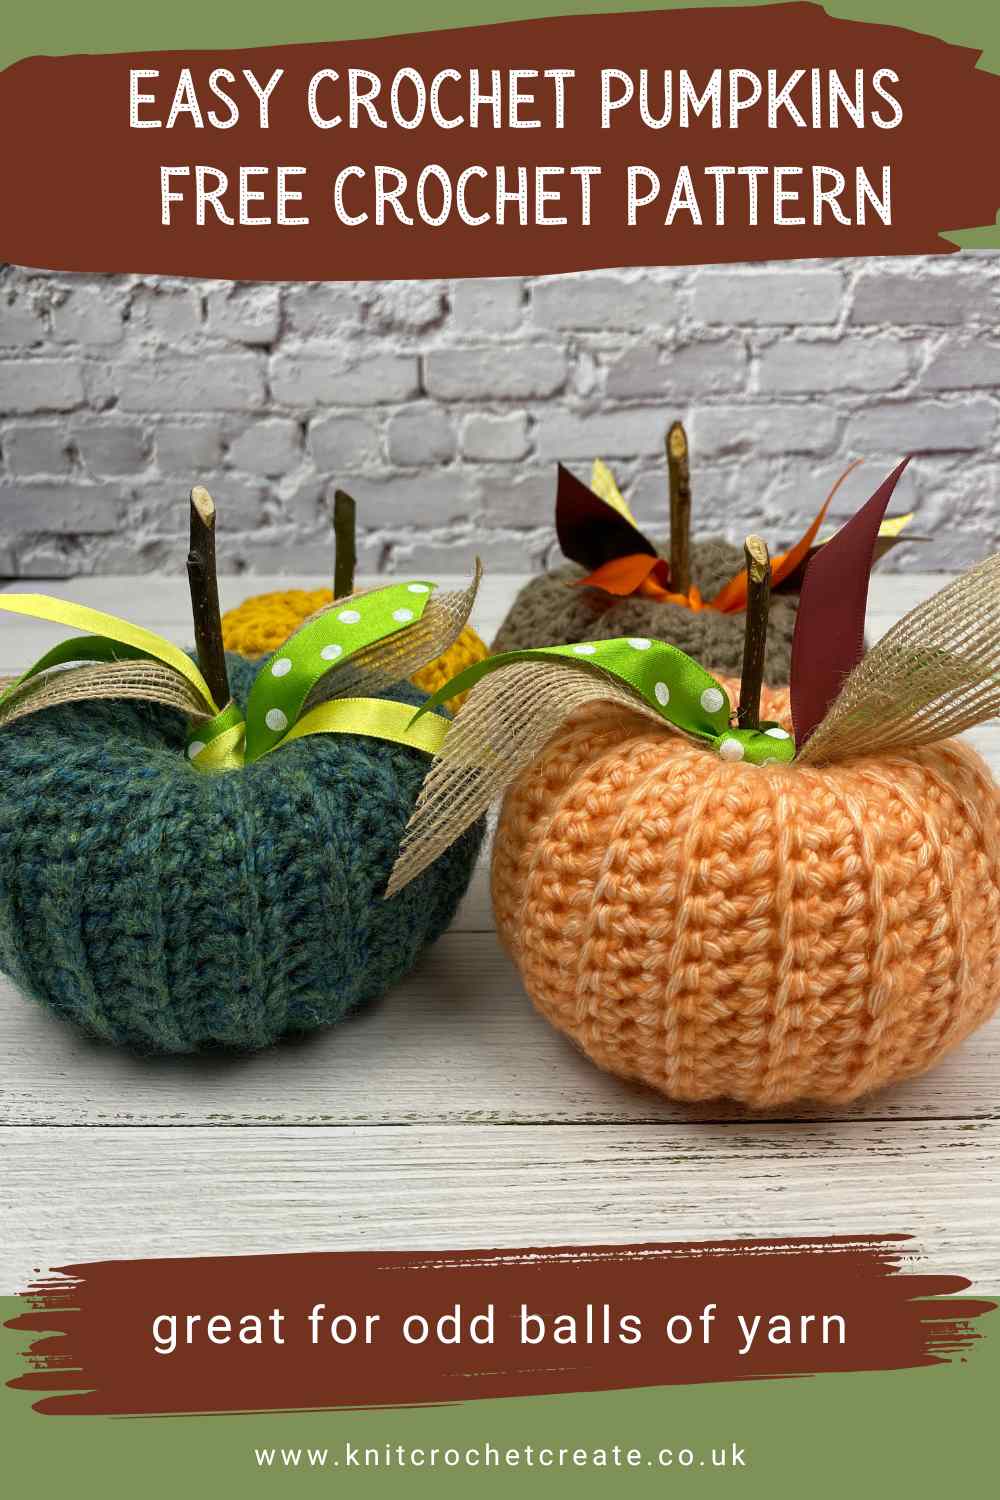
Easy Crochet Pumpkin - free crochet pattern
This easy crochet pumpkin pattern is a quick and fun make for autumn or fall. Whether you’re decorating your home for Halloween or Thanksgiving, or just want to add some cosy seasonal touches, these little pumpkins are perfect.
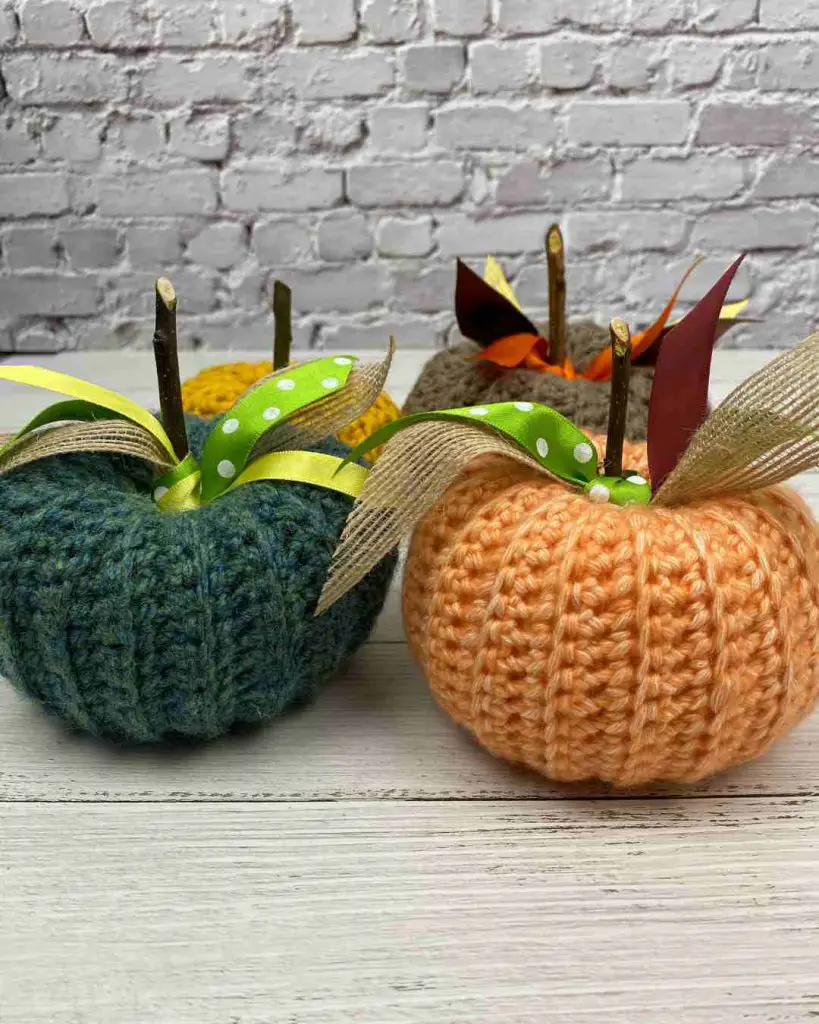
They’re ideal for using up small balls of yarn from your stash, and you can make them in lots of different colours and sizes, and they also make lovely handmade gifts or table decorations. I love making them as gifts and to decorate my home, because they work up so quickly. You'll soon hook up a whole pumpkin patch of your own.
Why you’ll love this Easy Crochet Pumpkin Pattern
- It’s a quick project - great for a relaxing evening of crafting.
- A perfect stash-buster - use up those odd bits of yarn in your favourite shades.
- Adds a warm, handmade feel to your autumn decor.
- Easy to customise with different sizes, colours, and textures.
- Great for gift hampers, table displays or party favours.
How to Use Your Crochet Pumpkin
Once you’ve made your pumpkin, here are a few ideas for how to use it:
- Decorate a shelf or windowsill with a mix of pumpkins in different colours.
- Use them as part of your Halloween or Thanksgiving table decor.
- String several together to make an autumn-themed garland.
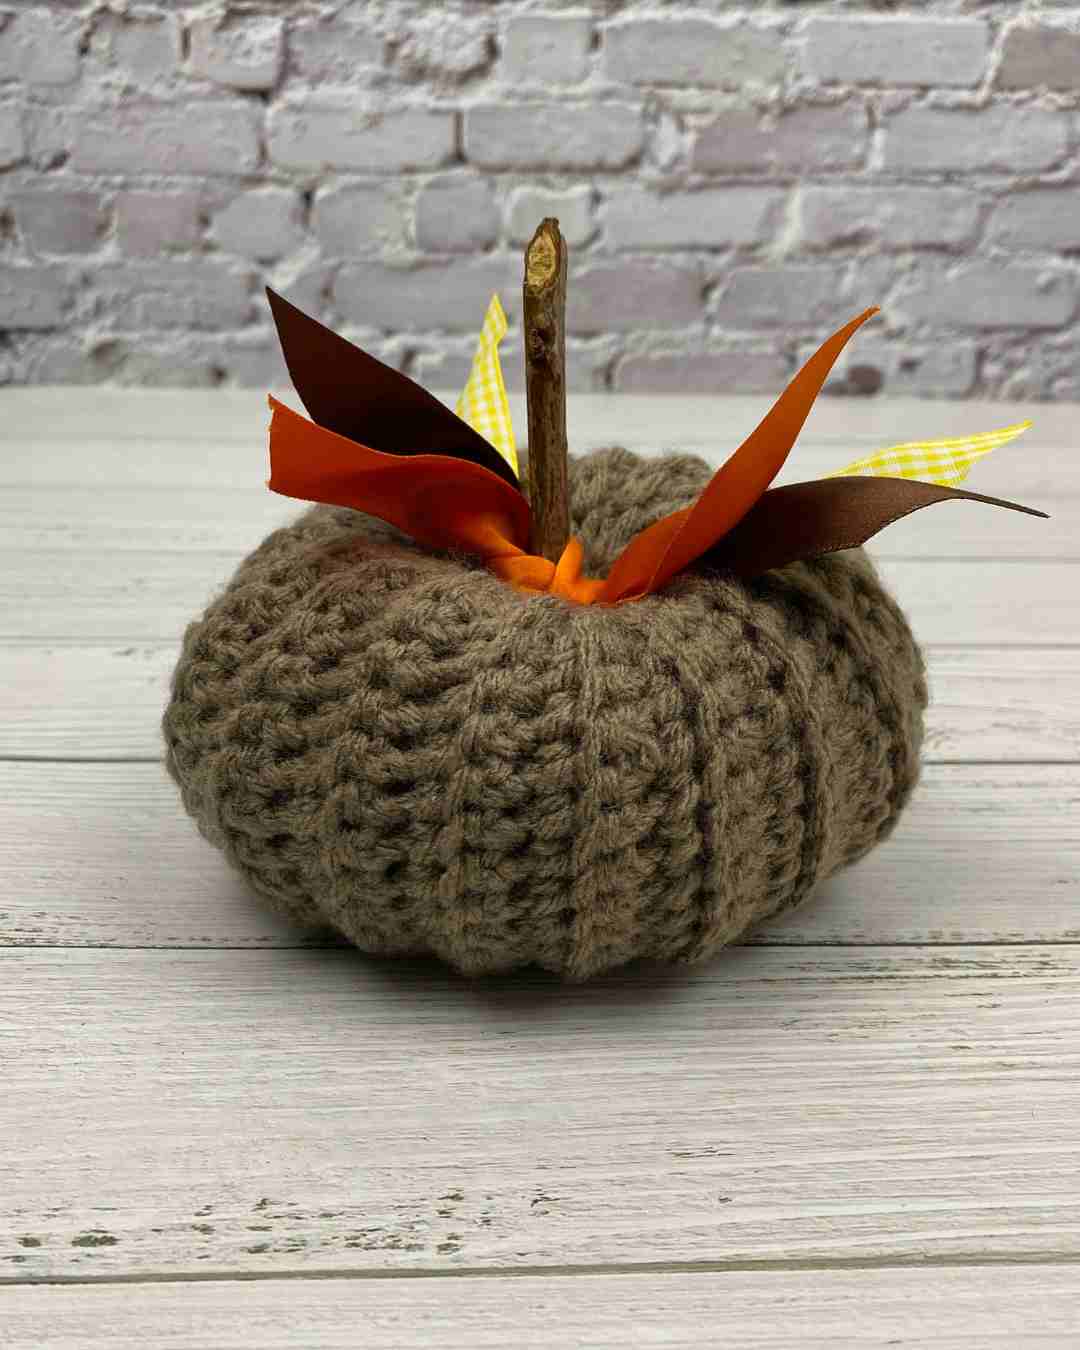
- Add a cinnamon stick or twig stem for a rustic finish.
- Gift a set of pumpkins to friends or family as a handmade seasonal gift.

Copyright
Please read the copyright terms, which apply globally, before using or downloading your pattern: The contents of this page, including the pattern instructions and images, are published under copyright to me ©Lynne Rowe 2025 under my brand Knit Crochet Create® and are for your own personal use only. Feel free to sell items made from this pattern for charity fundraising purposes, or to gift to family and friends, but selling small numbers for profit is only allowed with permission. Please email lynne@knitcrochetcreate.com for permission to sell in small numbers. By downloading or using this pattern, you therefore agree to these terms.
How to get your Free Easy Crochet Pumpkin Pattern
- Follow the free version of the pattern below, so you can get started right away. US terms are given first. Scroll down for UK terms.
Buy the premium pattern to download and keep
- Buy a pdf to download and save on your own device for the future. Save it in your pattern library and use it again and again.
- Buy on Ravelry here: Pattern on Ravelry
- Buy on Etsy here: Pattern on Etsy
Materials Needed
- You can use any thickness of yarn with its recommended hook size (you will find this information on the yarn band).
- I used approximately 33g (50 metres) of chunky yarn with a 5.5mm (US I/9) hook, for each pumpkin.
- Yarn needle
- Removable stitch marker
- Scissors
- Small amount of toy filling
- A small twig or a cinnamon stick for the stem
- Short lengths of ribbon
- Glue gun
Tension or Gauge
Your tension or gauge will differ, depending on yarn and hook size used. Tension/gauge is not critical for this project.
Finished Size
Approximately 12cm (4.75in) across, using chunky weight yarn and 5.5mm (US I/9) hook. This measurement will vary if a different yarn or hook size is used.
Crochet Abbreviations (US TERMS)
- ch = chain
- sc = single crochet
- rep = repeat
- st(s) = stitch(es)
- RS = right side
- WS = wrong side
Easy Crochet Pumpkin Pattern - US Crochet Terms
With your chosen yarn and recommended hook size, chain 19, then work back along the chain just made:
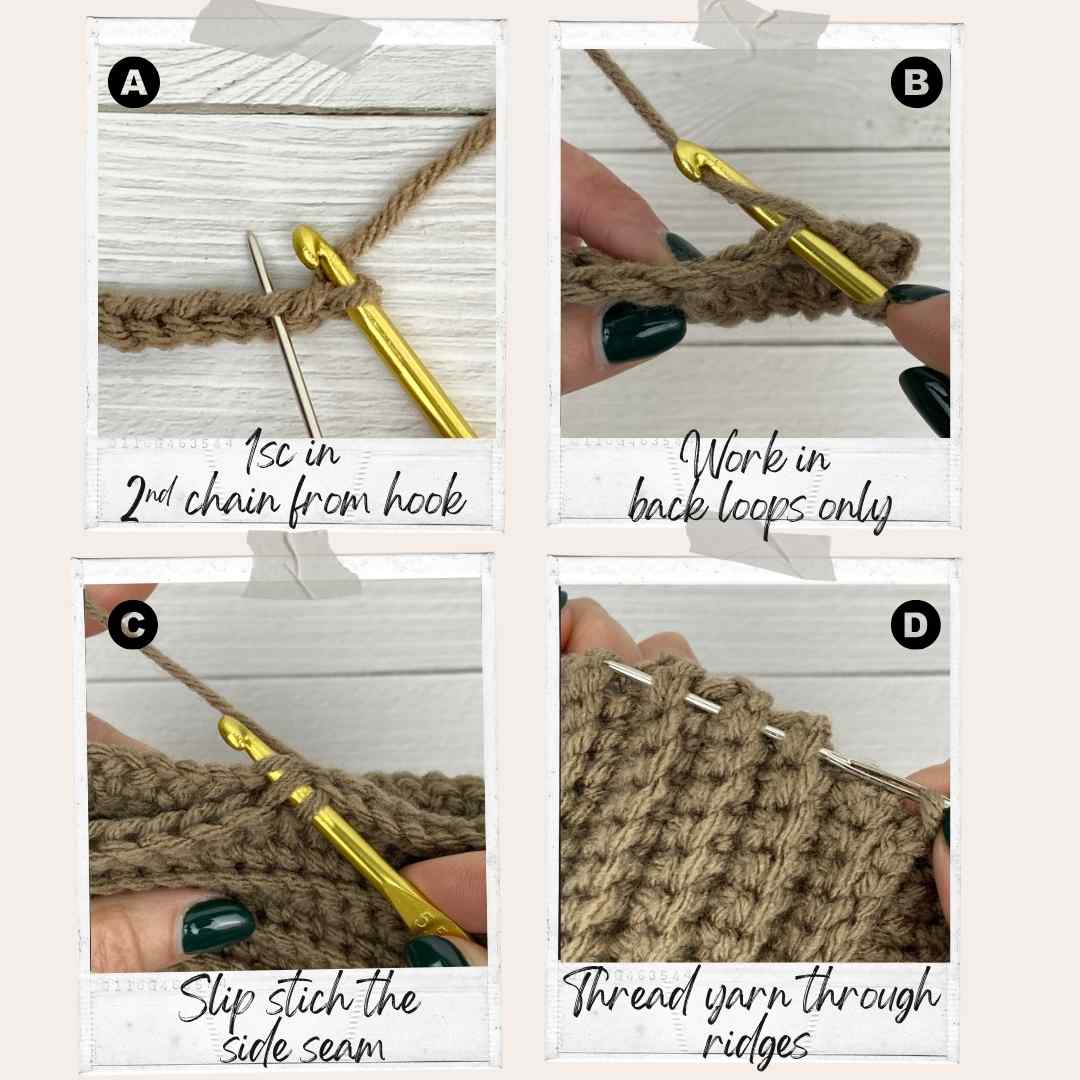
Row 1 (right side): Skip first chain, 1 single crochet (1sc) in second chain from hook (image A below), 1sc in each chain to the end, then turn. [18 sc]
Place a removable stitch marker on right side of work, to help identify the right side.
Now you will only work into the back loop of each stitch (see image B below).
Row 2: Ch1 (does not count as a stitch), 1sc into the back loop only of each stitch to the end, then turn.
Repeat Row 2 until you have worked 36 rows in total from the beginning. You will therefore end after working a wrong-side row. Fasten off.
Note that each ridge is made up of 2 rows, so you will have 18 ridges. Your rectangle of crochet should be twice as long as it is wide (work a few rows more if needed).
Making Up
With wrong sides together and right sides outermost, slip stitch the side seam, through the starting chain edge, and the back loops of the last row (image C above).
Cut a long length of yarn and thread it through the bumps of each ridge at one end (image D above). Pull yarns ends tightly to close the hole then tie in a firm knot. Thread yarn through to inside. Stuff firmly with toy filling.
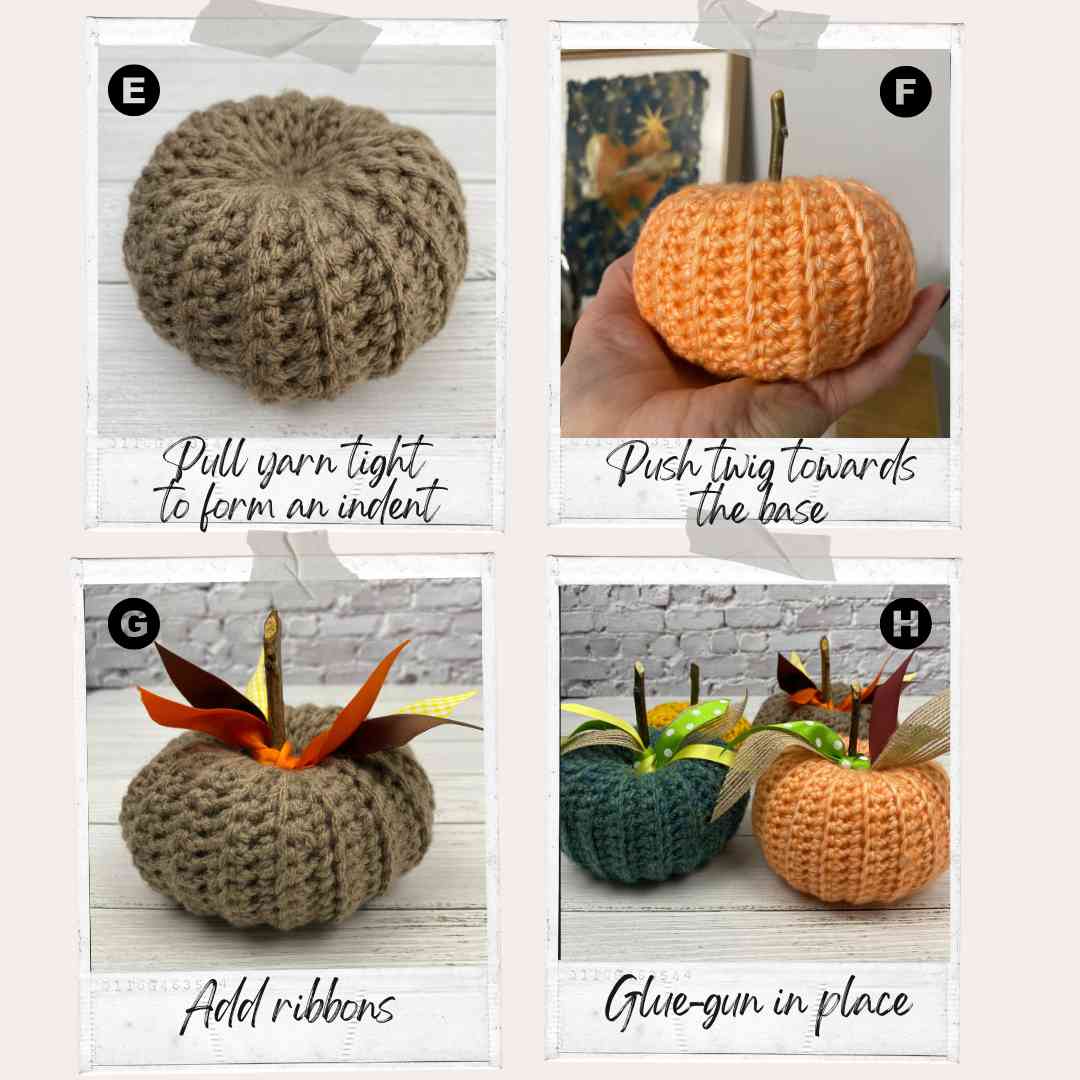
Cut a long length of yarn and thread it through ridges of top edge, as before. Pull yarns ends tightly and knot, leaving a small hole for the twig. Thread one end of yarn all the way from top, to base of pumpkin, and then back up again, and out at the top. Tie tightly to create an indent (image E below).
Finishing Touches
Insert twig into hole and push it carefully towards the base (image F below). Use a glue gun to secure twig. Tie two or three layers of ribbon around the twig and glue gun in place (images G and H below).
Crochet Abbreviations (UK TERMS)
- ch = chain
- dc = double crochet
- rep = repeat
- st(s) = stitch(es)
- RS = right side
- WS = wrong side
Easy Crochet Pumpkin Pattern - UK Crochet Terms
With your chosen yarn and recommended hook size, chain 19, then work back along the chain just made:
1st Row (right side): Skip first chain, 1 double crochet (1dc) in second chain from hook (image A), 1dc in each chain to the end, then turn. [18 dc]
Place a removable stitch marker on right side of work, to help identify the right side.
Now you will only work into the back loop of each stitch (see image B).
2nd Row: Ch1 (does not count as a stitch), 1dc into the back loop only of each stitch to the end, then turn.
Repeat Row 2 until you have worked 36 rows in total from the beginning. You will end after working a wrong-side row. Fasten off.
Note that each ridge is made up of 2 rows, so you will have 18 ridges. Your rectangle of crochet should be twice as long as it is wide (work a few rows more if needed).
Follow Making Up and Finishing instructions as given for US terms above.

Share Your Creations!
I’d love to see your finished Crochet Pumpkin! Share your work on social media and tag me @knitcrochetcreate on Instagram because I'd love to see your handmade creations.
If you enjoyed crocheting this quick and easy pumpkin, then you will also enjoy my crochet strawberries pattern which is also free. You can find the blog post here
I also have a great board on Pinterest for other Yarn Stash ideas here
Let's keep in touch!
I'd love to chat more.
Sign up for my newsletter and receive a weekly dose of crafting inspiration, featuring the latest trends, tips, and projects to fuel your creativity.