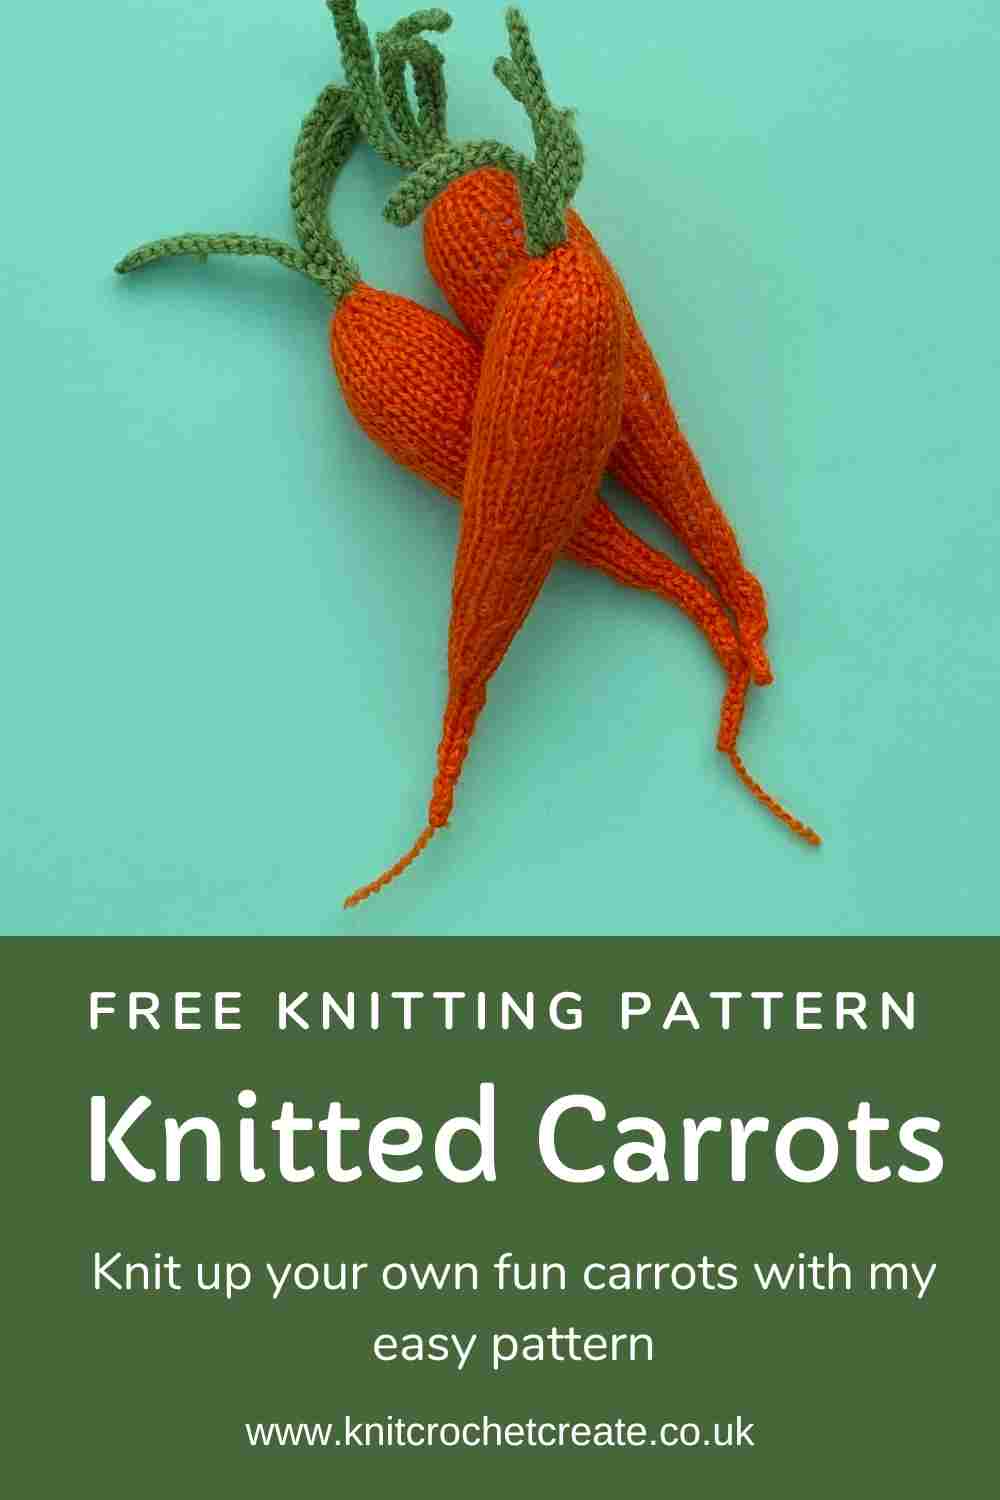
Free Knitted Carrot Pattern - Easy Toy Knitting Pattern
If you're looking for a delightful and whimsical project to spark your imagination, why not try knitting a carrot with my free knitted carrot pattern? It's fun to knit, and best of all, it's free.
Knitting is not just about scarves and sweaters; it's an open canvas for you to take your creativity in which ever direction you please, so here's a cute knitting pattern for a carrot. They're sure to bring a smile!! And they'd look great as part of an Easter table display too.
In this blog post, I'll share my charming and fun carrot knitting pattern that's perfect for beginners and experienced knitters alike.
So, grab your knitting needles, some colourful yarn, and let's embark on this creative journey together. Before you know it, you'll have knitted a realistic bunch of knitted carrots that you can pop on a saucer and leave out for Rudolph and his reindeer pals at Christmas.
You could even add some eyes to make your own Kevin the Carrot.
How do I knit a carrot from this free knitted carrot pattern?
If you're worried that knitting a carrot might be too complex, then fear not! My free knitted carrot pattern is designed with simplicity in mind, so you can make your carrot easily.
I'll provide step-by-step instructions and helpful tips to guide you through the process. Even if you're a beginner, you'll be amazed at how quickly you can create this adorable carrot. It's a great way to build your knitting skills and confidence, because they are quick and easy to make.
You can knit a carrot in four easy steps:
- The carrot is knitted flat in stocking stitch, starting at the top of the carrot then knitting towards the lower tip of the carrot.
- You will increase to create the wider section at the top, then decrease towards the tip.
- Then the side seam is sewn, and the carrot is stuffed whilst you sew.
- Finally, you knit the stalks and sew them to the top of the carrot.
Make Your Own Kevin the Carrot
If you're a fan of the Aldi Christmas adverts, you'll know that Kevin the Carrot has become a much-loved festive character. The great news is that this free knitted carrot pattern is the perfect starting point for making your very own handmade Kevin. Simply knit the carrot following the pattern below, using thicker yarn such as aran-weight with 4mm (US G/6) knitting needles. Then add a pair of small safety eyes (available from craft shops or online) to bring him to life. You could also add a tiny mouth for extra character, and I-cord arms and legs. See instructions further down the page for I-cord knitting, and try 5 stitches for your I-cord. He makes a wonderful handmade Christmas gift, a festive tree decoration, or a fun addition to a Christmas stocking. Search "Kevin the Carrot" for inspiration on how to style your finished make.
When to Make Knitted Carrots
Knitted carrots are surprisingly versatile and work beautifully for all sorts of occasions throughout the year:
- Easter — they make a charming addition to an Easter table display, or to add a rustic feel to your Easter decor.
- See my Easter Chick Egg Cosies free pattern, for more Easter Knitting.
- Christmas — knit a small bunch and leave them on a plate alongside your mince pies, as the perfect prop for Rudolph and his reindeer pals.
- See my Easy Christmas Trees Bunting for more Festive Knitting.
- Children's gifts — they make lovely handmade gifts and stocking fillers for play food (for children's toy kitchens), especially alongside other knitted vegetables.
- See my Knitted Donuts free pattern for more knitted food.
- Craft fairs — because they're quick to knit, you can easily make a whole bunch in an evening, making them ideal for selling at craft fairs and markets.
- Stash busting — they use only small amounts of yarn, so they're a perfect way to use up oddments from your yarn stash at any time of year.
How do I increase my knitting stitches to shape my knitted carrot?
To increase your stitches, the method used in this pattern is 'Make 1 stitch' (abbreviation is M1).
Increasing with the 'M1' method, is made by picking up the strand of yarn that is lying between the two needles (inserting left-hand needle from front to back), then you knit into the back of this stitch to twist the stitch and avoid making a hole in your knitting.
This forms a neat, almost invisible increase and so is great for increasing in the middle of the row.
I tried using kfb (knitting into the front and back of the stitch) but this left an unsightly small hole, which I wasn't happy with, and I think you can see the holes, even in the photo.
Here's a good link for increasing with the 'M1' method, if you need it
Copyright
Please read the copyright terms, which apply globally, before downloading your pattern:
This pattern version is published under copyright to me ©Lynne Rowe 2011 and is for your own personal use only. Feel free to sell items made from this pattern for charity fundraising purposes, or to gift to family and friends. Selling small numbers for profit is only allowed with permission. Please email lynne@knitcrochetcreate.com for permission to sell in small numbers. By downloading or using this pattern, you agree to these terms.
Free Knitted Carrot Pattern: You will need
- Double knitting (light worsted weight yarn): oddments of orange and oddments of green.
- 2.75mm (US size 2) straight needles.
- 2 x 2.75mm (US size 2)double-pointed needles (for tip of carrot).
- Toy filling (fiber fill) that confirms to Safety Standards.
- Tapestry needle (wool needle).
Abbreviations used
- Approx = approximately
- K: knit.
- P: purl.
- M1: make 1 increase by by picking up the horizontal strand of yarn that lies between the two stitches on the needles and knitting into the back of it (this twists the stitch and prevents a hole).
- Stocking stitch (stockinette stitch): one row knit, one row purl, repeated as many times as stated.
- K2tog: knit the next two stitches together as one stitch to decrease 1 stitch.
- P2tog: purl the next two stitches together as one stitch to decrease 1 stitch.
Special Instructions
To knit an I-cord: Using two double-pointed needles, knit across the sts with the second DPN and do not turn work. *Slide sts to the opposite end of the needle (without turning the needle). Pull yarn tight across back of work and knit across the stitches**. Repeat from * to ** until required length is reached. Cast off.
FREE KNITTED CARROT PATTERN BEGINS
Cast on 7 sts using 2.75mm straight needles and orange double knitting (light worsted weight) yarn.
- Row 1: Purl all sts.
- Row 2: [K1, M1] to the last st, K1. (13 sts)
- Rows 3-5: Starting with a purl row, stocking stitch 3 rows.
- Row 6: [K2, M1] to the last st, K1. (19 sts)
- Rows 7-11: Starting with a purl row, stocking stitch 5 rows.
- Row 12: [K3, M1] to the last stitch, K1. (25 sts)
- Rows 13-17: Starting with a purl row, stocking stitch 5 rows.
- Row 18: [K2, K2tog] to the last st, K1. (19 sts)
- Rows 19-25: Starting with a purl row, stocking stitch 7 rows.
- Row 26: [K1, k2tog] to the last st, k1. (13 sts)
- Rows 27-33: Starting with a purl row, stocking stitch 7 rows.
- Row 34: [K1, K2tog] to the last st, K1. (9 sts)
- Rows 35-39: Starting with a purl row, stocking stitch 5 rows.
- Row 40: [K2, K2tog] twice, K1. (7 sts)
- Rows 41-45: Starting with a purl row, stocking stitch 5 rows.
- Row 46: [K1, K2tog] twice, K1. (5 sts)
- Row 47: P2tog, P3tog. (2 sts)
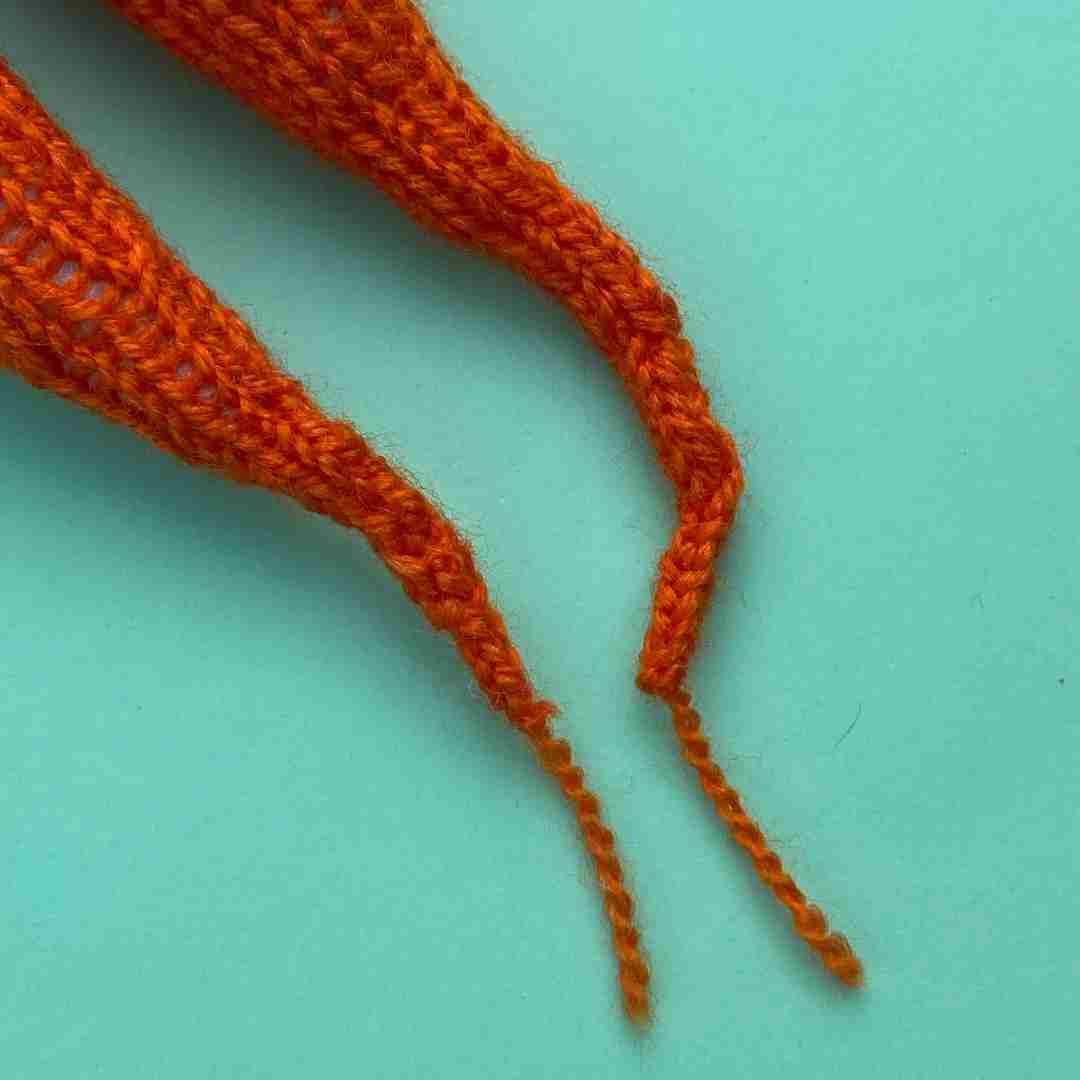
Change to double pointed needles and work an I-cord for 3 or 4 rows on remaining 2 sts then K2tog (1 st remaining). Cut yarn (leaving a tail end of approx 3-4cm) and pull yarn through last st. Pull tight to fasten off. Starting from the top of the carrot, with a separate length of yarn, use mattress stitch to close the side seam, filling with toy filling as you sew, leaving the cast on sts open. Use your knitting needle to poke the toy filling into the point of the carrot. You have now completed the first part of knitting a carrot.
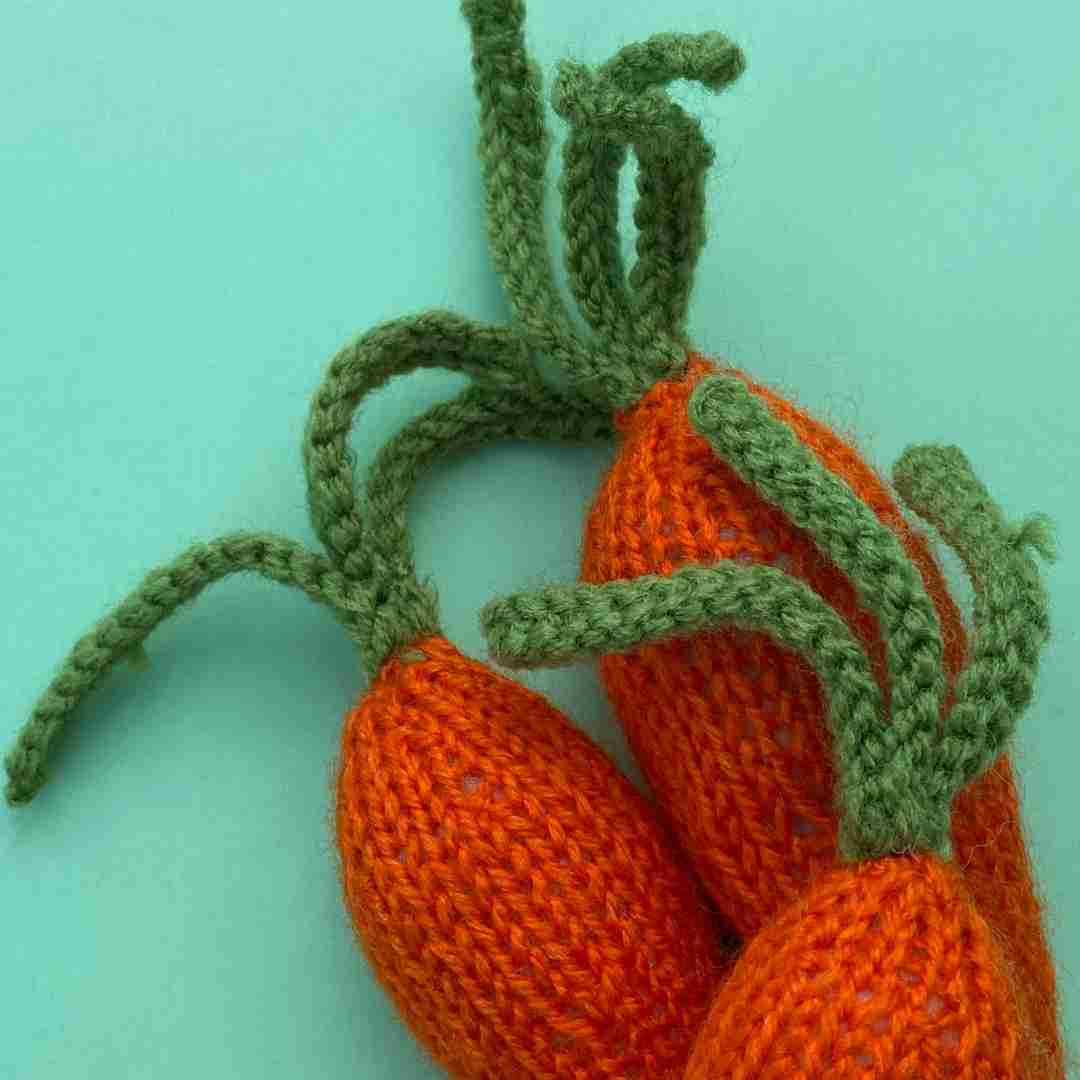
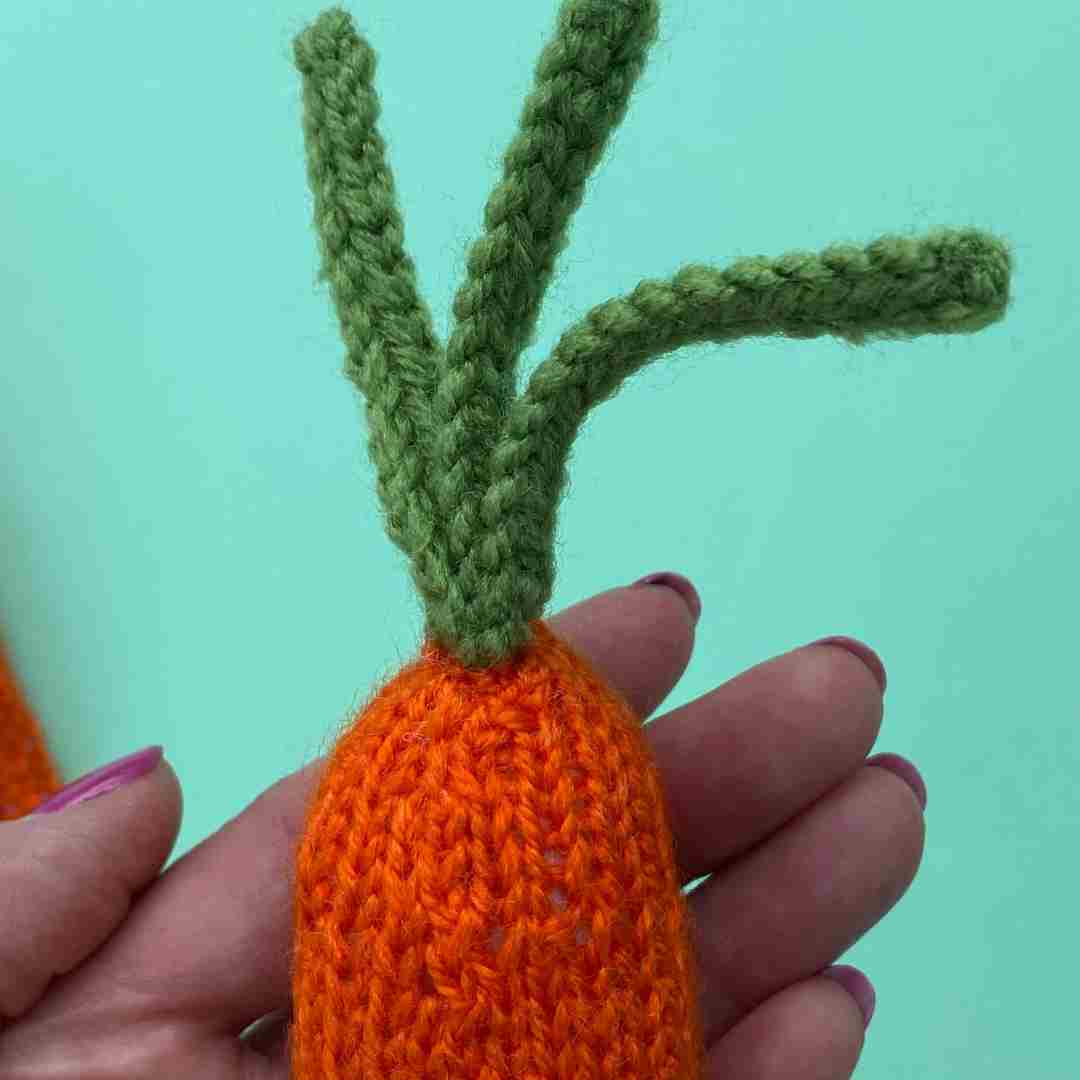
Stalks
Make three in total of varying lengths (I made two with 18 sts and one with 20 sts).
- Using 2.75mm needles and green yarn, cast on 18 or 20 sts.
- Cast off.
- Stitch the three stalks together for approx 1cm, then stitch to the top of the carrot inside the cast on edge.
Knitted Carrot Pattern: Frequently Asked Questions
- Is this knitted carrot pattern suitable for beginners? Yes, this pattern is suitable for beginner knitters who are comfortable with knit and purl stitches. The shaping is straightforward and the pattern includes a simple increase and decrease technique that is explained step by step. If you're new to knitting, the carrot is a brilliant first project because it's small, quick to complete, and very satisfying to finish.
- What yarn do I need to knit a carrot? This pattern uses double knitting (DK) weight yarn — also known as light worsted weight — in orange for the carrot body and green for the stalks. You only need small amounts of each colour, so it's a great stash-busting project. Any DK yarn will work well, so feel free to use up oddments from your yarn stash.
- How long does it take to knit a toy carrot? Each carrot takes approximately one to two hours to knit and sew up, making it a perfect quick project. Once you've made your first one and got into the rhythm, subsequent carrots tend to go even faster. Many knitters find they end up making a whole bunch in one sitting!
- Can I sell items made from this free knitting pattern? You are welcome to sell small numbers of items made from this pattern, but only with permission. Please email lynne@knitcrochetcreate.com to request permission before selling. Items made for charity fundraising or gifting to family and friends are always welcome with no permission needed.
- Can I make the carrots in different sizes? Yes! You can easily adjust the size by changing your yarn weight and needle size. Using a chunky yarn and larger needles will give you a bigger carrot, while a fingering weight yarn and smaller needles will produce a miniature version. The finished size will vary, but the pattern structure remains the same.
What Next?
If you enjoyed knitting this charming carrot, you may also enjoy my knitted pumpkin pattern which is also free. You can find the blog post here
Share your makes from my Free Knitted Cake Pattern
If you love this pattern, then I’d love to see your finished projects! Tag me on Instagram [@knitcrochetcreate] so I can admire your creations.
Let's keep in touch!
I'd love to chat more.
Sign up for my newsletter and receive a weekly dose of crafting inspiration, featuring the latest trends, tips, and projects to fuel your creativity.
I like the green stems; they look truer to life than the other ones I've seen on Ravelry. I-cord would be great for that, too! Thanks!
I like the green stems; they look truer to life than the other ones I've seen on Ravelry. I-cord would be great for that, too! Thanks!
Thanks so much for this pattern, it is exactly what I needed
Thanks so much for this pattern, it is exactly what I needed
These look good enough to eat!
These look good enough to eat!
I’m not sure how to end this. The directions stop at row 40. Do I cast off after that? Also, do you have directions on how to make the stems?
Thank you!
Hi Linda, I've fixed it now - many apologies - I'm not sure what happened (thanks for alerting me)