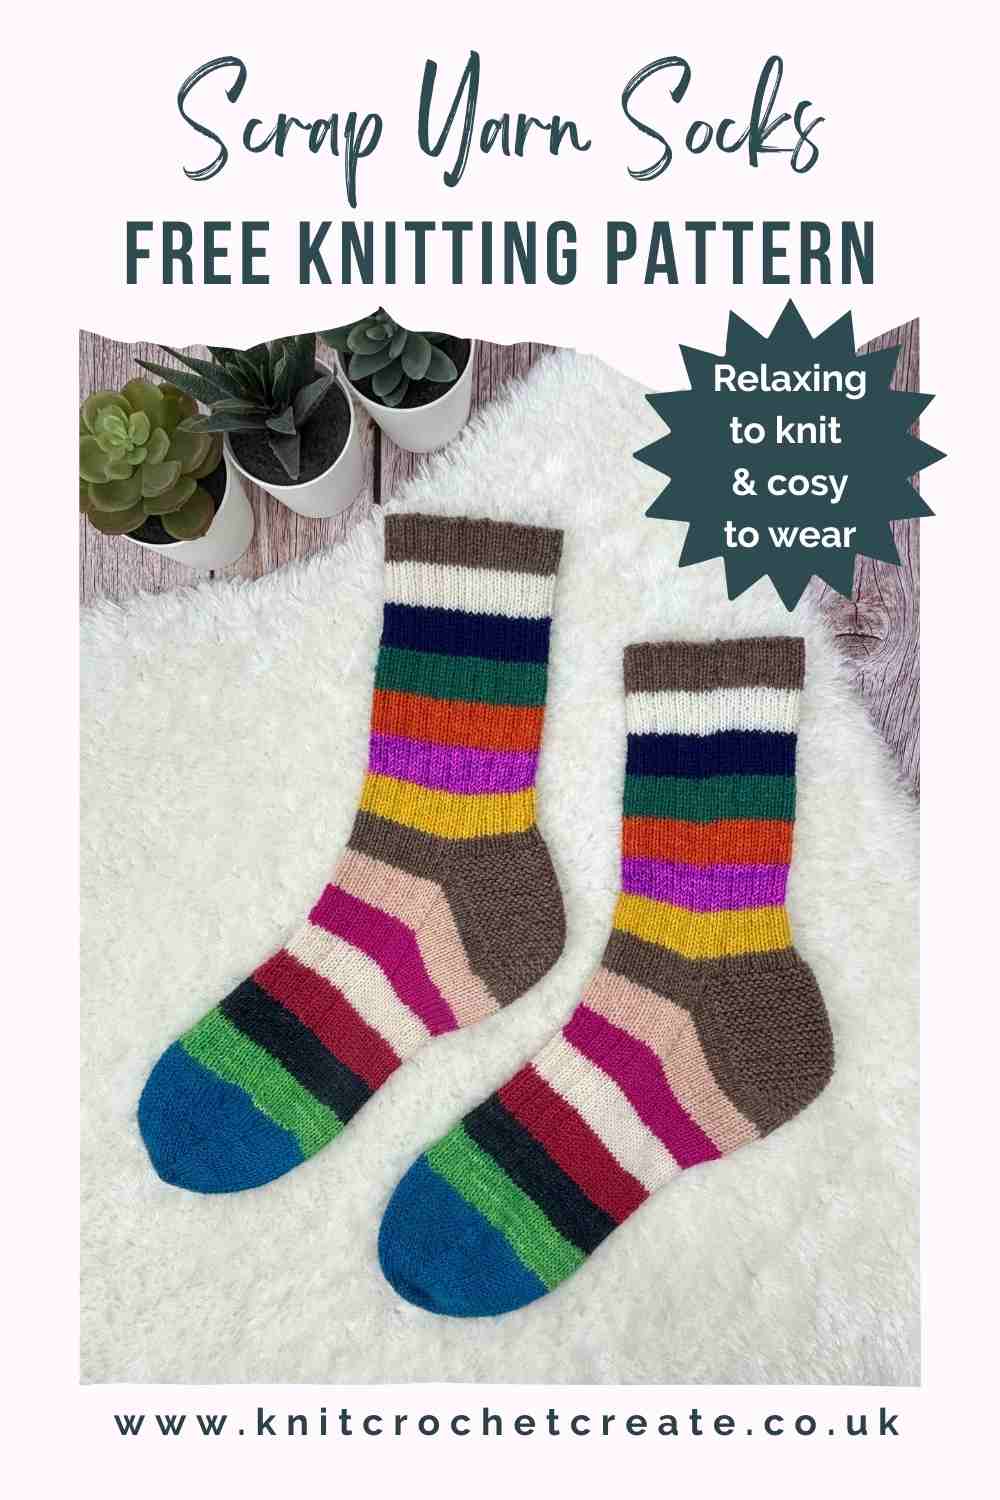
Scrap Yarn Socks Pattern - free knitting pattern
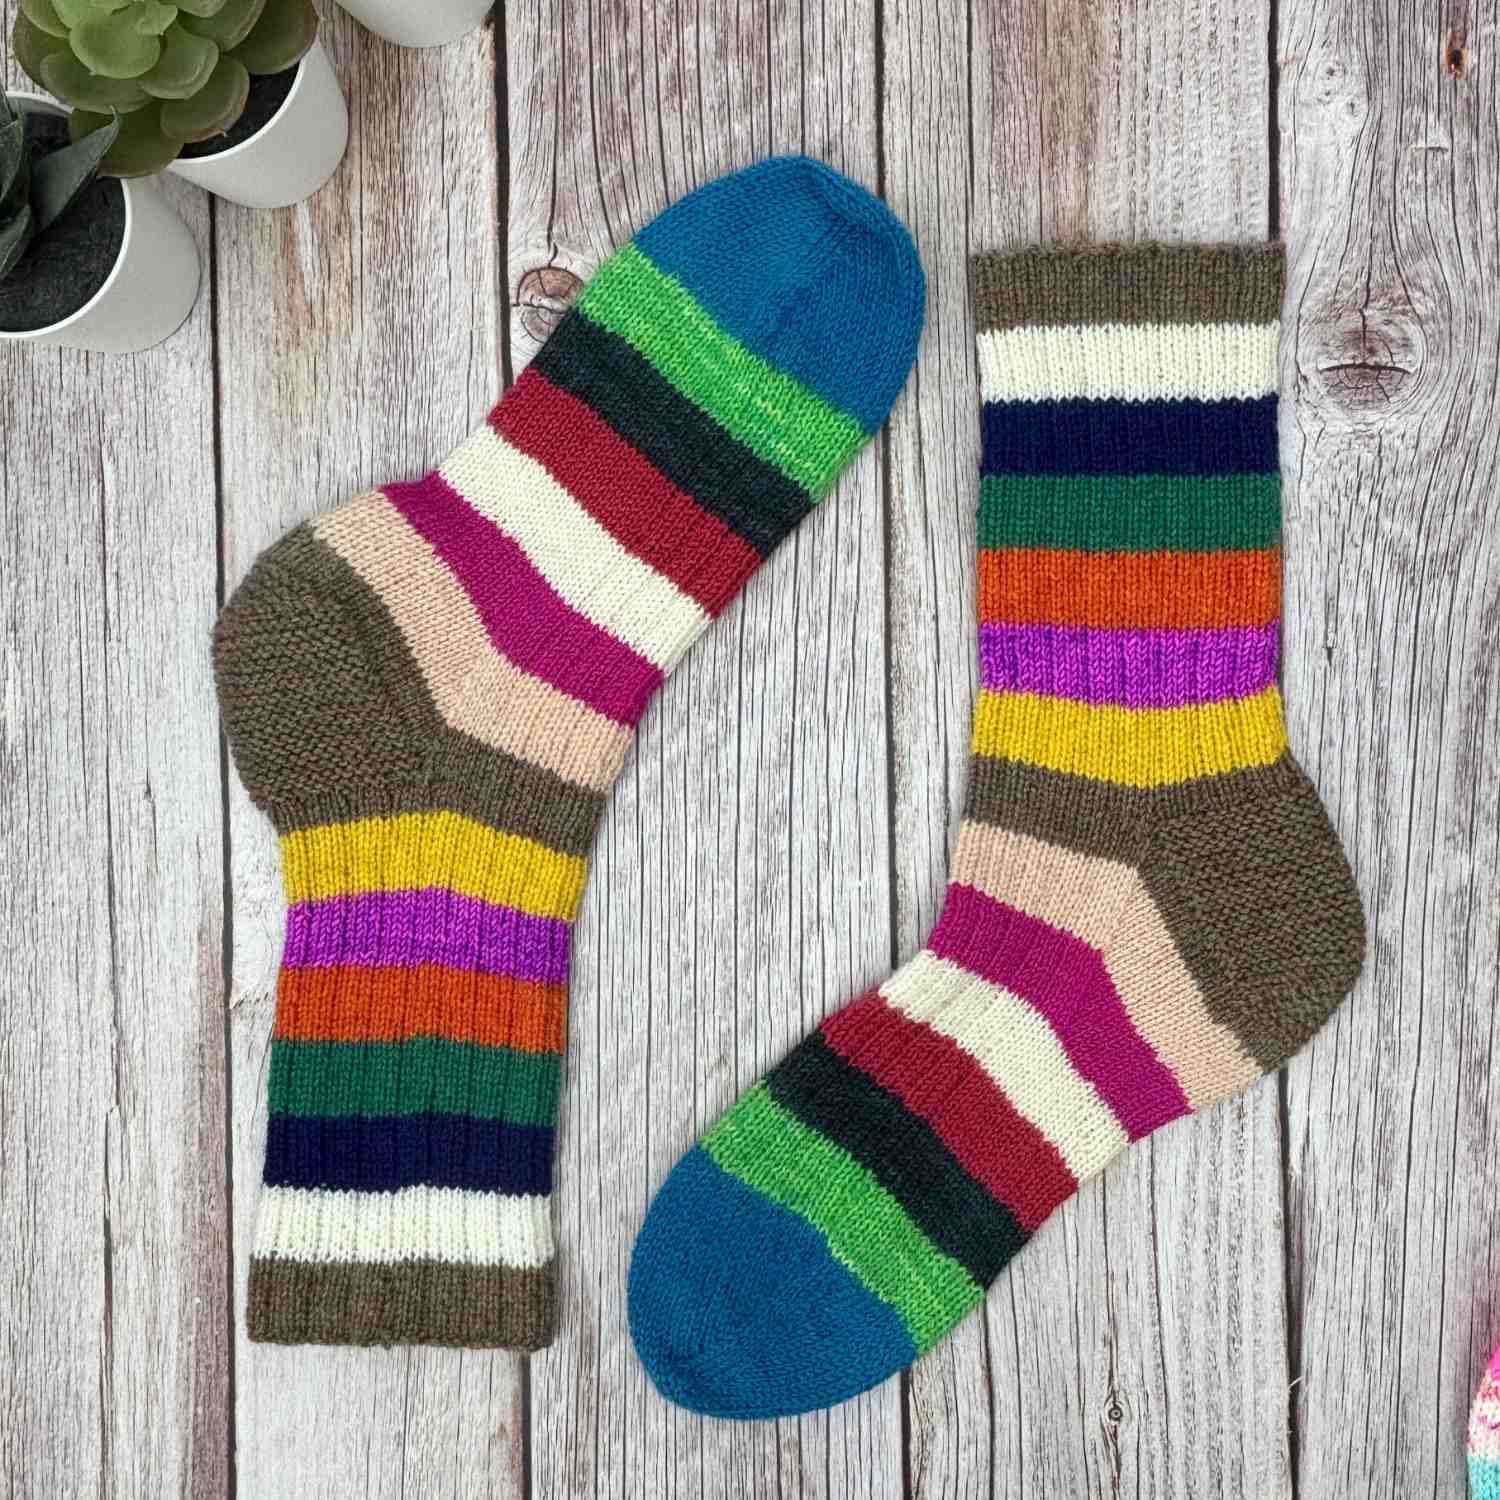
My free scrap yarn socks pattern is perfect if you love using up leftover sock yarn. These scrappy socks are designed to be a relaxing, no-stress knit. They use a simple 3 x 1 rib for a comfortable fit and a garter stitch heel that is easy to work and also hard-wearing.
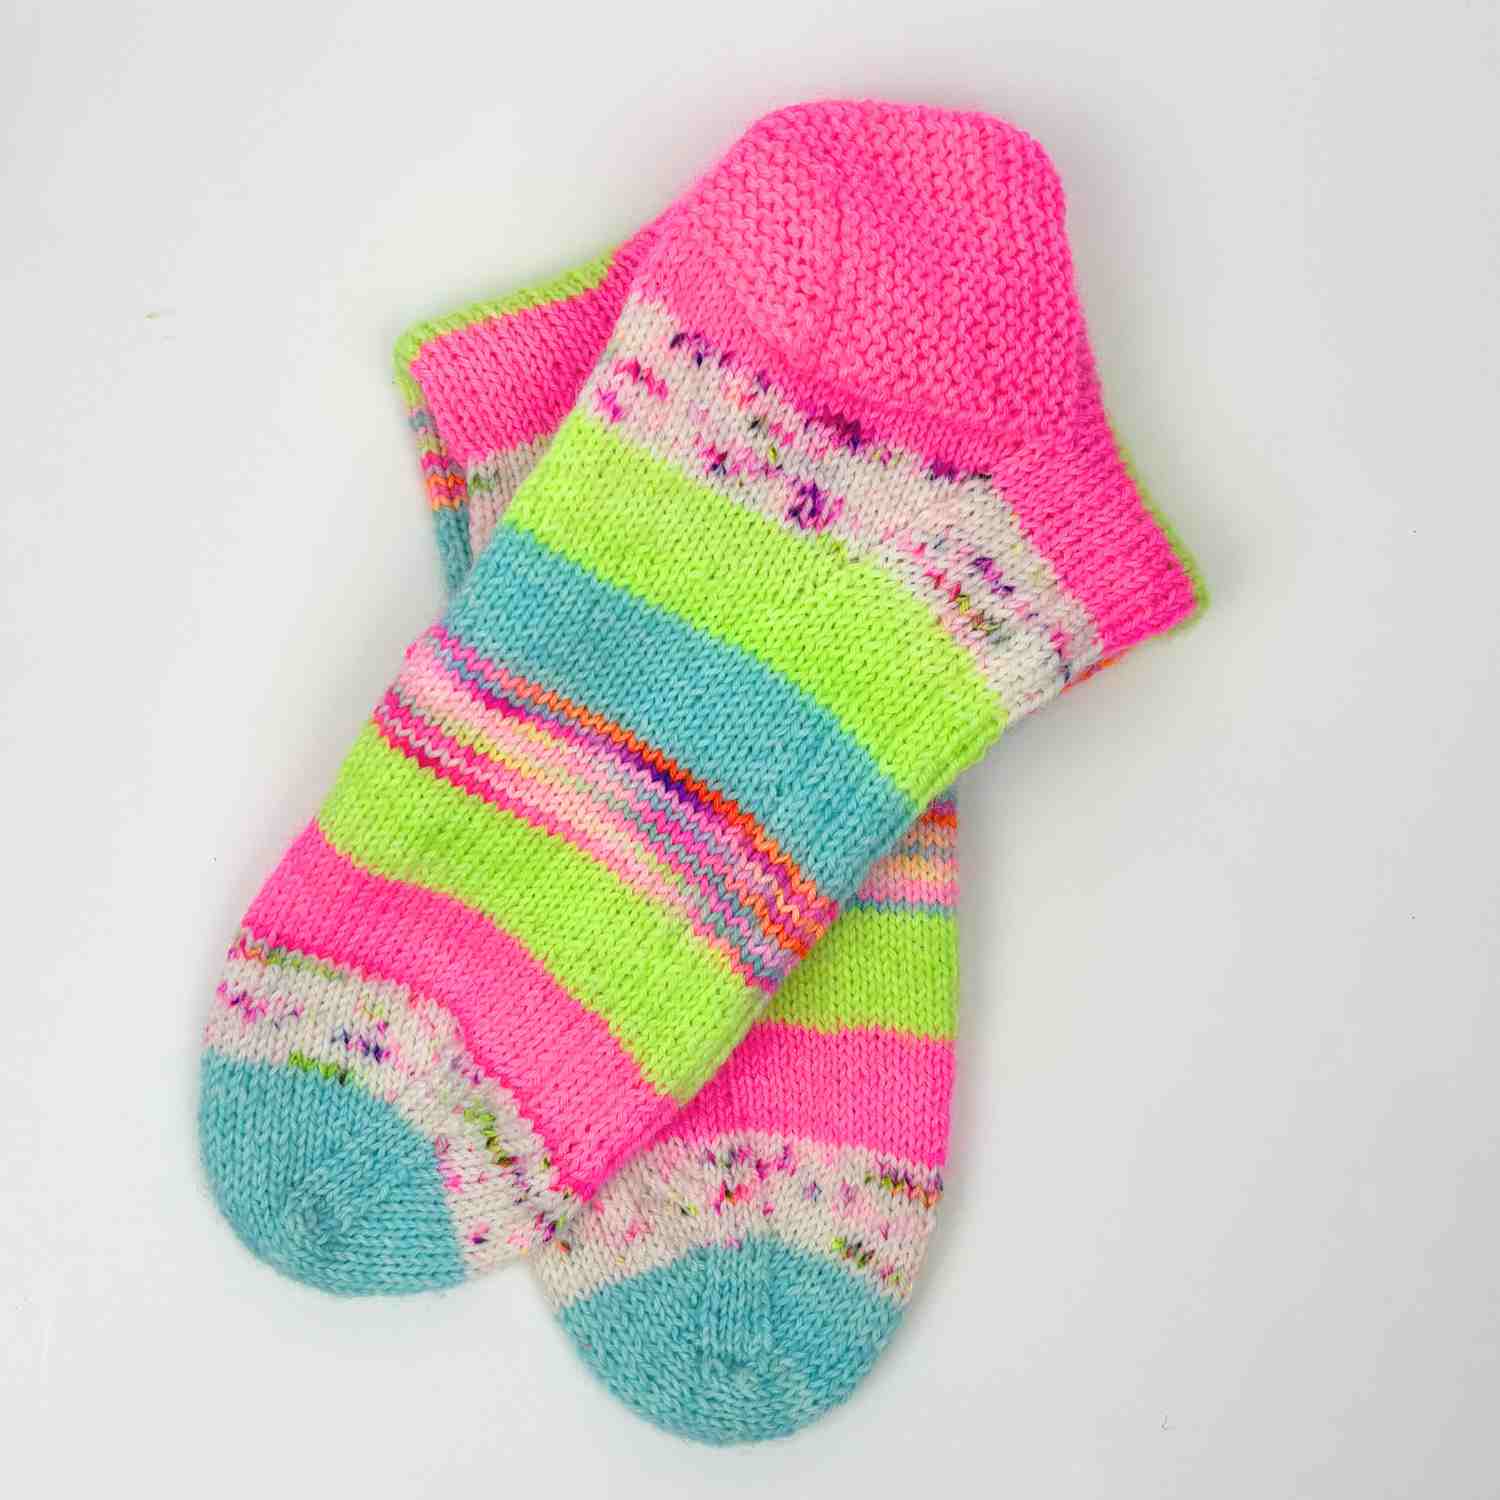
This is a great pattern for oddments and leftover yarn, whether that’s small balls from previous projects or partial skeins that are too good to waste. You can use one colour throughout or mix and match scraps to make each pair truly unique.
The socks are worked in five sizes, making them ideal for gifting or knitting for yourself. If you're ready to get knitting, go and grab your stash yarn oddments and let's get knitting.
Why you’ll love this Free Scrap Yarn Socks Pattern
- Perfect for scraps and self-striping yarns too.
- Simple 3 x 1 rib – relaxing and easy to memorise.
- Garter stitch heel for a cosy feel.
- Great TV or travel project.
- Five sizes included.
Level of Difficulty and Techniques Used
Easy, for a confident sock knitter: You need to be comfortable with:
- Knit and Purl stitches.
- Knitting in the round.
- Simple decreasing.
- Picking up stitches.
- Grafting stitches to close toe (Kitchener Stitch).
- Changing yarn colour.

Scrap Yarn Socks Pattern: Yarn Stash Ideas
This free scrap yarn sock pattern is perfect for using yarn from your stash. You can knit it with 4 ply sock yarn in any colours from your stash:
It works well with:
- Hand-dyed yarn.
- Speckled, variegated, or tonal yarn.
- A single colour.
- A self-striping yarn.
Because the stitch pattern is simple, it lets your yarn do the talking.
Copyright
Please read the copyright terms, which apply globally, before using or downloading your pattern:
The contents of this page, including the pattern instructions and images, are published under copyright to me ©Lynne Rowe 2025 under my brand Knit Crochet Create® and are for your own personal use only.
You are welcome to sell items made from this pattern for charity fundraising purposes, or to gift them to family and friends, but selling small numbers for profit is only allowed with permission. Please email lynne@knitcrochetcreate.com for permission.
By downloading or using this pattern, you therefore agree to these terms.
Scrap Yarn Socks Pattern Information
Materials
- Approximately 75-100g of 4ply (sock yarn) oddments (depending on size knitted).
- Include approximately 10g of heel colour and 10g of toe colour.
- Regular sock yarn is 75% wool/25% nylon.
- 2.5mm (US 1 or US 2) needles for working in the round (see Gauge/Tension, page 2).
- Either short circulars, DPNS, long circular needles, or flexi-trios.
- 2.25mm (US 1) straight needles for working the heel in rows.
- Wool needle; 3 x stitch markers; tape measure.
Tension
Before blocking: 32 sts and 44 rows to 10 x 10cm (4 x 4in) measured in stocking (stockinette) stitch using 2.5mm (US2 or US1) needles. Note that Gauge/Tension is measured in stocking stitch, as rib is stretchy and therefore not reliable for measuring accurate tension/gauge.
Finished Size of Scrap Yarn Socks
- To fit Adult foot XS (S) (M) (L) (XL)
- Foot length is adjustable.
- To fit actual foot circumference: 18.5 (20) (21) (22.5) (23.5) cm.
Abbreviations
- BOR = beginning of round
- k = knit
- k2tog = knit 2 sts together (to decrease 1 st)
- skpo = slip 1 stitch knitwise, knit 1 stitch, pass slipped stitch over the knitted stitch (to decrease 1 st)
- p = purl
- PM = place marker
- RS = right side
- SM = slip marker
- st(s) = stitch(es)
- [ ] = work instructions within brackets as stated
Stash Yarn Socks Pattern Begins
LEG
- See notes at end, for my method of changing colour.
- Each leg round begins with P1 because this helps to hide the colour changes.
With first colour and your preferred 2.5mm needles for working in the round, cast on 56 (60) (64) (68) (72) sts, then join to work in the round, taking care not to twist the stitches. Use a stitch marker to mark BOR. Slip marker at the end of each round.
- Pattern Round 1: [P1, K3] to end of round.
Round 1 sets the rib pattern. Repeat Round 1 until 60 -70 rounds have been worked, and at the same time change colour as desired for your stripe pattern, choosing from one of the following options (making sure you end the leg after a full stripe):
- 4-round stripes (work 64 or 68 rounds)
- 6-round stripes (work 60 or 66 rounds)
- 10-round stripes (work 60 or 70 rounds)
HEEL FLAP
Change to next colour (heel colour) and repeat Pattern Round 1 for half the depth of next stripe, so that your heel sits in the centre of a stripe. For example if you are knitting 6-round stripes, you will knit 3 rounds only. Now work Heel Flap:
- Remove BOR stitch marker.
- Pattern 0 (2) (0) (2) (0) st(s) to centre the heel placement.
Change to 2.25mm needles. Work in rows:
- Heel Row 1: With 2.25mm needles, K27 (29) (31) (33) (35) sts, turn.
You will continue to work forward and back in rows on these sts only, for the heel flap. Note: No need to slip stitches at the start of the heel rows.
HEEL TURN
Leave remaining 29 (31) (33) (35) (37) sts not being worked on your original needle(s) while you work the heel. These remaining stitches will become your top of foot stitches, and the rib pattern is now symmetrical on these stitches.
- Repeat Heel Row 1 a further 27 (29) (31) (33) (35) times. You now have a heel flap with 14 (15) (16) (17) (18) garter stitch ridges.
Note that k2tog is used on every row of heel turn. These decreases are not visible in the garter stitch pattern, so the decreases don’t need to mirror each other.
- Row 1 (RS): Slip 1 st knitwise, K14 (15) (16) (17) (18), k2tog, K1, turn.
- Row 2: Slip 1 st knitwise, K4, k2tog, K1, turn.
Note: There is a visible gap between the stitches already knitted and the stitches waiting to be worked; use this gap as a marker for the following rows.
- Row 3: Slip 1 st knitwise, knit to 1 st before the gap, k2tog, K1, turn.
- Repeat Row 3 until all sts have been used up and 15 (17) (17) (19) (19) sts remain.
Note: On the last 2 rows only for sizes XS (M) (XL) you will miss off the K1 at the end.
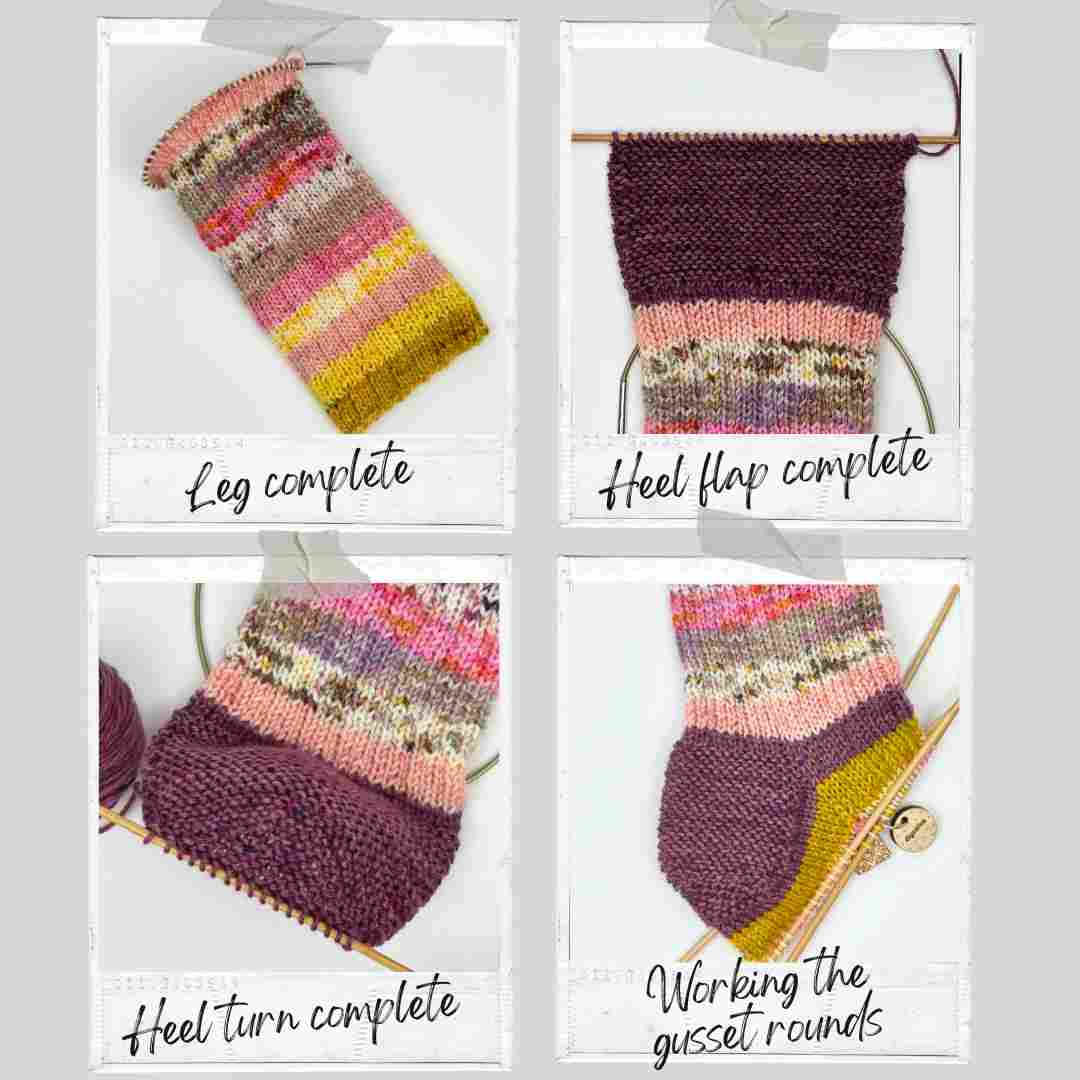
GUSSET
Place BOR marker for new start of the round. Change back to 2.5mm needles for knitting in the round. Note: Pick up stitches in between the garter stitch ridges (under two loops at end of row), and the final one in gap directly before/after the top of foot stitches (knit through back loop of yarn strand).
With RS facing, knit across heel stitches, then pick up and K14 (15) (16) (17) (18) sts along the left side of your heel flap, PM, work in established rib pattern across 29 (31) (33) (35) (37) sts for top foot, PM, pick up and K14 (15) (16) (17) (18) sts along the right side of your heel flap, ending at BOR marker. Slip BOR marker. (72 (78) (82) (88) (92) sts)
Continue to change yarn at BOR as required to maintain your stripe pattern.
- Gusset Round 1: K to 3 sts before next marker, k2tog, K1, SM, pattern across top of foot, SM, K1, skpo, K to end of round, then slip BOR marker. [2 sts decreased]
- Gusset Round 2: K to next marker, SM, pattern across top of foot, SM, K to end, slip BOR marker.
- Repeat Gusset Rounds 1 and 2, until you have 56 (60) (64) (68) (72) sts, and at the same time, continue to change yarn at BOR as required to maintain stripe pattern. Note that there are 2 more sts on top of sock needles than the sole of foot, which will be adjusted before the toe begins (but in total your stitch count is correct).
FOOT
The BOR marker will stay in the same place for now, so that the colour changes are in a good place at one side of the heel.
- Repeat Gusset Round 2, until your foot measures approximately 4 (4.5) (4.5) (4.5) (5)cm less than desired foot length, and at the same time, continue to change yarn at BOR as required to maintain your stripe pattern. On the last round of Foot, work the following, so that you have the same number of sts for top and bottom of foot:
- Final Foot Round: Remove BOR marker, K to next marker, SM (this is now the new BOR marker), K1, skpo, knit to last 3 sts, k2tog, K1, SM, knit to end, slip new BOR marker. (54 (58) (62) (66) (70) sts)
TOE
If you are mid-way through a stripe, you can continue to complete the current stripe, then change to a single colour for the toe. Otherwise you can change colour for the toe.
- Round 1: K all sts to end of round and slip both markers.
- Round 2: *K1, skpo, K to 3 sts before next marker, k2tog, K1; repeat from * once more. (4 sts decreased)
- Round 3: K all sts to end of round and slip both markers.
- Repeat Rounds 1-3 once more.
- Then Repeat Rounds 2-3 only, until 22 (26) (26) (30) (30) sts remain. Remove stitch markers.
FINISHING YOUR SCRAP YARN SOCKS
Graft your toes closed using Kitchener Stitch. When weaving in ends, pull gently on yarn tails if needed, to tighten any loose stitches from the colour changes. Place socks flat and spray with cold water then leave to dry completely. Don’t use sock blockers because they may stretch the rib and your socks will become too big.
HOW I CHANGE COLOUR FOR MY SCRAP YARN SOCKS PATTERN
For the leg, at end of last round in current colour, bring both old yarn and next colour forward between stitches and P1 with both yarns, to start round. Take both colours to back, ready to knit, then drop old colour. Continue with new colour only. For the foot, I change colour at BOR then on the next round only, I slip the first stitch purlwise.
Download your free PDF here, for one week only:
What Next?
If you enjoyed this pattern, you might also like my similar free patterns that also use garter stitch:
Share your makes from my Scrap Yarn Socks Pattern
If you love this pattern, then I’d love to see your finished projects! Tag me on Instagram [@knitcrochetcreate] so I can admire your colour combinations and see what you make with them.
Let's keep in touch!
I'd love to chat more.
Sign up for my newsletter and receive a weekly dose of crafting inspiration, featuring the latest trends, tips, and projects to fuel your creativity.