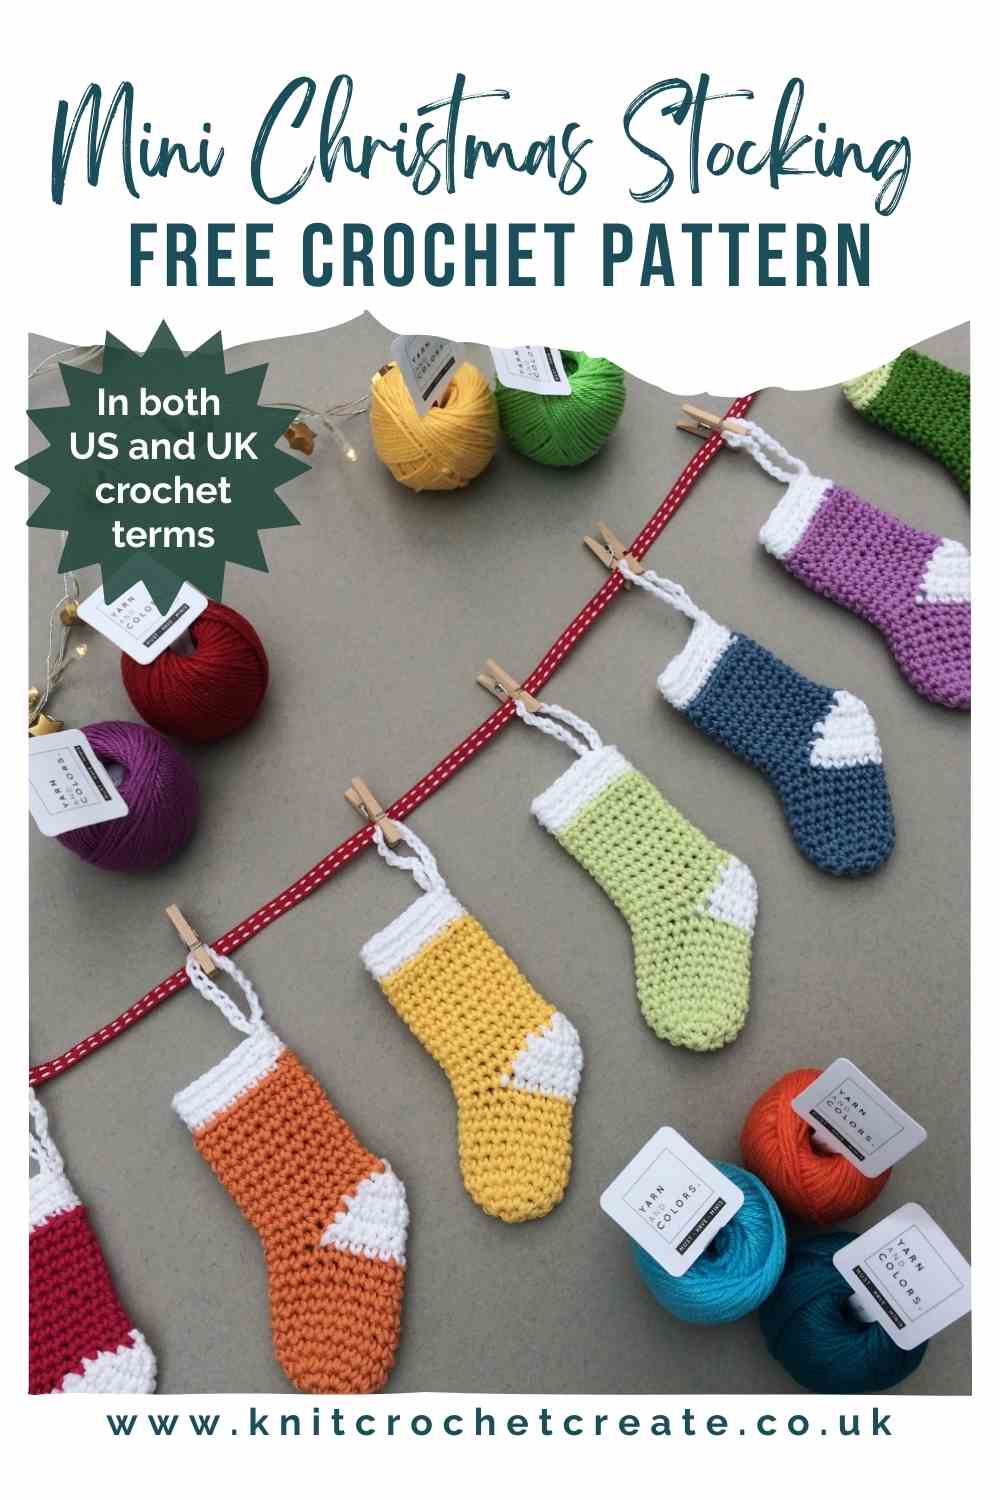
Mini Stocking Crochet Pattern - Free
With my Free Mini Crochet Stocking Pattern, you can make small crochet stockings that are ideal for using up leftover yarn from your stash. These mini stockings are quick to crochet, easy to customise, and perfect for scrap yarn projects. Each one uses just a small amount of yarn, making them a great option if you have lots of odd balls or short lengths of yarn.
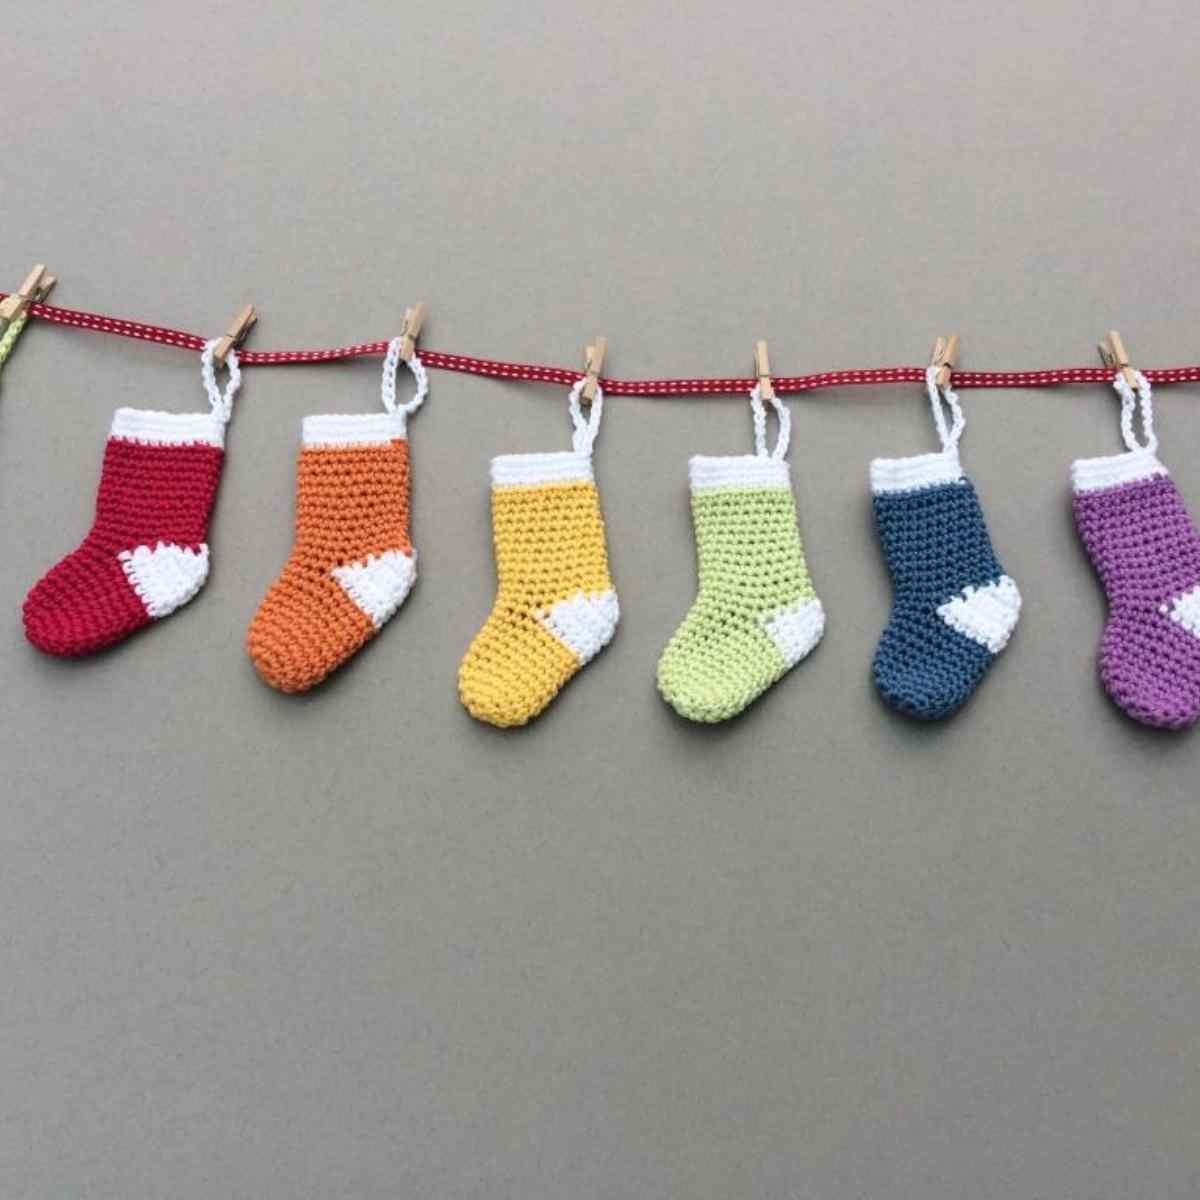
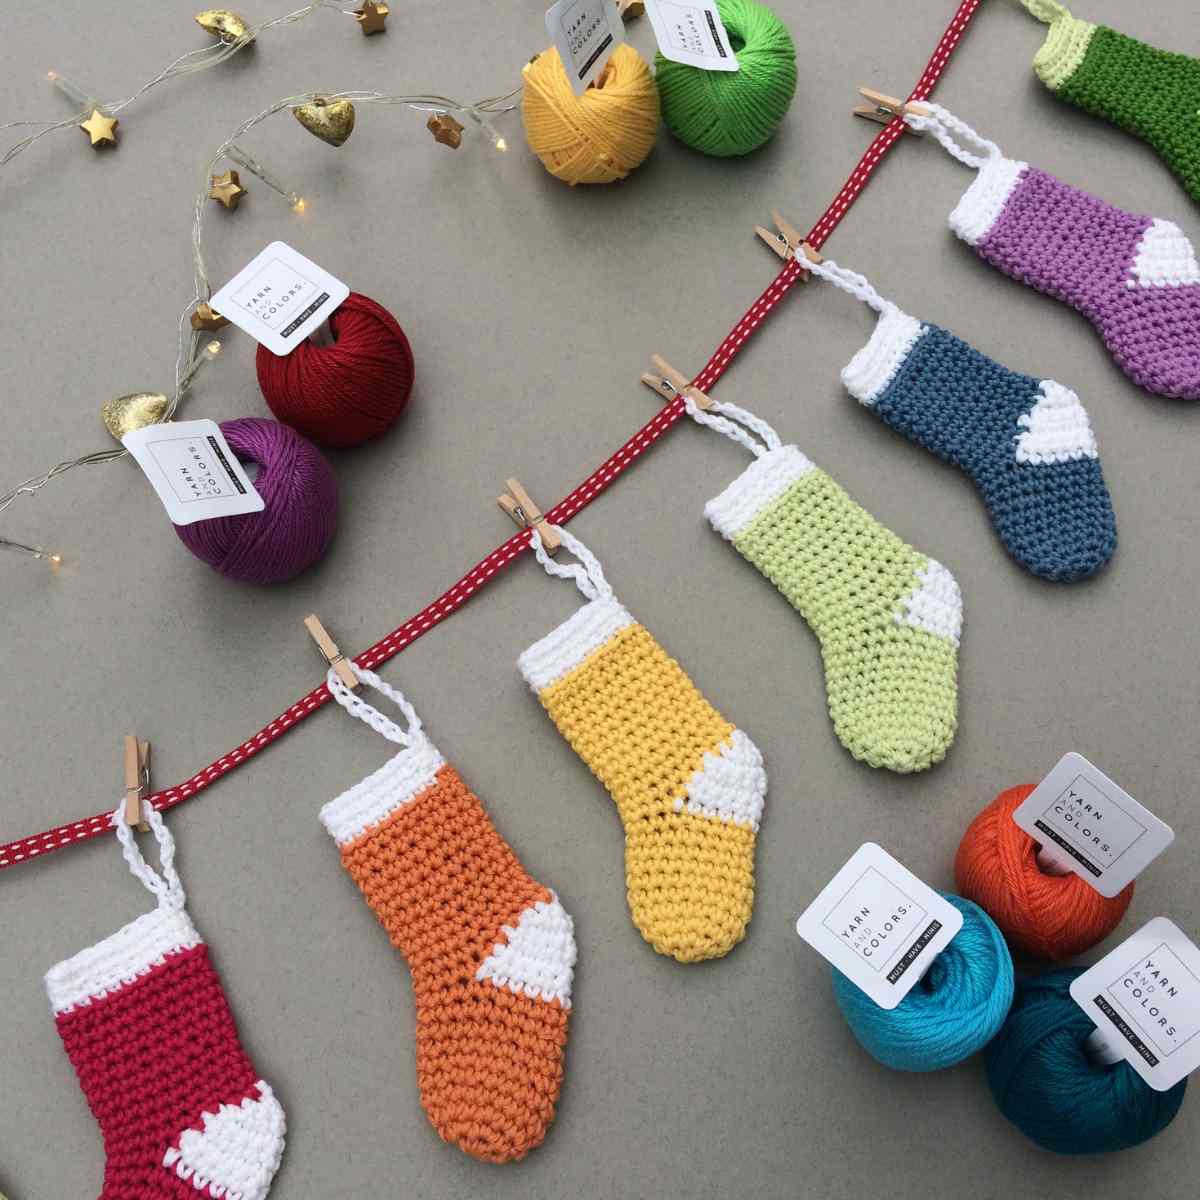
Mini crochet stockings are a simple and practical Christmas make. You can hang them on your Christmas tree, use them as gift tags or gift toppers, or join several together to create a festive crochet garland for your mantelpiece, shelves, or staircase. They also make lovely handmade decorations and small gifts.
If you are looking for a quick crochet Christmas project, a stash-busting crochet idea, or a small crochet gift pattern, these mini stockings are a great choice. They are fun to make, satisfying to finish, and a simple way to add handmade charm to your Christmas decorations using yarn you already own.
About My Mini Stocking Crochet Pattern
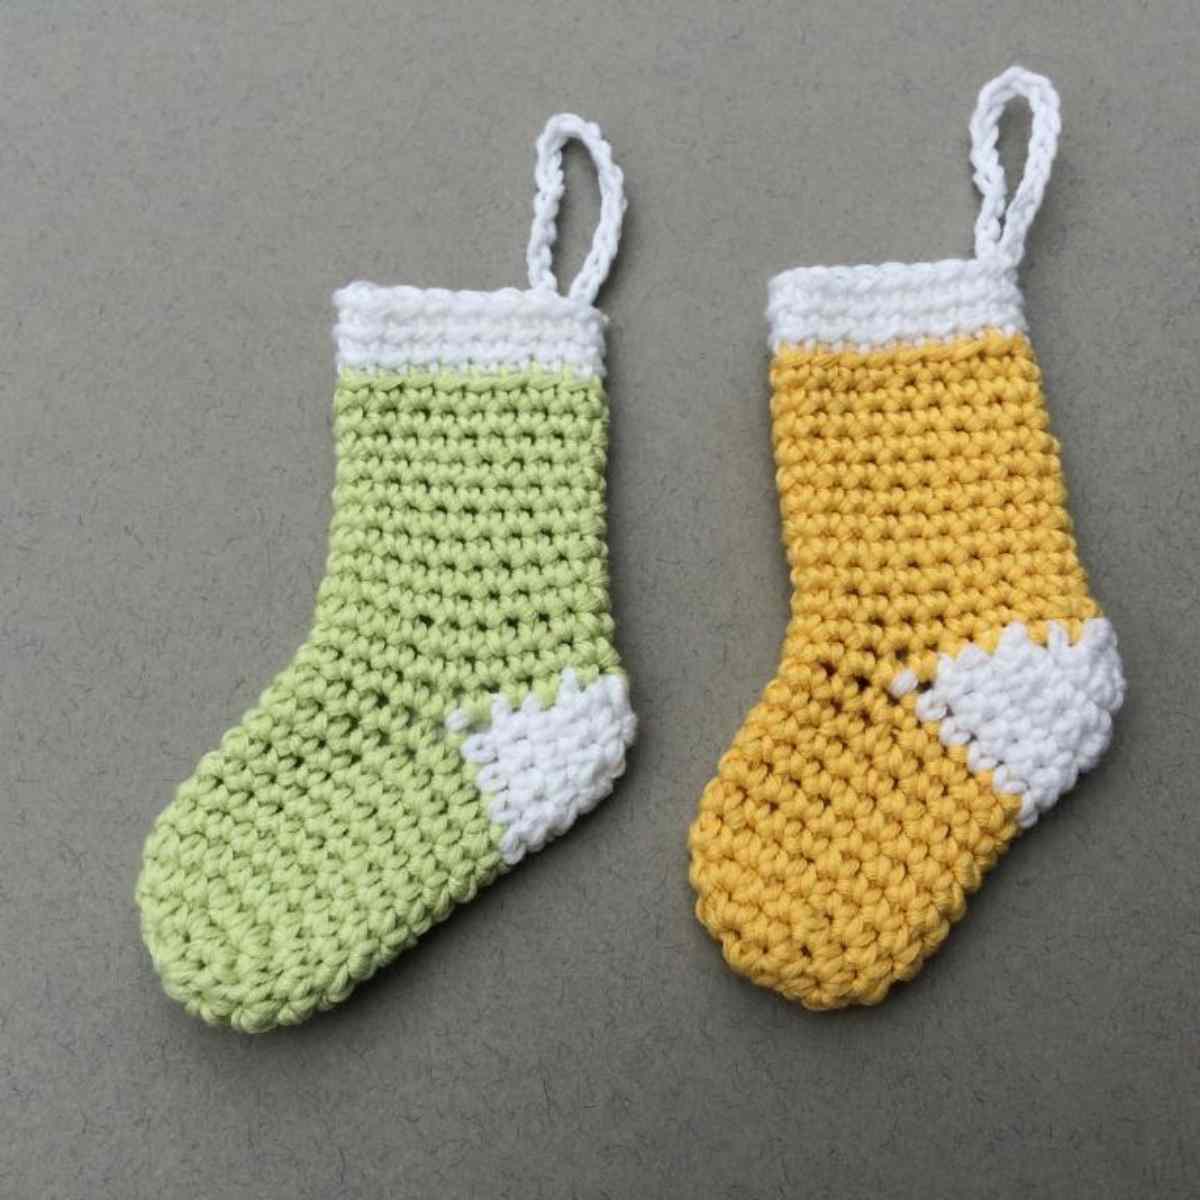
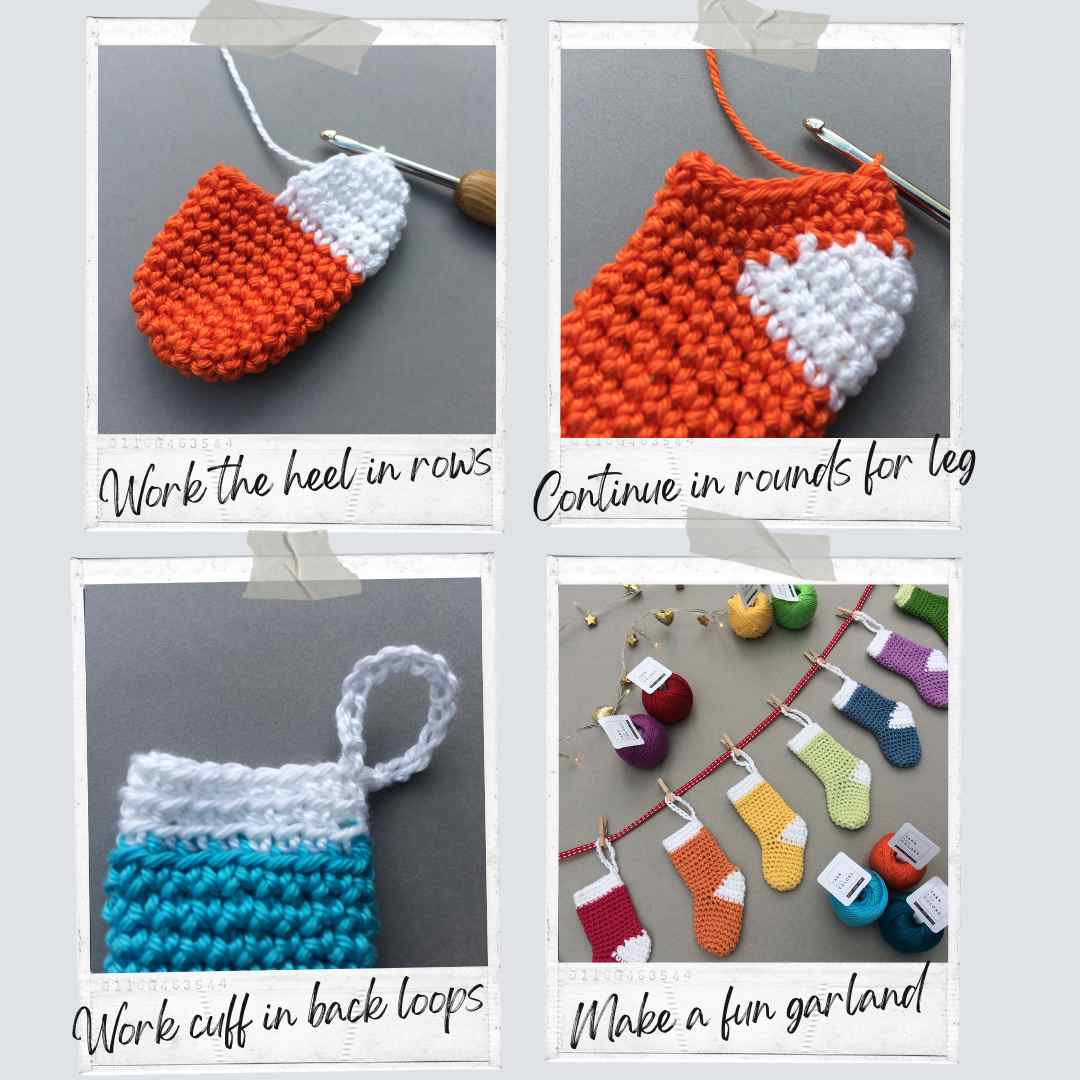
These mini stockings are worked from the toe up, in rounds, with the heel worked in rows.
I’ve used a bright colour palette to create a cheerful set of mini stockings, mixing bold colours with traditional Christmas shades. They are ideal for using up small amounts of leftover yarn, therefore making them perfect for scrap yarn projects. If you have sparkle yarn or metallic thread in your stash, you can easily add it for a simple festive detail.
How to Use and Enjoy Your Mini Crochet Stockings
- Hang them on your Christmas tree using yarn or ribbon that matches your decorations.
- Use them as gift toppers for a reusable and handmade finishing touch.
- String several together to make a simple crochet garland for your mantelpiece or shelves.
- Attach a few mini stockings to a wreath for a cosy, handmade look.
- Make extra-small versions to use on cards, place settings, or as table decorations.
These mini crochet stockings are perfect for stash-busting and are a fun, satisfying project that’s sure to make you smile while you’re making them
How To Get Your Free Mini Crochet Stocking Pattern
The pattern is written out in full in both US and UK crochet terms. US terms are given first, followed by UK terms.
Scroll down to the relevant pattern section to find the step-by-step instructions for the terms you prefer. You don’t need to sign up or log in because it’s free right here on the blog.
Copyright
Please read the copyright terms, which apply globally, before using or downloading your pattern:
The contents of this page, including the pattern instructions and images, are published under copyright to me ©Lynne Rowe 2025 under my brand Knit Crochet Create® and are for your own personal use only.
You are welcome to sell items made from this pattern for charity fundraising purposes, or to gift them to family and friends, but selling small numbers for profit is only allowed with permission. Please email lynne@knitcrochetcreate.com for permission.
By downloading or using this pattern, you therefore agree to these terms.

FREE Mini Crochet Stocking Pattern
Materials
Yarn per stocking
- 4ply yarn (cotton yarn or sock yarn) in Main Colour and White, as follows:
- Approximately 4g of Main Colour for each stocking.
- Approximately 1-2g of White for heel.
Hook
- A 3mm (US D/3) crochet hook.
You Will Also Need
- Wool needle for weaving in ends.
- Stitch marker.
- Hanging ribbon if making a garland (thin 6-7mm wide ribbon is best).
- Tiny wooden craft pegs if desired, to attach to a garland or gift.
Tension
Is not critical for this project, because it doesn't matter if your stocking turns out slightly smaller or larger than the finished size given below.
Finished Size
- Approximately 10cm (4in) long from top to toe, using 4ply yarn and 3mm (US D/3) hook.
Mini Crochet Stocking Pattern Begins (US terms)
Stitches Used (US terms)
- ch(s) = chain or chain stitches
- sc = single crochet
- sc2tog = single crochet 2 stitches together (to decrease 1 stitch)
- slst = slip stitch
- st(s) = stitches
- RS = right side
- WS = wrong side
Pattern Notes
- Each stocking is worked in a spiral without joining each round, unless indicated otherwise.
- Use a stitch marker to mark the start of the round then move it up as you work.
- To maximise yarn, leave just enough yarn at the colour change to tie off ends and weave in.
Instructions (US crochet terms)
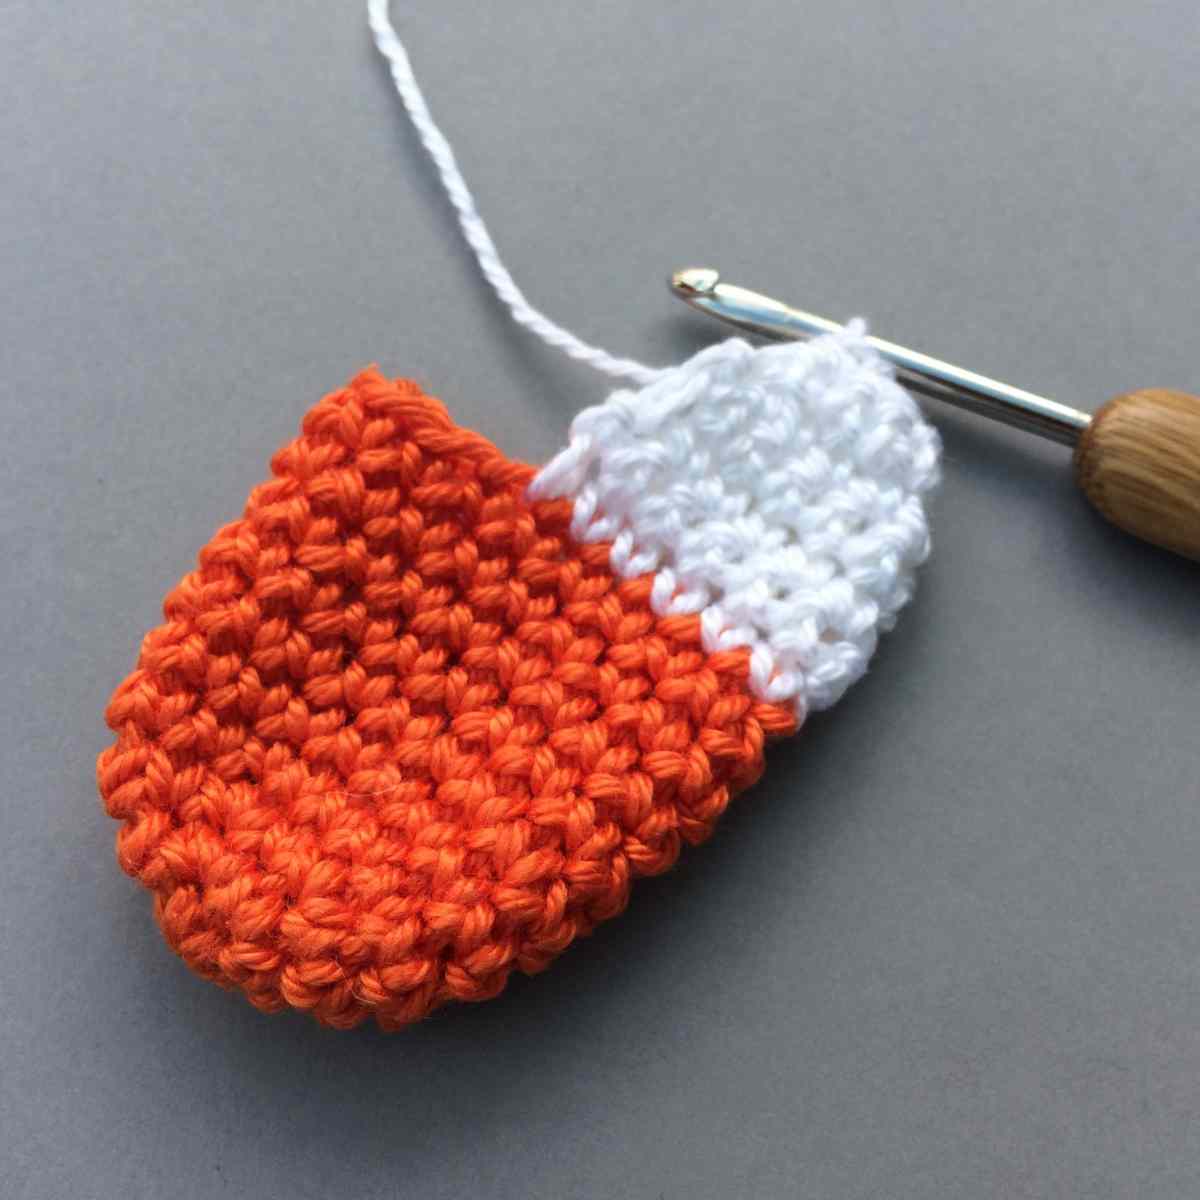
TOE AND FOOT
Worked from toe to cuff. Using 3mm (US D/3) hook, and chosen Main Colour, make 2ch.
Note: Alternatively, you could start with a magic loop and ch1.
Round 1 (RS): 6sc in 2nd ch from hook (or into magic loop). (6 sts)
Continue to work in the round. Place a stitch marker in the first stitch of each round to help mark the start of the round, then move it up as you work each round.
Round 2: 2sc in each st around. (12 sts)
Round 3: [2sc in next st, 1sc in next st] 6 times. (18 sts)
Rounds 4-10: 1sc in each st, changing to White on last yarn over of the last sc of Round 10. With White now on hook, continue in White for Heel.
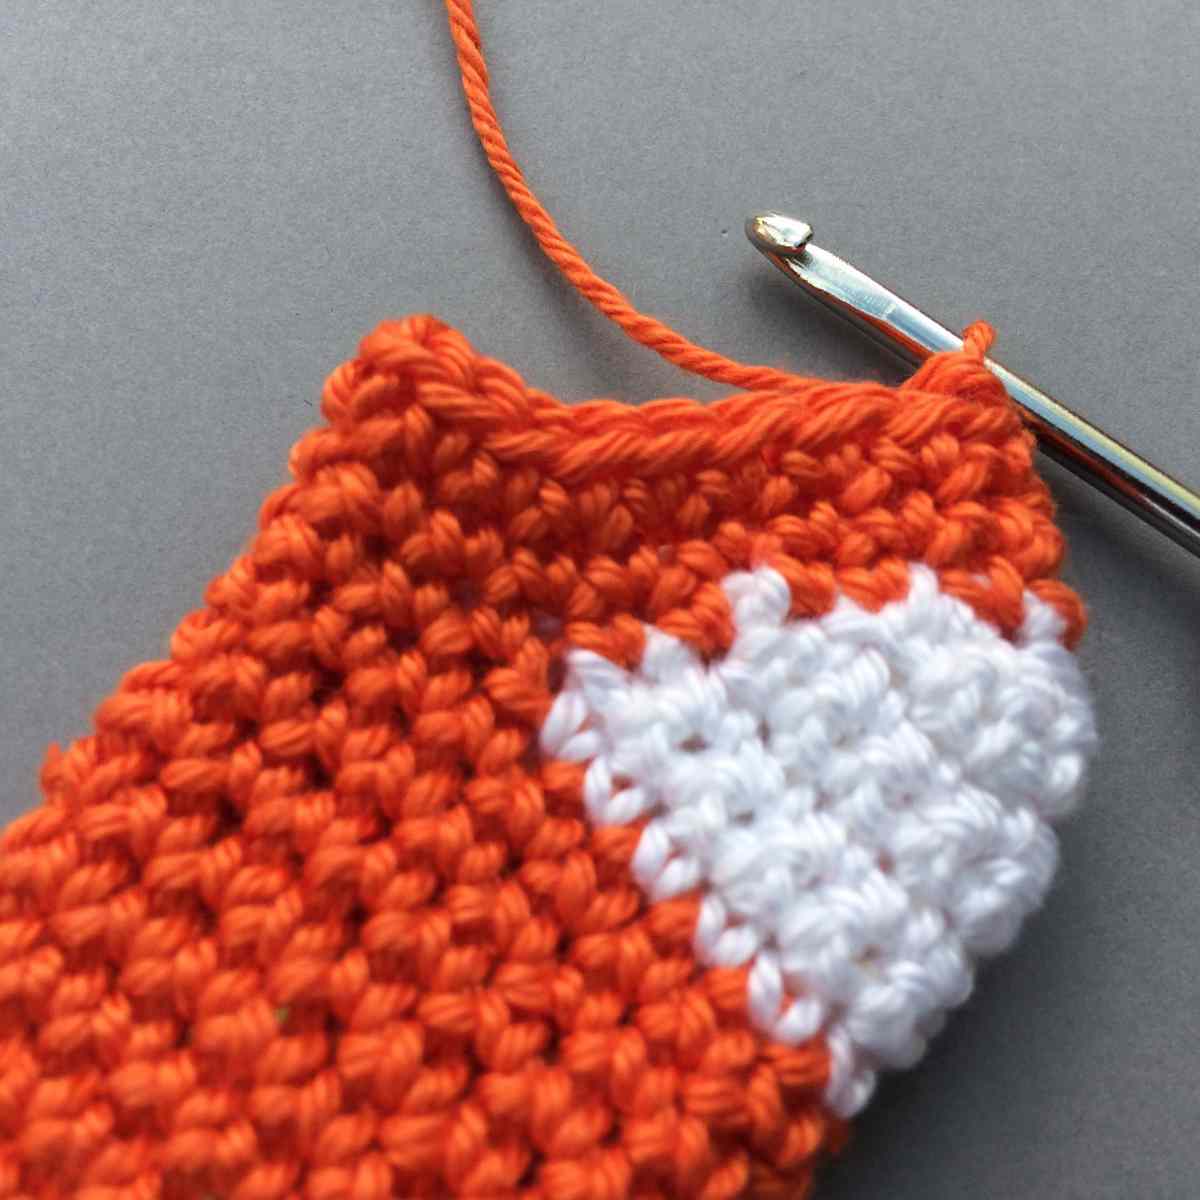
HEEL
Row 1 (RS) (part row): 1sc in each of next 11 sts. Turn and work in rows for heel, leaving last 7 sts unworked. (11 sts)
Rows 2-4: 1ch (does not count as a st), 1sc in each st, then turn.
Row 5: Do not ch1, skip st at base of loop on hook, 1sc in each of next 8 sts, skip next st, 1sc in last st, turn. (9 sts)
Row 6: Do not ch1, skip st at base of loop on hook, 1sc in each of next 6 sts, skip next st, 1sc in last st, turn. (7 sts)
Row 7: Do not ch1, skip st at base of loop on hook, [sc2tog] twice, skip next st, sc in last st, changing to Main Colour on last yarn over of last sc. (3 sts)
With Main Colour now on hook, continue with Leg.
LEG
Worked in the round, using a stitch marker as before to mark first stitch of each round.
Round 1: Work 4sc evenly along the first heel edge, then work 1sc in each of the 7 sts of the main stocking, then work 6sc evenly along the next heel edge. (17 sts)
Rounds 2-10: 1sc in every st, changing to White on last yarn over of the last sc of Round 10. Continue in White.
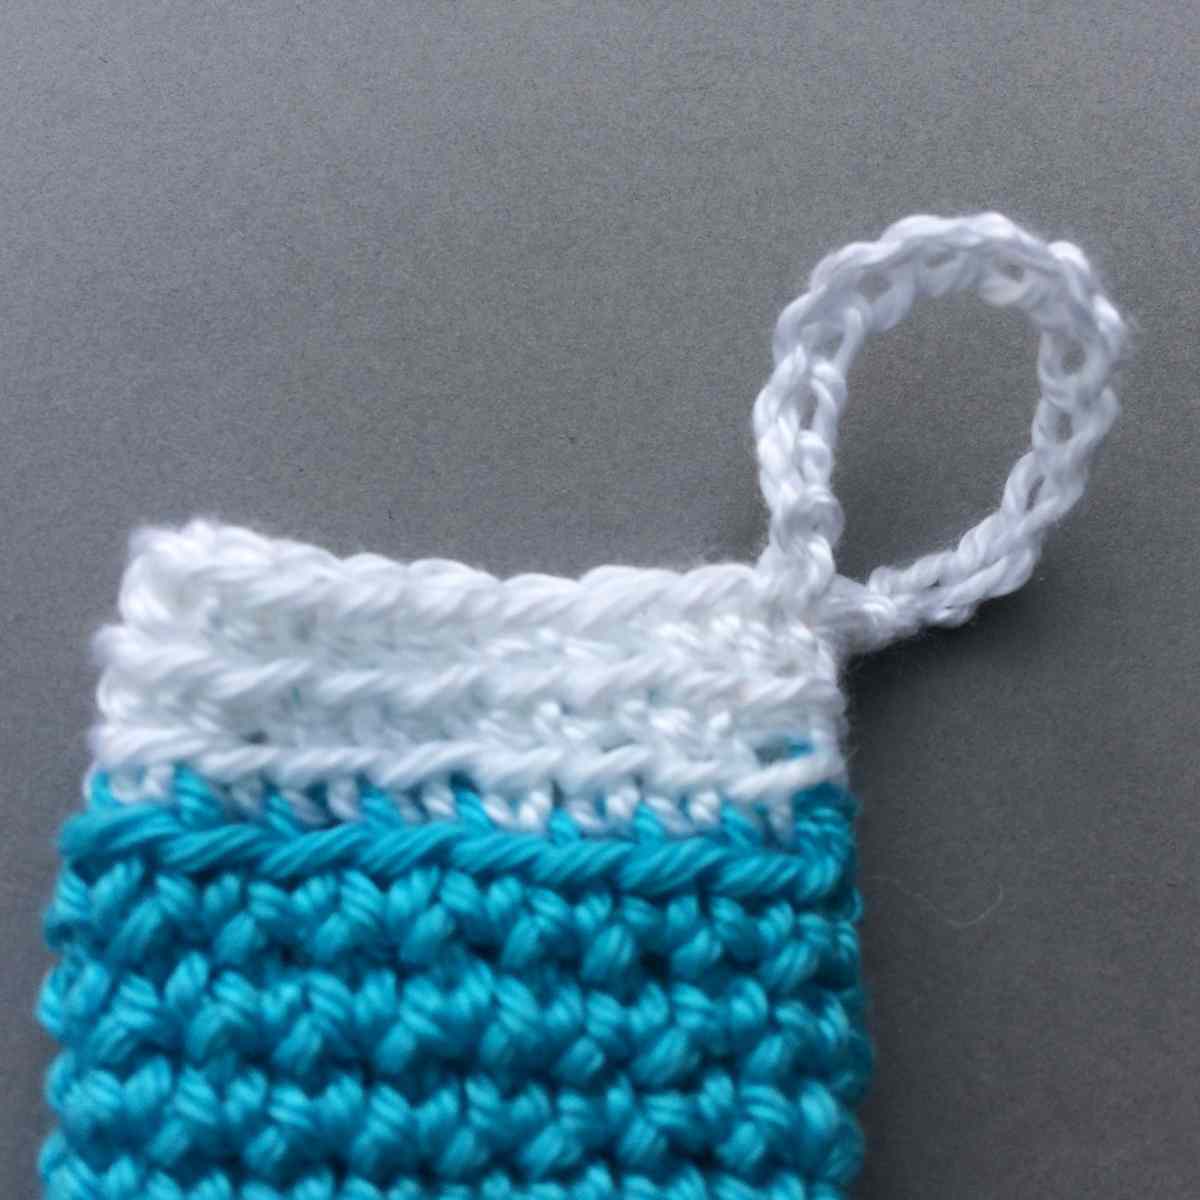
Rounds 11-13: 1sc in back loop only of every st. At the end of Round 13, slst in next stitch, so that you are at the centre back of the stocking.
HANGING LOOP
Ch 15, slst in next st. Cut yarn and fasten off. Weave in all ends on WS then trim.
FINISHING
Gently steam flat with a hot iron (do not put the iron directly onto the stockings) or a handheld steamer. If making a garland, attach stockings to the ribbon, evenly spaced, with a tiny wooden craft peg. Hang and admire.
Mini Stocking Crochet Pattern Begins (UK terms)
Stitches Used (UK terms)
- ch(s) = chain or chain stitches
- dc = double crochet
- dc2tog = double crochet 2 stitches together (to decrease 1 stitch)
- slst = slip stitch
- st(s) = stitches
- RS = right side
- WS = wrong side
Instructions (UK crochet terms)
TOE AND FOOT
Worked from toe to cuff. Using 3mm (US D/3) hook, and chosen Main Colour, make 2ch.
Note: Alternatively, you could start with a magic loop and ch1.
Round 1 (RS): 6dc in 2nd ch from hook (or into centre of magic loop). (6 sts)
Continue to work in the round. Place a stitch marker in the first stitch of each round to help mark the start of the round, then move it up as you work each round.
Round 2: 2dc in each st around. (12 sts)
Round 3: [2dc in next st, 1dc in next st] 6 times. (18 sts)
Rounds 4-10: 1dc in each st, changing to White on last yarn over of the last dc of Round 10. With White now on hook, continue in White for Heel.
HEEL
Row 1 (RS) (part row): 1dc in each of next 11 sts. Turn and work in rows for heel, leaving last 7 sts unworked. (11 sts)
Rows 2-4: 1ch (does not count as a st), 1dc in each st, then turn.
Row 5: Do not ch1, skip st at base of loop on hook, 1dc in each of next 8 sts, skip next st, 1dc in last st, turn. (9 sts)
Row 6: Do not ch1, skip st at base of loop on hook, 1dc in each of next 6 sts, skip next st, 1dc in last st, turn. (7 sts)
Row 7: Do not ch1, skip st at base of loop on hook, [dc2tog] twice, skip next st, dc in last st, changing to Main Colour on last yarn over of last dc. (3 sts)
With Main Colour now on hook, continue with Leg.
LEG
Worked in the round, using a stitch marker as before to mark first stitch of each round.
Round 1: Work 4dc evenly along the first heel edge, then work 1dc in each of the 7 sts of the main stocking, then work 6dc evenly along the next heel edge. (17 sts)
Rounds 2-10: 1dc in every st, changing to White on last yarn over of the last dc of Round 10. Continue in White.
Rounds 11-13: 1dc in back loop only of every st. At the end of Round 13, slst in next stitch, so that you are at the centre back of the stocking.
HANGING LOOP
Ch 15, slst in next st. Cut yarn and fasten off. Weave in all ends on WS then trim.
FINISHING
Gently steam flat with a hot iron (do not put the iron directly onto the stockings) or a handheld steamer. If making a garland, attach stockings to the ribbon, evenly spaced, with a tiny wooden craft peg. Hang and admire.
Share your crochet creations
If you love this pattern and make lots of mini stockings, then I’d love to see your finished projects! Tag me on Instagram [@knitcrochetcreate] so I can admire your colour combinations and see what you make with them.
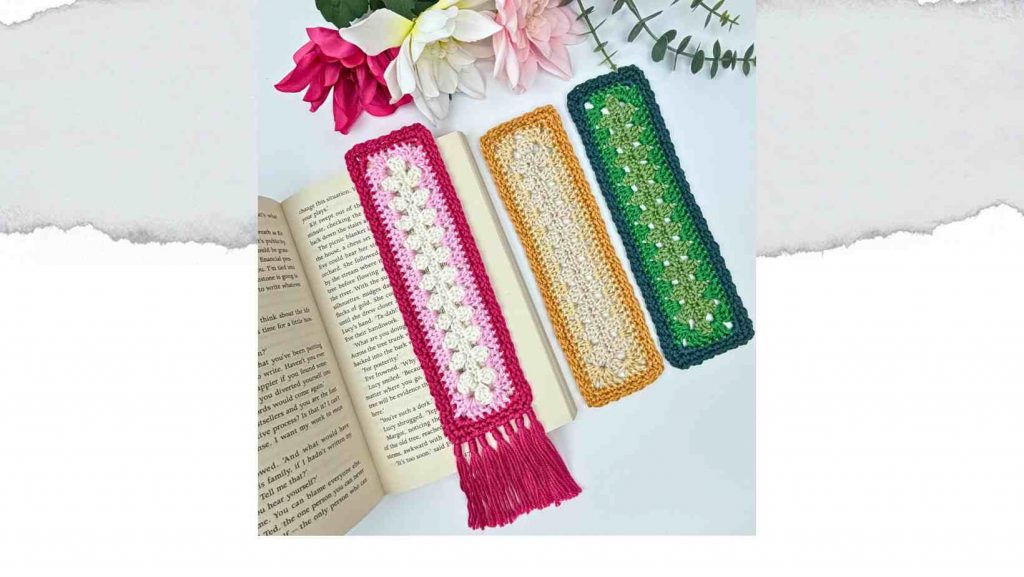
If you're looking for more stash-busting projects, then check out my other projects like the Cosy Reads Crochet BookmarkPattern – or my Easy Scarf Crochet Pattern – which are both free on the blog.
Let's keep in touch!
I'd love to chat more.
Sign up for my newsletter and receive a weekly dose of crafting inspiration, featuring the latest trends, tips, and projects to fuel your creativity.