Tea Cosy Knitting Pattern For Christmas
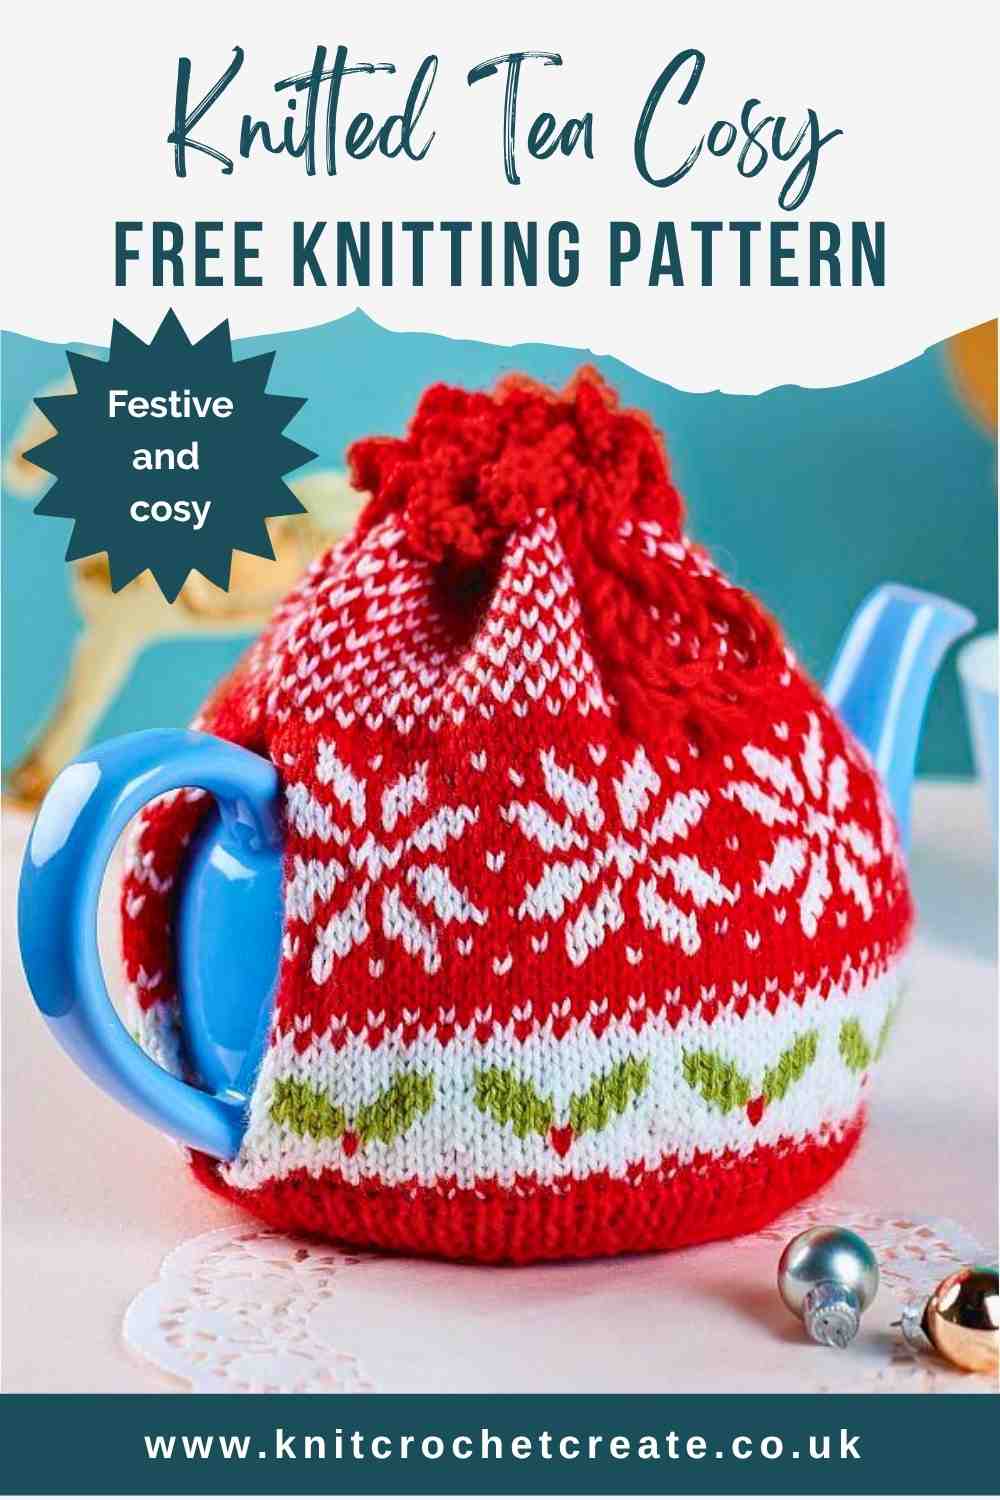
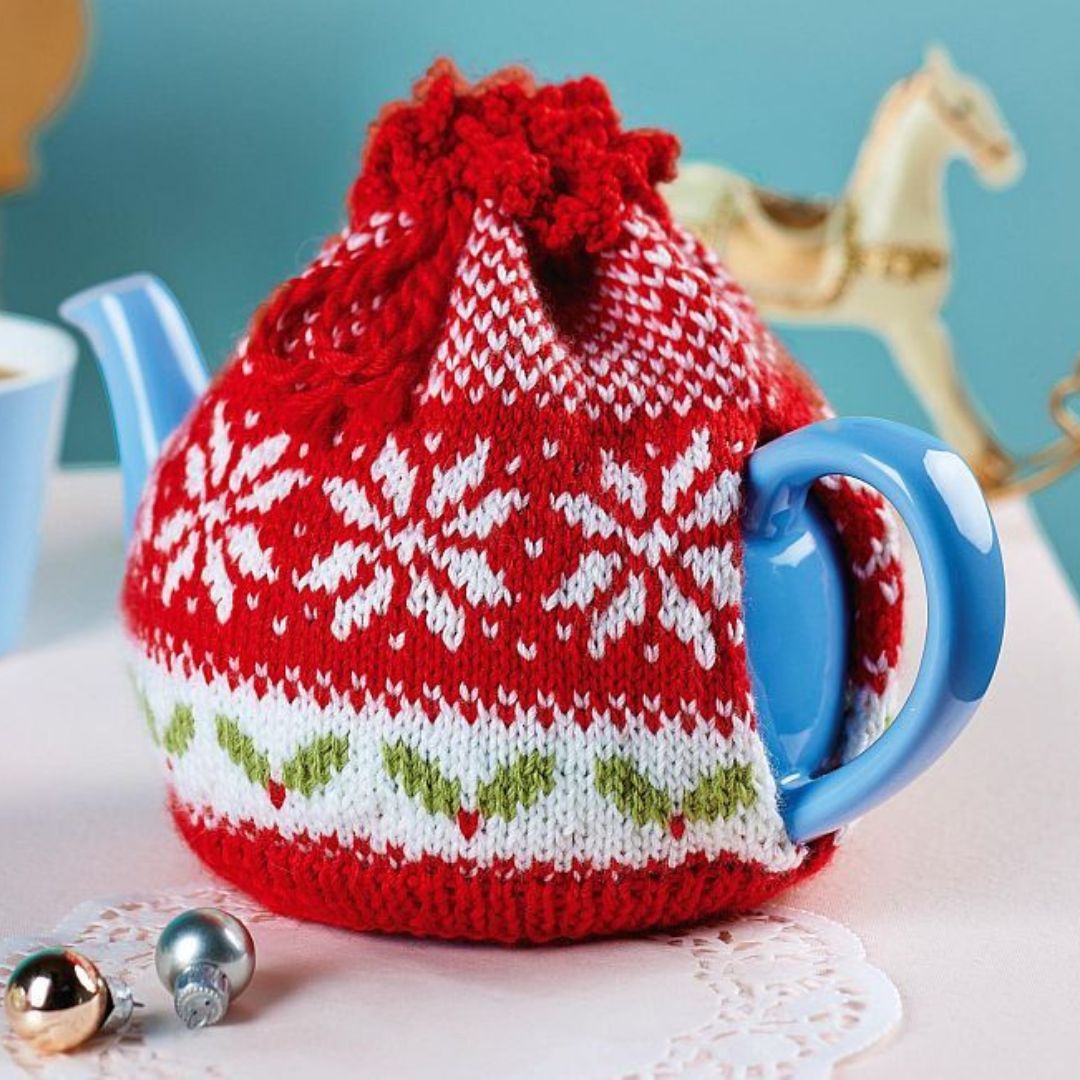
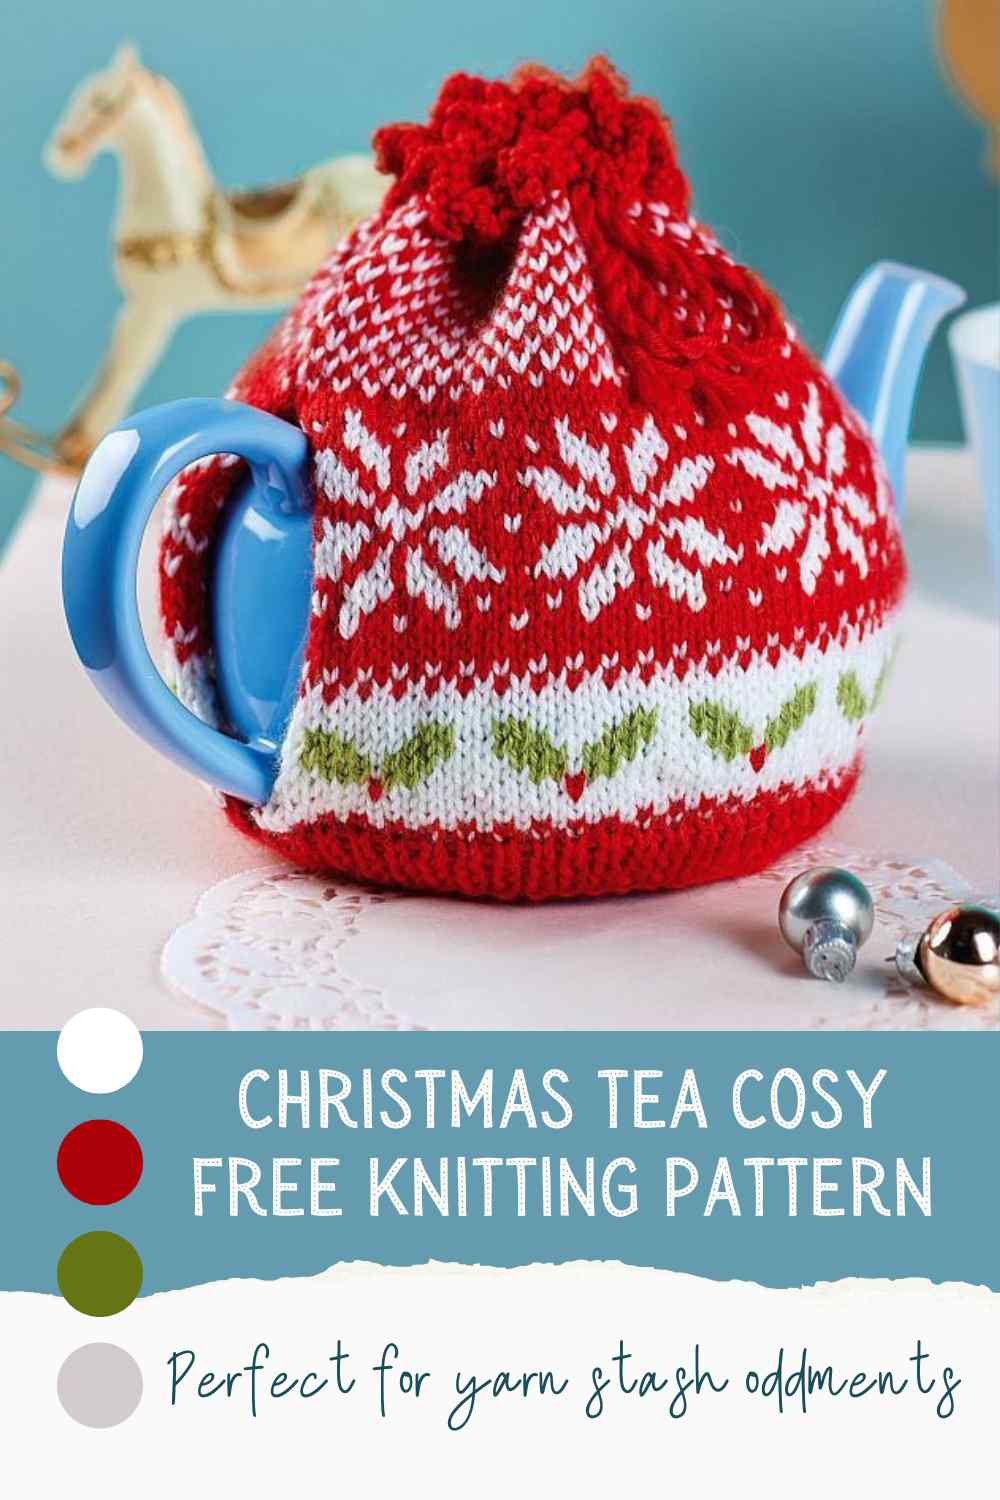
My Tea Cosy Knitting Pattern with a Knitted Fair Isle Design features classic red and white yarn, with snowflakes with a touch of holly. It’s a fun and satisfying make that brings instant Christmas cheer, and it will keep your tea hot from the first cup to the last.
Made in double knitting (light worsted weight) yarn, this cosy fits an average medium-sized teapot and is knitted flat then sewn up. It’s a lovely way to practise simple stranded colourwork and makes a great gift for tea lovers.
How to Get Your Free Tea Cosy Knitting Pattern
You’ll find the full written pattern below with clear step-by-step instructions.
It’s free right here on the blog — no sign-up needed.
Why You’ll Love This Tea Cosy Knitting Pattern
- A practical and festive project to brighten your table.
- Uses double knitting (light worsted) yarn in small amounts.
- Perfect for using up red, white, and green yarns from your stash.
- Makes a beautiful handmade gift for friends or family.
- A relaxing project to knit on cosy winter evenings.
How to Use Your Free Tea Cosy Knitting Pattern
This pattern makes a two-panel tea cosy featuring traditional Christmas motifs.
Here are a few ideas for using it:
- Knit one as a gift for a tea-loving friend.
- Create a matching set for your festive table with coasters or mug cosies.
- Try different colour combinations – traditional red and white, or go modern with silver and blue.
Copyright
All contents of this page, including text, charts, and images, are ©Lynne Rowe 2025 under Knit Crochet Create® and are for personal use only.
You may sell finished items made from this pattern for charity fundraising, or gift them to friends and family.
Selling small numbers for profit is allowed only with permission – please email lynne@knitcrochetcreate.com to request permission.
By downloading or using this pattern, you therefore agree to these terms.
FREE Tea Cosy Knitting Pattern Begins
Materials
Yarn
- Double knitting (light worsted weight) yarn in the following colours:
- Yarn A = Red: 1 x 50g ball for the main body
- Yarn B = White: 1 x 50g ball for the main body
- Yarn C = Green: Small oddments for the holly leaves
- Note: You can use any double knitting (light worsted), with the knitting needles specified below.
- I used Bergere De France Ideal yarn; 50g (115m) in:
- Yarn A = Pavot (24408)
- Yarn B = Everest (51220)
- Yarn C = Olivine (20754)
- I used Bergere De France Ideal yarn; 50g (115m) in:
Knitting needles
- A pair of straight 3.25mm knitting needles, for knitting in rows.
- A pair of straight 3.5mm knitting needles, for knitting in rows.
Tension
24 sts and 31 rows to 10 x 10cm, on 3.5mm needles (or correct needle size to achieve this tension).
Finished Size of Tea Cosy
- To fit a Medium-sized 4-6 cup tea pot.
Abbreviations for stitches used
- K = knit.
- K2tog = knit two stitches together as one stitch (to decrease 1 st)
- P = purl
- St(s) = stitch(es)
- YO = yarn over (to increase 1 st)
Important Notes
- Read charts from right to left on odd numbered rows and then from left to right on even numbered rows.
- Carry unused yarns across the back of the work and to the ends of each row and twist yarns before starting each row.
- Twist unused yarns after every 3 or 4 sts to carry them across the back of the work.
- Work chart in stocking stitch, but Knit first and last sts on Purl rows where indicated.
Tea Cosy Knitting Pattern Instructions
Using Yarn A and 3.25mm needles, cast on 59 sts and begin at base of tea cosy.
Lower Rib
1st Row (right side): [K1, P1] to the last st, K1.
2nd Row (wrong side): [P1, K1] to the last st, P1.
3rd to 6th Rows: Rep Rows 1 & 2 twice more, then change to 3.5mm needles.
Tea Cosy: First Pattern Section
Continue with 3.5mm needles.
7th Row: Work Row 7 of Chart 1 (see image below) as follows: K first st, Knit the pattern repeat 5 times, K last 3 sts, turn.
8th Row: Work Row 8 of Chart 1 (see image below) as follows: K first st, P next 2 sts, Purl the pattern repeat 5 times, Knit last st, turn. Remember to K the first and last stitch on this and every P row because this helps the edges to sit flat and not curl under too much.
9th to 19th Rows: Continue to work the corresponding rows of the chart (keeping stocking stitch correct (knit on right side and purl on wrong side) and also knitting first and last stitches on a P row.

Tea Cosy: Second Pattern Section
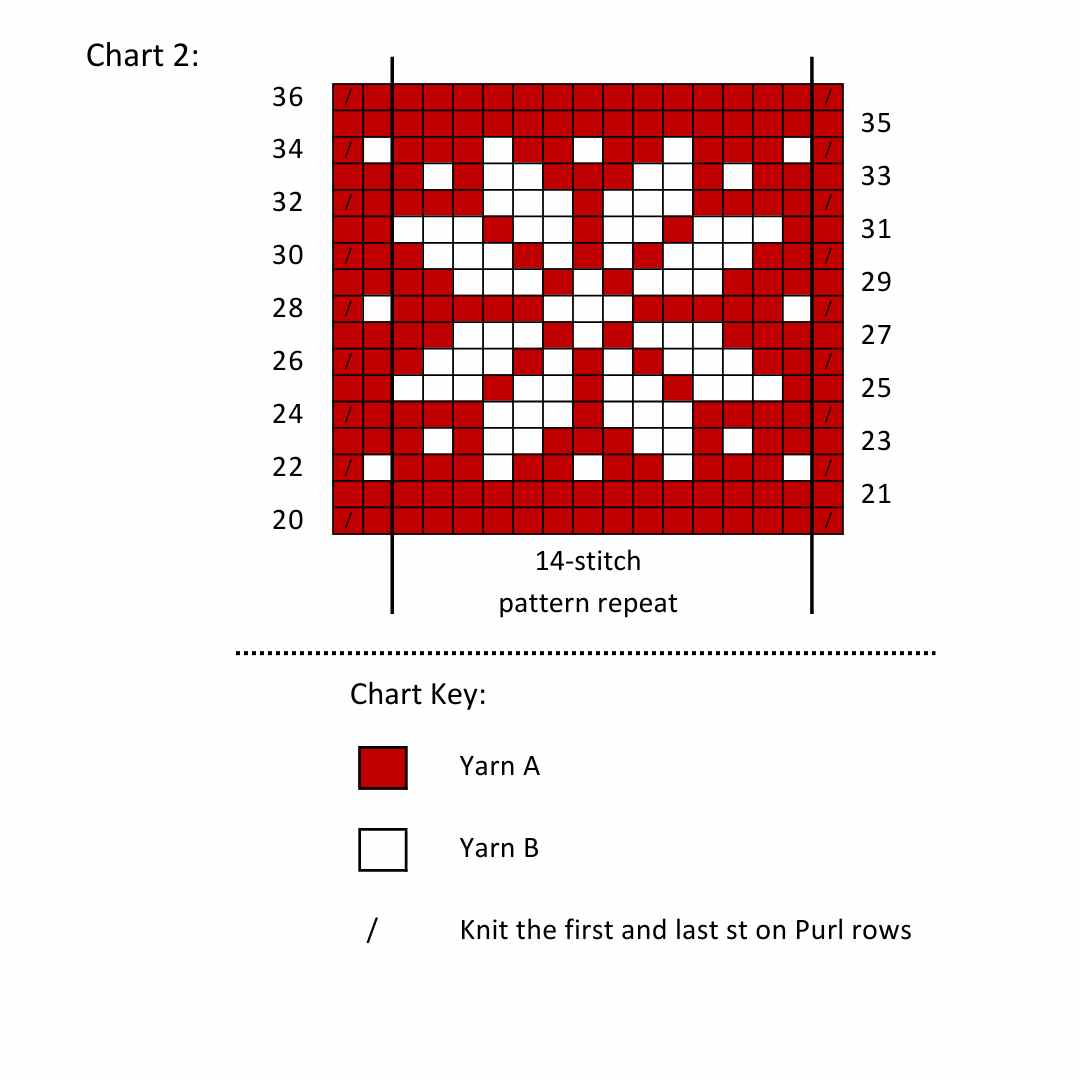
Rows 20-36: Work corresponding rows of Chart 2 (see image below), keeping stocking stitch correct, and knitting first and last st on a Purl row, as before, and working the 14-stitch pattern repeat, 4 times across each row.
Tea Cosy: Third Pattern Section
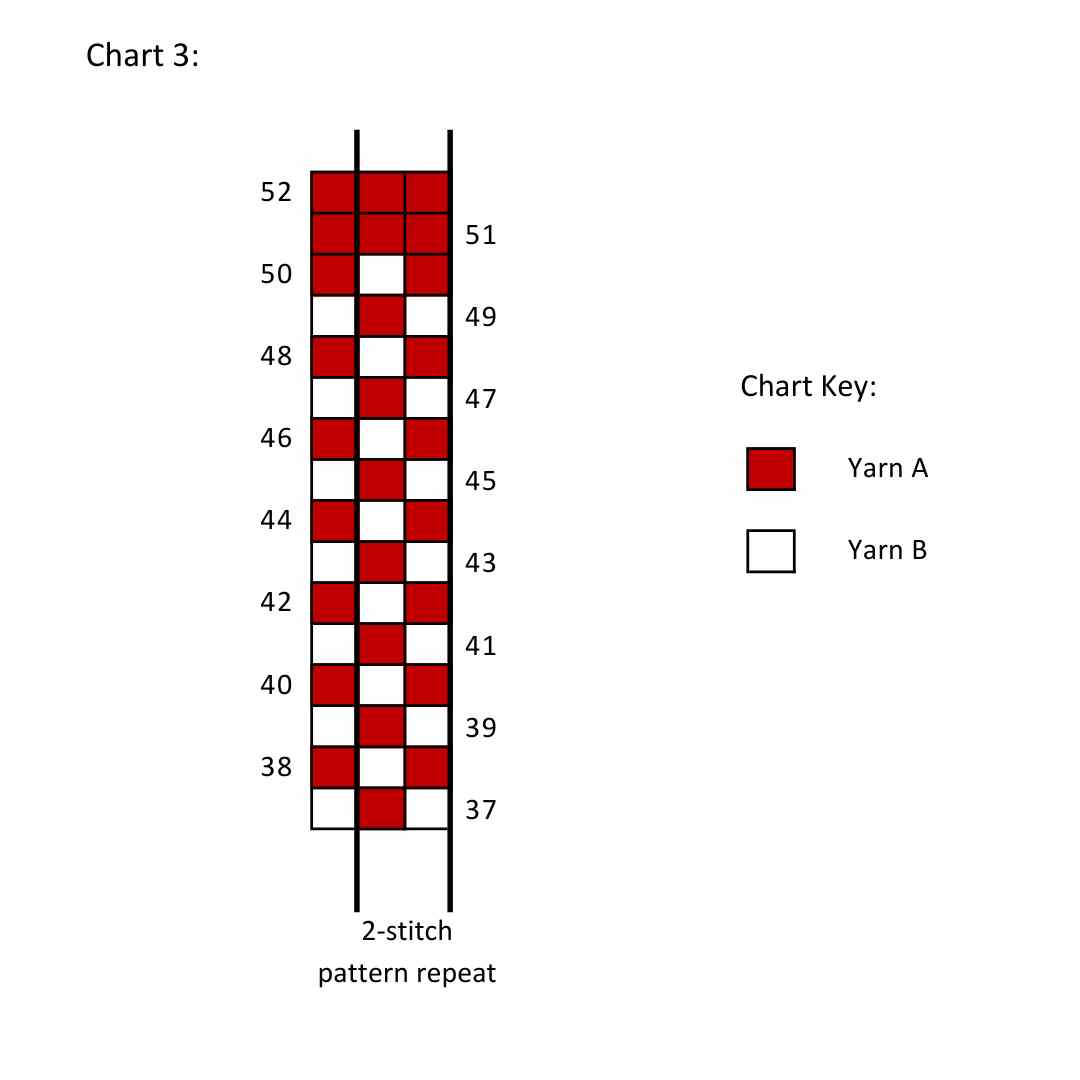
Rows 36-52: Work corresponding rows of Chart 3 (see image below), keeping stocking stitch correct. After Row 50 you can cut off Yarn B, and continue in Yarn A to end.
Tea Cosy: Top Section
Row 53: K2, YO, K2tog, [K1, YO, K2tog] to the last st, K1.
Rows 54-58: Starting with a Purl row, stocking stitch 5 rows.
Next work a picot cast-off as follows: Knit first 2 sts, then lift the first stitch on the right needle over the second to cast off, *pass the stitch on the right needle back to the left needle. Cast on 2 sts, using a 2-needle cast on method, then cast off 4 sts**. Rep from * to ** until the end.
Cut yarn and pull through last st on needle. Weave in all ends.
Making Up Your Tea Cosy
- Lay knitted pieces on an ironing board and pin flat (do not stretch), then lightly steam, holding the iron above the knitted piece (do not touch with iron). Leave to dry.
- Stitch the bottom edges of the cosy together at the ribbed edges.
- Stitch the top edges together down to the top of the snowflakes section (Row 36).
- Weave all yarn ends into wrong side of work then trim.
- Braid or plait three 1m lengths of Yarn A together then tie ends to secure.
- Thread the cord through the eyelet holes then tie in a bow.
- If necessary, knot the ends of the cord nearer to the bow and trim ends below the knots.
Share your creations
If you love this pattern and make lots of trees, I’d love to see your finished decorations! Tag me on Instagram [@knitcrochetcreate] so I can admire and share your projects.
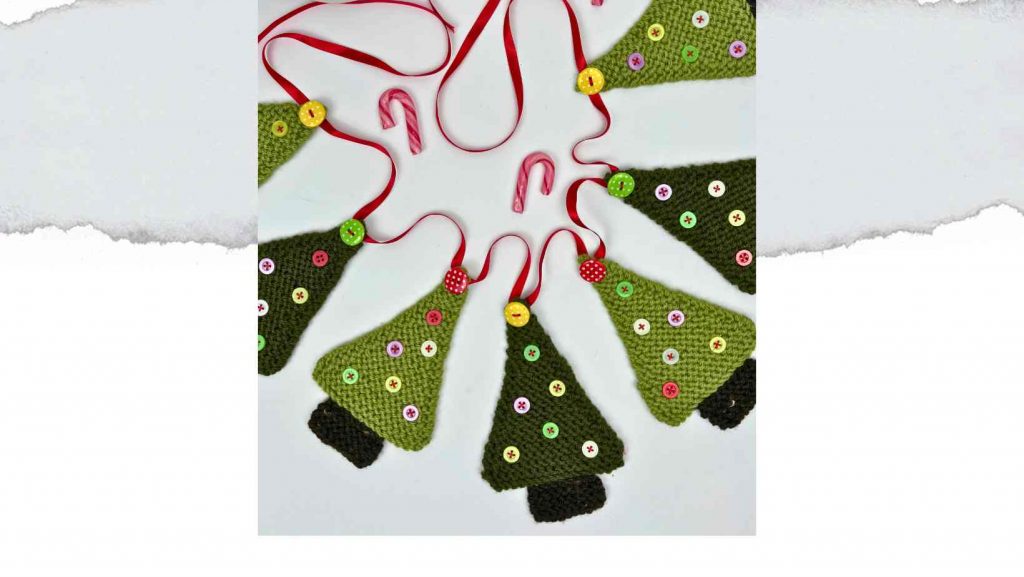
If you enjoyed this easy Christmas Tree Knitting Pattern, check out my other stash-busting projects like the Christmas Tree Garland or my Knitted Lace Fingerless Mittens – both free on the blog.
Let's keep in touch!
I'd love to chat more.
Sign up for my newsletter and receive a weekly dose of crafting inspiration, featuring the latest trends, tips, and projects to fuel your creativity.