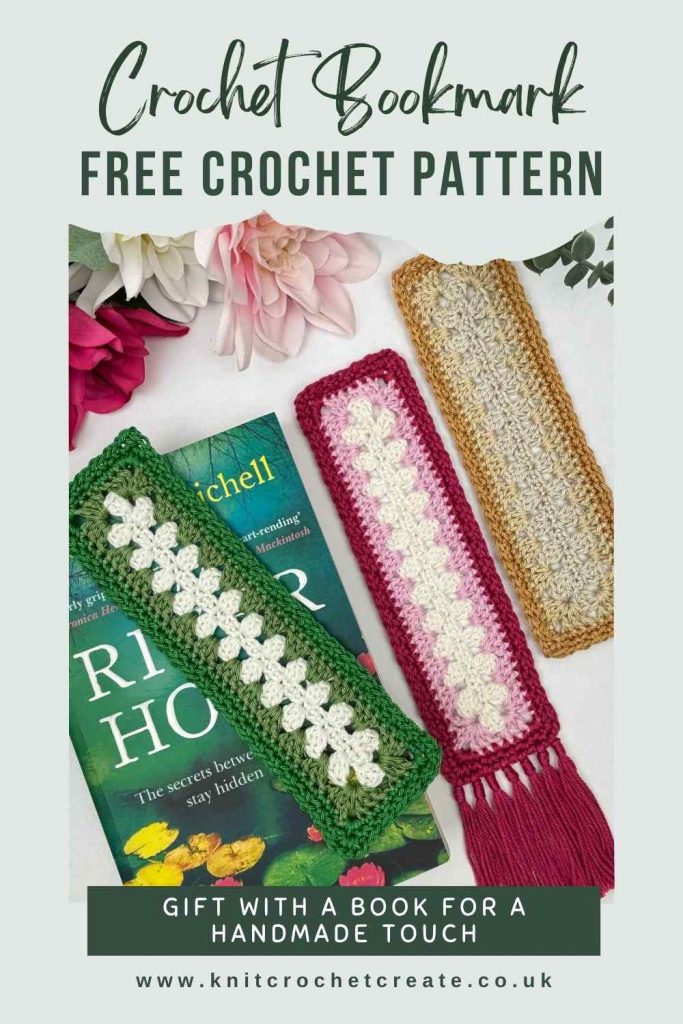
Free Crochet Bookmark Pattern - Granny Stitch Rectangle
With my free crochet bookmark pattern you can make a thoughtful gift, which is perfect for this time of year. Books are one of the best gifts you can give, because there’s truly a book for everyone — whether they love cosy crime, inspiring biographies, craft books, cookery, or fantasy adventures.
Pairing a book with a handmade crochet bookmark adds a personal, creative touch that turns a simple gift into something extra special. It also shows care, time, and thought — and it’s something the recipient can treasure and use, long after they’ve finished the book.
Even if they pass the book on to someone else to enjoy, they can still keep the bookmark forever.
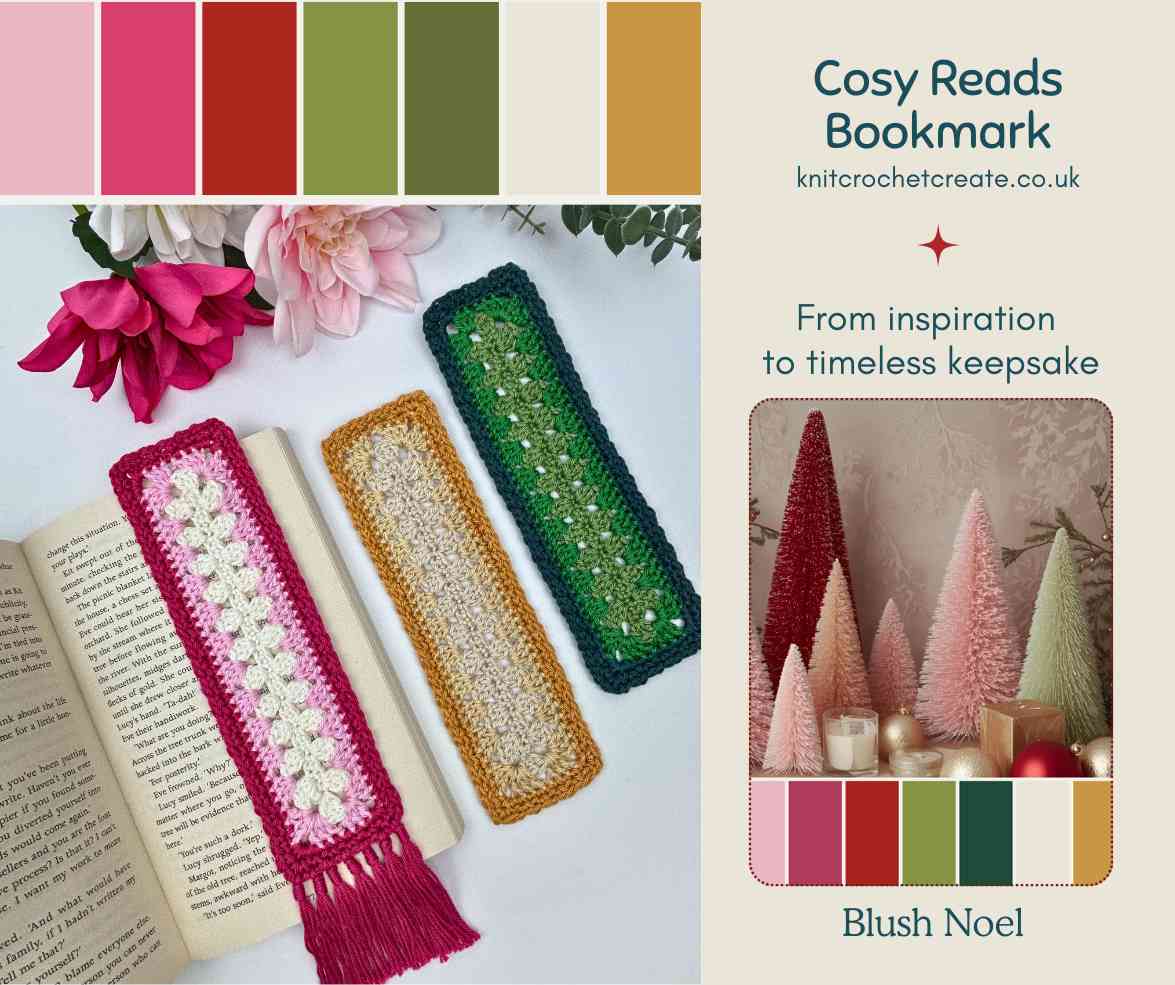
My Cosy Reads Free Crochet Bookmark Pattern
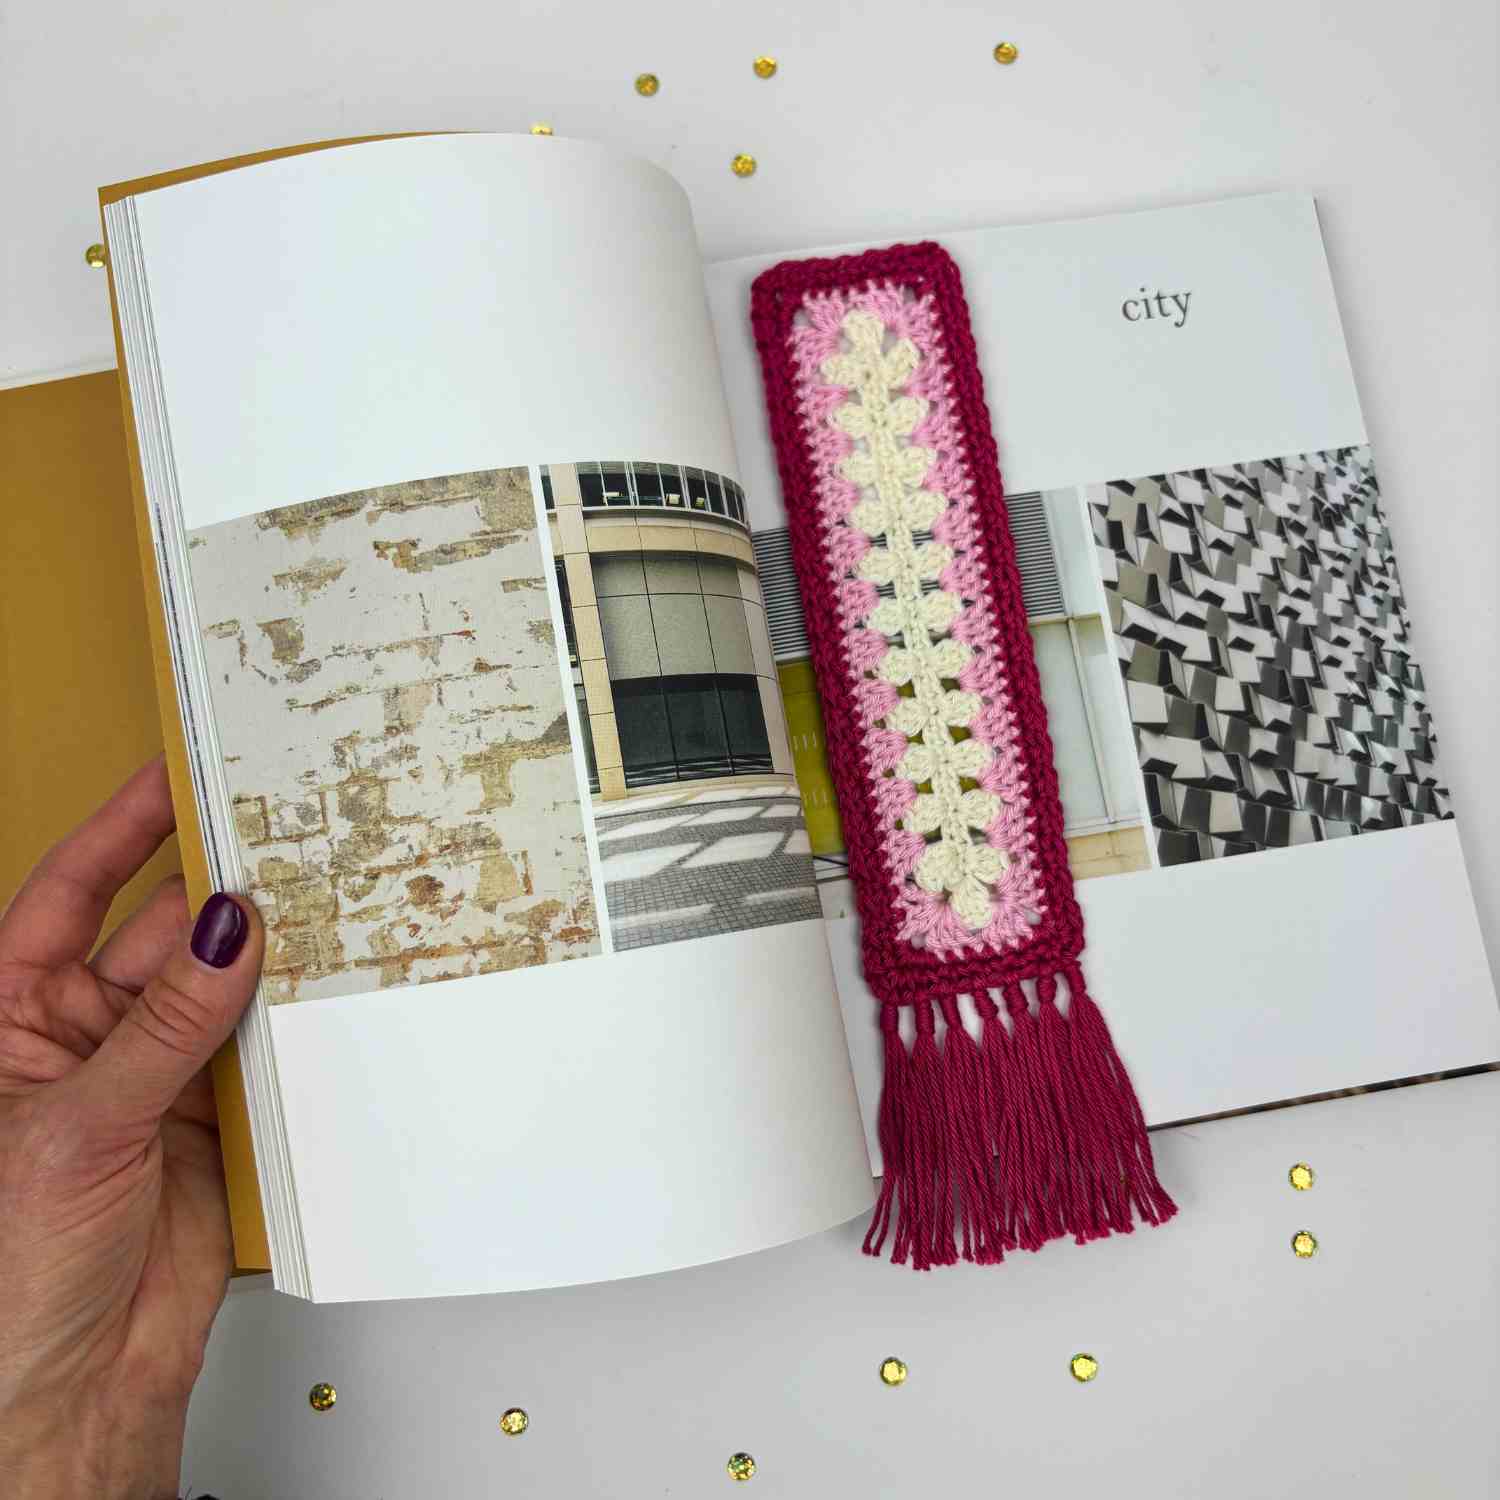
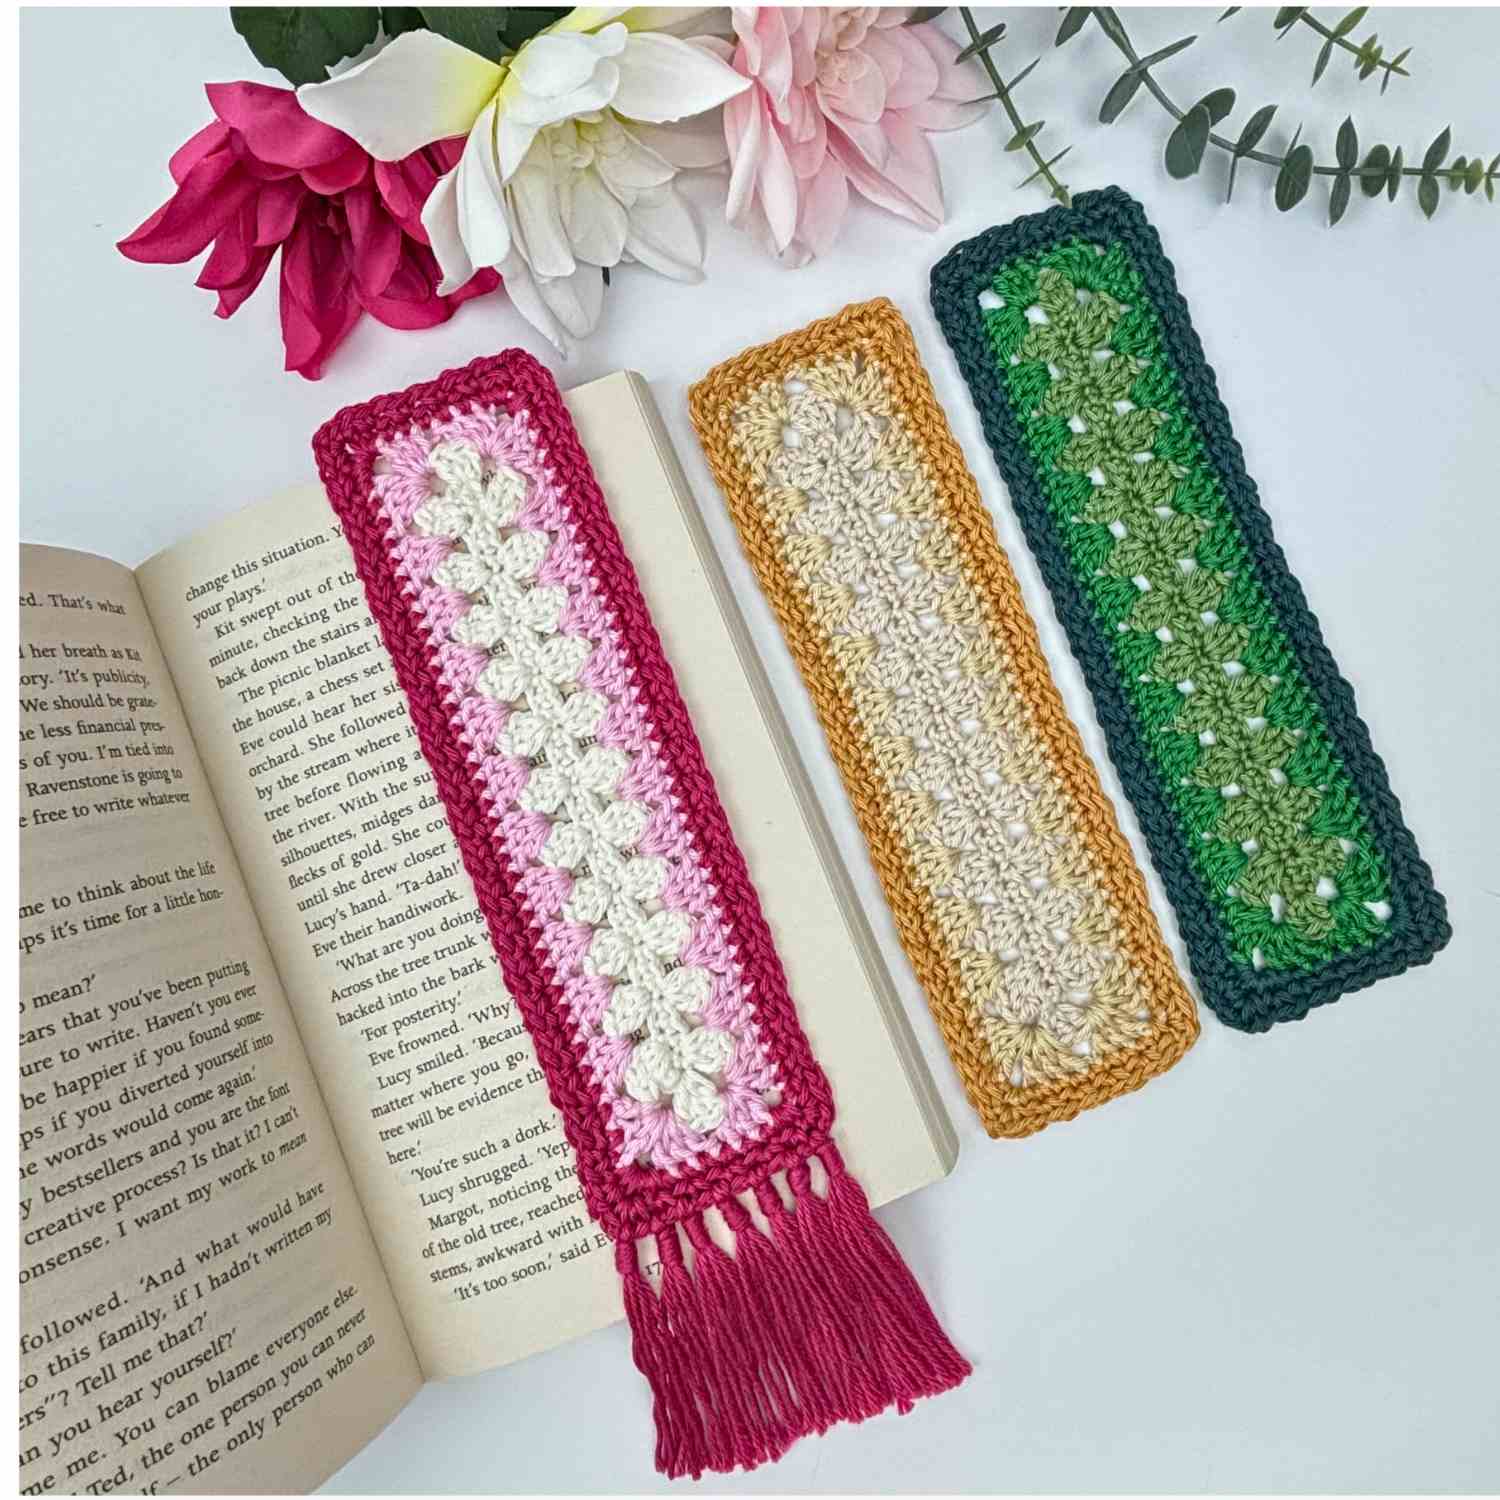
My Cosy Reads Bookmark is my first project in the Stash to Sparkle CAL Blog Hop (see below for Blog Hop details). I’ve taken inspiration from this week's colour palette, Blush Noel, to create soft, festive colour fades in pinks, cream and golds, and greens. I then designed a quick and simple bookmark that's also satisfying to make, and perfect for using up those small yarn scraps hiding in your stash. And if you happen to have a bit of sparkle thread, then you can use that too for a festive touch.
Each bookmark explores a different colour combination, to show how you can take just a few elements of a colour scheme and make something completely unique.
It’s a lovely reminder that you don’t need to use a full set of colours to capture the feel of a palette — because sometimes, a few shades are all it takes to create a cohesive, beautiful piece.
The Stash To Sparkle CAL Blog Hop
The Stash to Sparkle CAL is a 4-week blog hop running through November, with 8 free stash-busting crochet projects shared between Annie Design Crochet and myself. You can read all about it in the blog post here: Stash To Sparkle CAL.

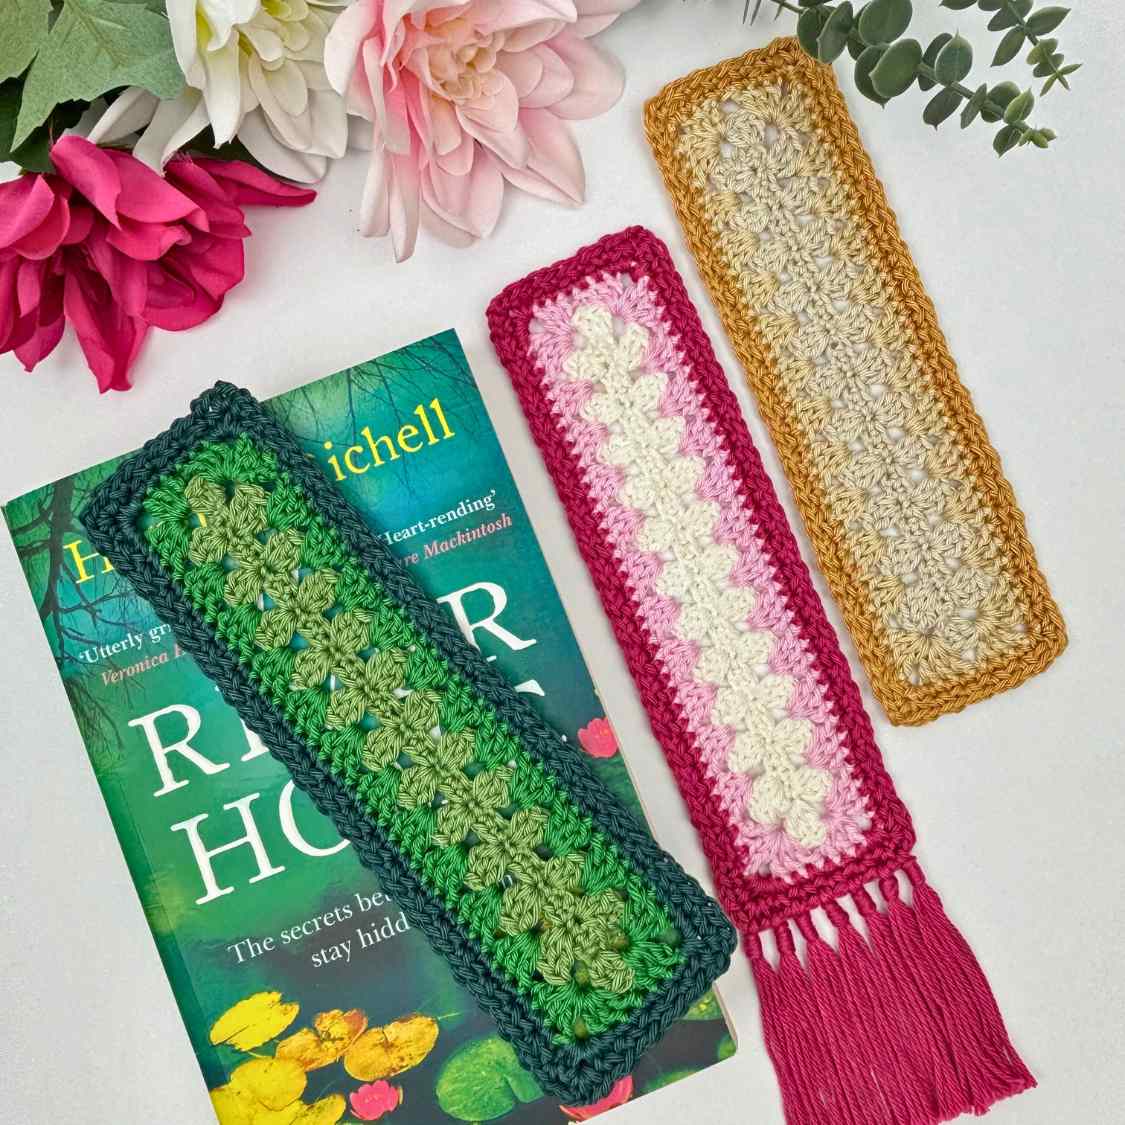
How To Match Your Crochet Bookmark To A Book
As an alternative to our Blush Noel colour palette, you can make your crochet bookmark even more special by matching the colours to the book’s cover or theme.
Pairing colours this way turns a quick crochet make into a coordinated handmade gift that looks well-planned and professional — which therefore makes it perfect for festive giving.
Turn Your Free Crochet Bookmark Pattern Into A Budget-Friendly Gift
You don’t always have to buy new books either, because secondhand or regifted books make brilliant presents. Many are like new, only read once (or not at all), and are often found in excellent condition. Combining a pre-loved book with a stash-busting crochet bookmark is therefore a wonderful way to give a meaningful, low-cost, and eco-friendly gift this festive season.
How To Get Your Free Crochet Bookmark Pattern
The pattern is written out in full in both US and UK crochet terms. US terms are given first, followed by UK terms.
Scroll down to the pattern section to find the step-by-step instructions. You don’t need to sign up or log in because it’s free right here on the blog.
Why You’ll Love This Free Crochet Bookmark Pattern
- Perfect for stash-busting: You can use up even the smallest scraps of yarn to create something pretty and practical.
- Quick to make: Each bookmark takes very little time, making it ideal for a last-minute gift or relaxing evening project.
- Beginner-friendly: The granny stitch is simple, rhythmic, and easy to master — even if you’re new to crochet.
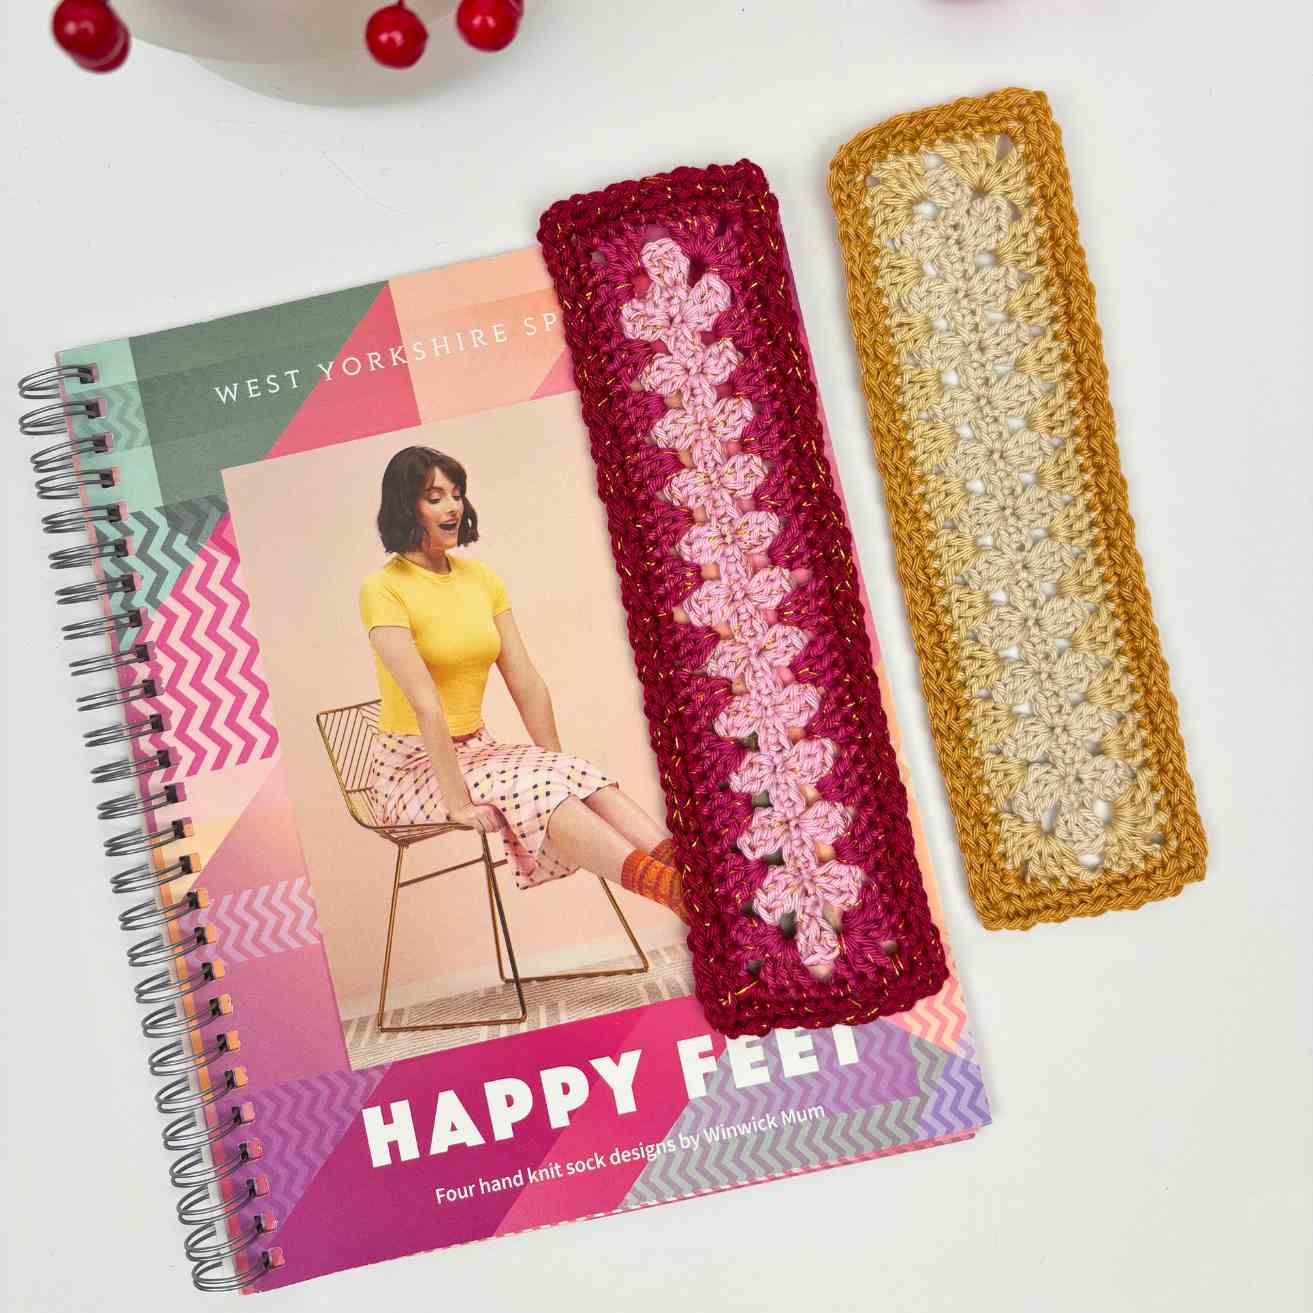
- Customisable: You can play with colour fades, add tassels or beads, or make them in your favourite shades.
- Thoughtful gift idea: Handmade bookmarks make lovely little presents to pair with books or gift cards.
It’s one of those projects that gives you instant satisfaction, because they are quick to make, easy to personalise, and perfect for gifting.
Copyright
Please read the copyright terms, which apply globally, before using or downloading your pattern:
The contents of this page, including the pattern instructions and images, are published under copyright to me ©Lynne Rowe 2025 under my brand Knit Crochet Create® and are for your own personal use only.
You are welcome to sell items made from this pattern for charity fundraising purposes, or to gift them to family and friends, but selling small numbers for profit is only allowed with permission. Please email lynne@knitcrochetcreate.com for permission.
By downloading or using this pattern, you therefore agree to these terms.
FREE Crochet Bookmark Pattern (Granny Stitch Rectangle)
Materials
- Small amounts of 4ply cotton yarn in three different colours per bookmark. For example:
- Pale Pink or Off-white for the Foundation Row and Round 1.
- Mid Pink for Round 2.
- Deep Pink or Red for Rounds 3 and 4.
- Note you can use any combination of colours.
- You can add in some sparkle if you have any gold or silver thread. Hold cotton with sparkle thread throughout, as one strand.
- A 3mm (US D/3) crochet hook.
- A 3.5mm (US E/4) crochet hook.
- Wool needle for weaving in ends.
- 2 x removable stitch markers.
Yarn Alternatives
Try sock yarn or fingering weight yarn instead, or use double knitting weight (light worsted) with the same hooks listed above. You could always add a fabric liner to your bookmark if needed. By using your bookmark as a template, cut a slightly larger rectangle of fabric, fold over the edges, then slip stitch to the back of your bookmark.
Tension
Is not critical for this project, because it doesn't matter if your bookmark turns out slightly smaller or larger than the finished size given below.
Finished Size
- Approximately 19.5cm (7.75in) long, excluding tassels which are optional; 5.5cm (2.25in) wide, using 4ply yarn and 3mm (US D/3) hook.
Crochet Bookmark Pattern begins (US terms)
Stitches Used (US terms)
- ch = chain
- sc = single crochet
- dc = double crochet
- rep = repeat
- skip = miss
- slst = slip stitch
- sp(s) = space(s)
Instructions (US crochet terms)
With US D/3 (3mm) hook and chosen yarn, make a slip knot onto hook, then ch35.
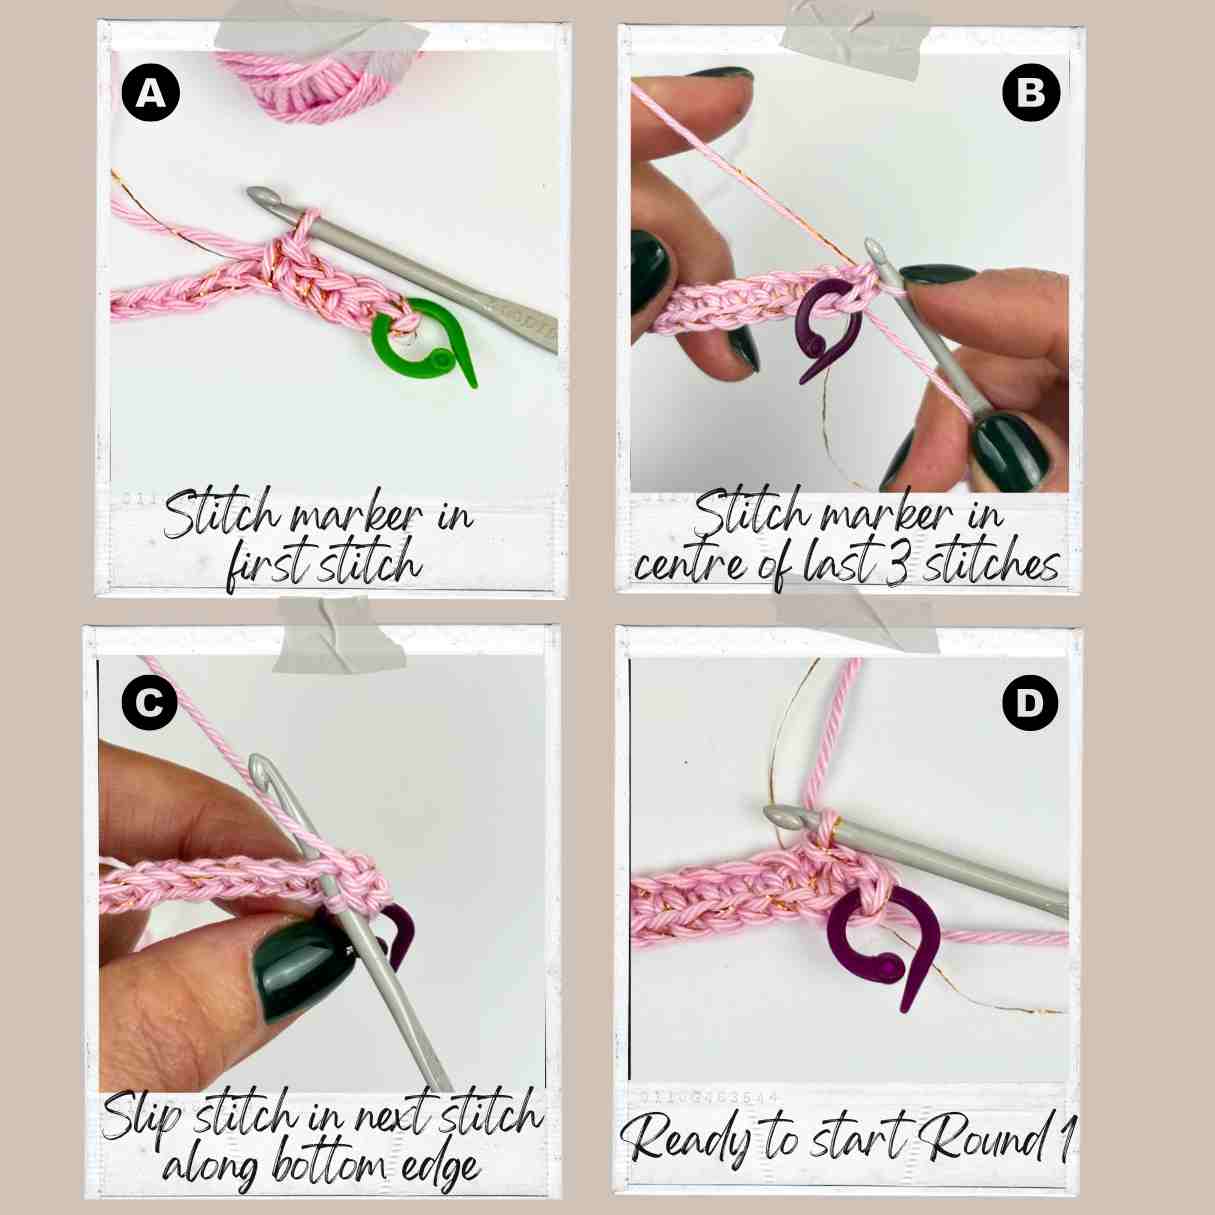
Foundation Row: Skip 1ch (does not count as a st), 1sc in next st and place a st marker in this first st (see Image A for placement), 1sc in next 32 ch, 3sc in last ch. Place a stitch marker in the centre stitch of last 3sc (see image B for placement). The two stitch markers show each end stitch of the Foundation Row. (36 sc)
Do not turn work, instead rotate work slightly and continue to work along the bottom loops of the chain stitches. Slst in next st along bottom edge (see image C).
You are now in the correct place to begin Round 1 (see Image D).
Now you will work in rounds.
Round 1:
To make it easier to follow the pattern, I have separated Round 1 into bullet points:
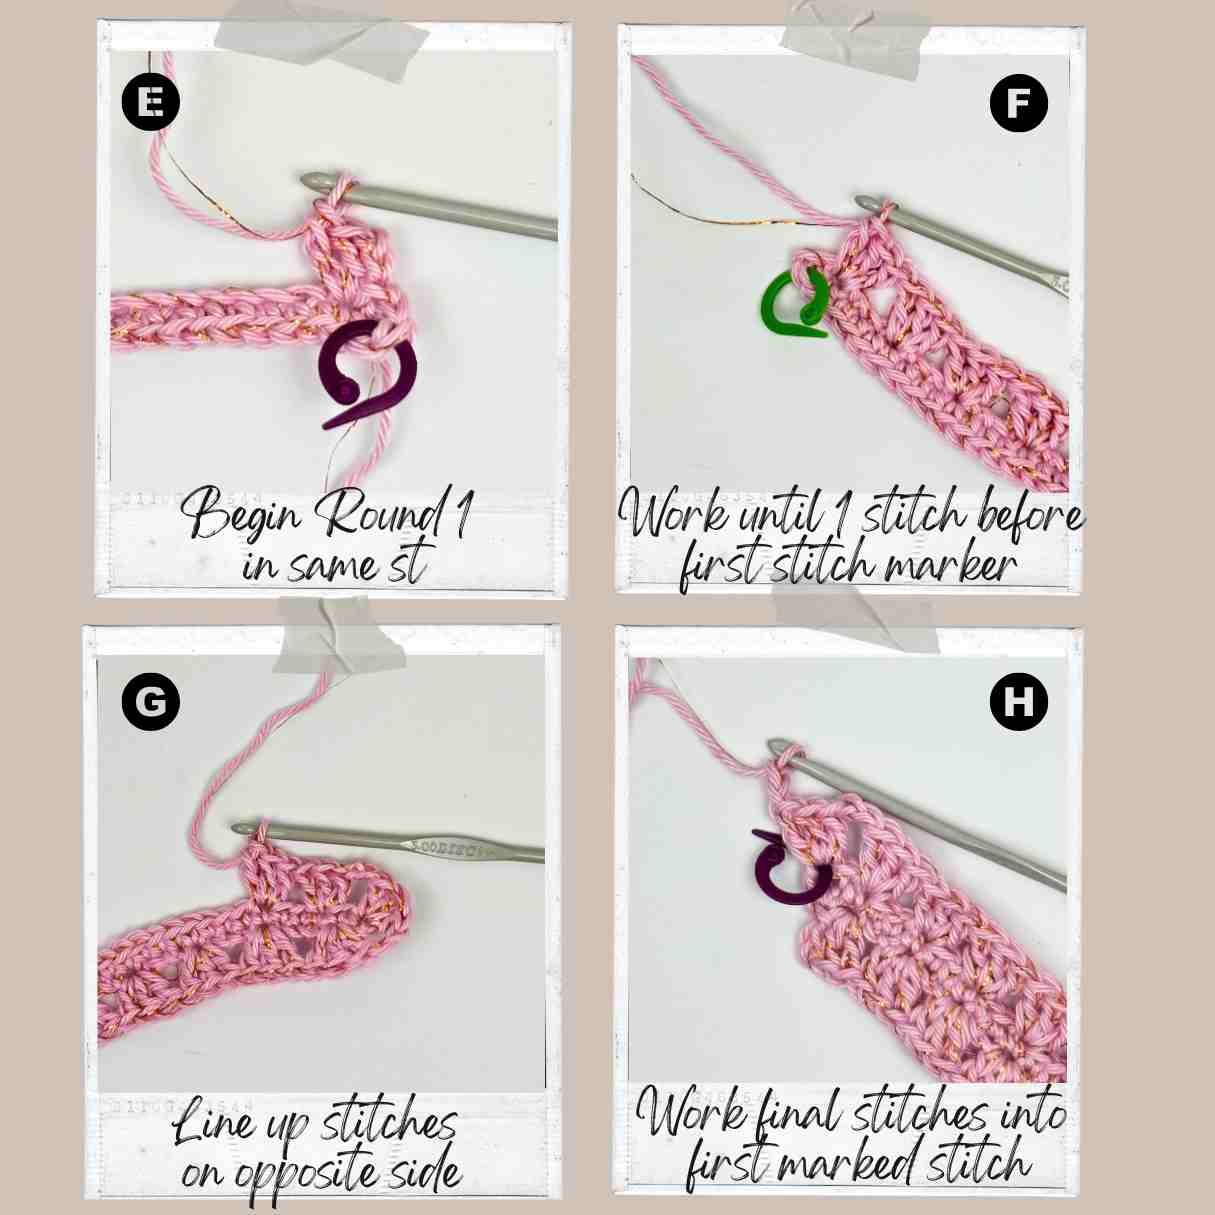
- Ch3 and 2dc in same st (see image E),
- [skip 2 sts, 3dc in next st] 10 times (see image F),
- ch2 for corner, skip last st and work 3dc in the marked st, ch2 for corner,
- now work along opposite edge of stitches, making sure to line up your stitches on opposite sides of the Foundation Row (see image G for placement of stitches), skip next st, 3dc in next st, [skip 2 sts, 3dc in next st] 10 times,
- ch2 for corner, skip next st, 3dc in next marked st (see image H), ch2 for corner,
- skip next st, then slst in top of beginning ch3 to join.
- Fasten off, then you can remove the stitch markers. (24 3dc-groups and 4 x ch2-sps).
Important Note: All of your dc-groups along each long sides should be lined up and opposite each other along the foundation row, with 1 x 3dc-group at each end of the bookmark, 11 x 3dc-groups along each side, and 4 x ch2-sps for corners.
Round 2:
Hold bookmark lengthways, with short end at top, then join next colour with slst to right-hand corner ch2-sp. To make it easier to follow the pattern, I have separated the round into bullet points:
- [Ch3, 2dc, ch2, 3dc] in same sp, ch1, [3dc, ch2, 3dc] in next corner ch2-sp (see image I),
- **now working along the long edge, [skip next 3dc-group, 3dc in next sp between dc-groups] 5 times, ch1, [skip next 3dc-group, 3dc in next sp between dc-groups] 5 times**,
- [3dc, ch2, 3dc] in next corner sp, ch1, [3dc, ch2, 3dc] in next corner sp,
- rep from ** to ** once more (see image J),
- slst in top of beginning ch3.
- Fasten off. (28 3dc-groups, 4 x ch1-sps, and 4 x ch2-sps).
Note: The ch1 at the centre point of each side is needed to create an odd number stitches along the sides for the following rounds.
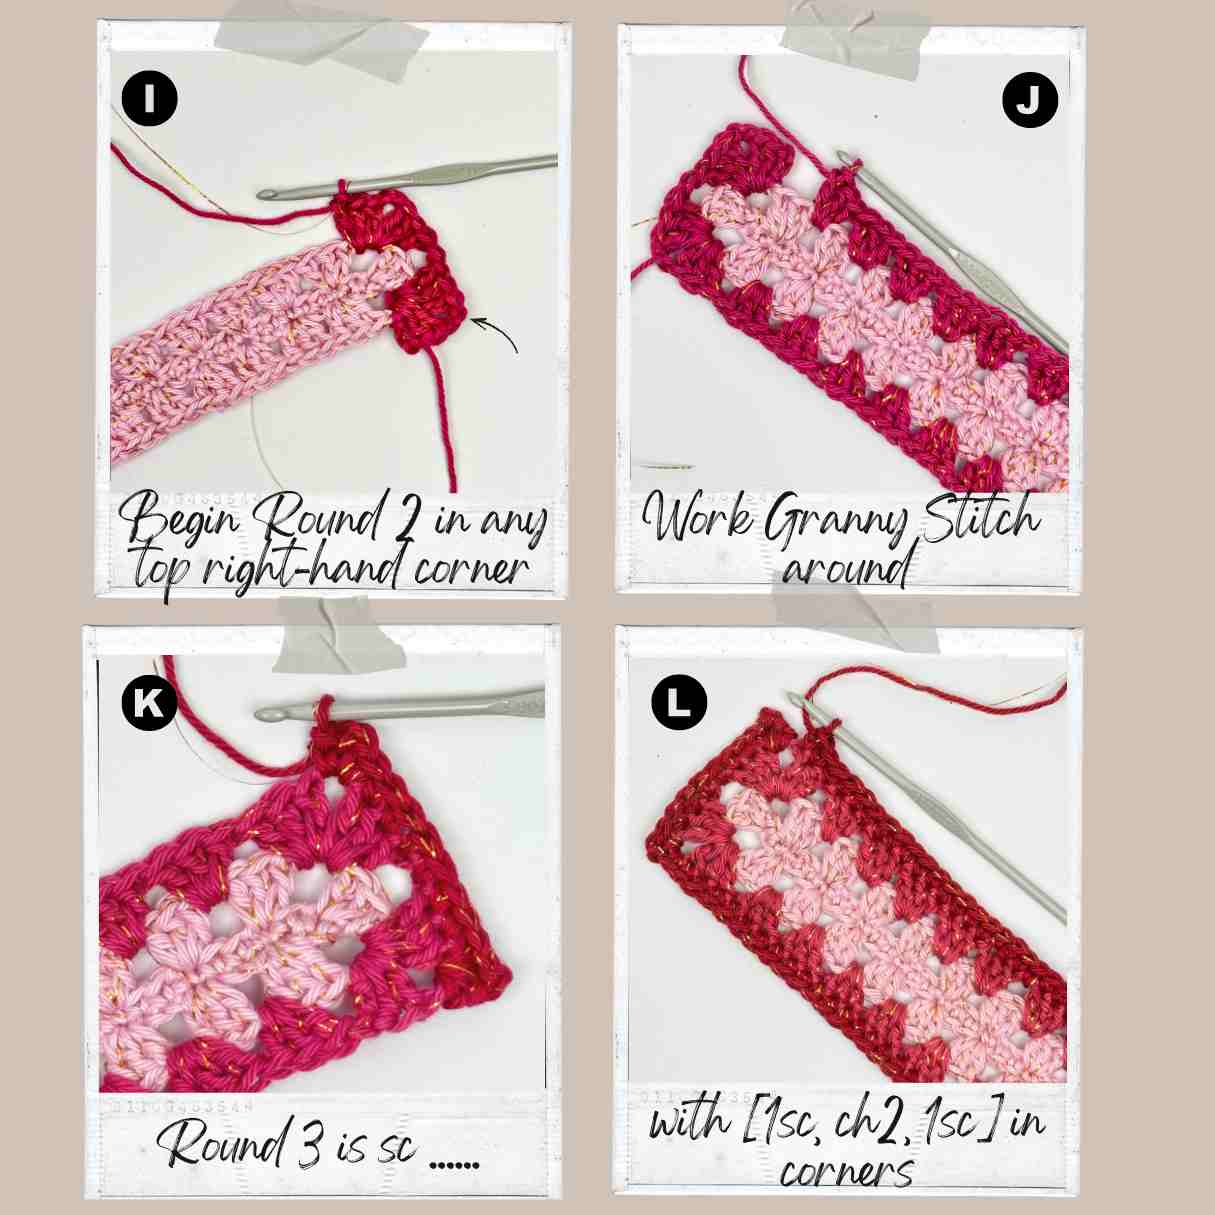
Round 3:
Hold bookmark lengthways, with short end at top, and join next colour with slst to right-hand corner ch2-sp. To make it easier to follow the pattern, I have separated the round into bullet points
- Ch1 (does not count as a st),
- **[1sc, ch2, 1sc] in corner sp, 1sc in each st and ch1-sp until you reach next corner, [1sc, ch2, 1sc] in corner ch2-sp (see image K above),
- now working along the long edge, 1sc in each st to centre ch1-sp, 1sc in ch1-sp, 1sc in each st to next corner**;
- rep from ** to ** once more (see image L),
- slst in top of first sc, slst in next st, slst into corner ch2-sp.
- Do not fasten off (9 sc along each short edge, 39 sc along each long edge, and 4 x ch2-sps for corners).
Round 4:
Change to US E/4 (3.5mm) hook for this round because the stitch is a tighter stitch. To make it easier to follow the pattern, I have separated the round into bullet points:
- With larger hook, ch1 (does not count as a st),
- **[2sc, ch2, 2sc] in corner space, [ch1, skip 1 st, 1sc in next st] 4 times, ch1, skip next st, [2sc, ch2, 2sc] in corner space, [ch1, skip 1 st, 1sc in next st] to last st before next corner, ch1, skip next st**;
- rep from ** to ** once more.
- Slst in first sc to join.
- Fasten off then weave in all ends.
- Pin flat to a towel or ironing board, with right side uppermost, then steam with a hand-held steamer or iron, and leave to dry before removing pins.
- If desired, add thin tassels to one short edge.
- I used 3 strands of yarn for each of my tassels. Fold at centre and use hook to pull folded end through corner stitch, to make a loop. Thread the cut ends of yarn through the loop made, and knot.
- I then took a spare strand and wrap it tightly, and neatly, around the knot to secure it. Tie ends tightly, and weave into the tassel.
Instructions (UK crochet terms)
With 3mm (US D/3) hook and chosen yarn, make a slip knot onto hook, then ch35.
Foundation Row: Skip 1ch (does not count as a st), 1dc in next st and place a st marker in this first st (see Image A for placement), 1dc in next 32 ch, 3dc in last ch. Place a stitch marker in the centre stitch of last 3dc (see image B for placement). The two stitch markers show each end stitch of the Foundation Row. (36 sts)
Do not turn work, instead rotate work slightly and continue to work along the bottom loops of the chain stitches. Slst in next st along bottom edge (see image C).
You are now in the correct place to begin Round 1 (see Image D).
Now you will work in rounds.
Round 1:
To make it easier to follow the pattern, I have separated the round into bullet points:
- Ch3 and 2tr in same st (see image E),
- [skip 2 sts, 3tr in next st] 10 times (see image F),
- ch2 for corner, skip last st and work 3tr in the marked st, ch2 for corner,
- now work along opposite edge of stitches, making sure to line up your stitches on opposite sides of the Foundation Row (see image G for placement of stitches), skip next st, 3tr in next st, [skip 2 sts, 3tr in next st] 10 times,
- ch2 for corner, skip next st, 3tr in next marked st (see image H), ch2 for corner,
- skip next st, then slst in top of beginning ch3 to join.
- Fasten off, then you can remove the stitch markers. (24 3tr-groups and 4 x ch2-sps).
Important Note: All of your treble groups along the sides should be lined up and opposite each other along the foundation round, with 1 x 3tr-group at each end of the bookmark, 11 x 3tr-groups along each side, and 4 x ch2-sps for corners.
Round 2:
Hold bookmark lengthways, with short end at top, then join next colour with slst to right-hand corner ch2-sp. To make it easier to follow the pattern, I have separated the round into bullet points:
- [Ch3, 2tr, ch2, 3tr] in same sp, ch1, [3tr, ch2, 3tr] in next corner ch2-sp (see image I),
- **now working along the long edge, [skip next 3tr-group, 3tr in next sp between tr-groups] 5 times, ch1, [skip next 3tr-group, 3tr in next sp between tr-groups] 5 times**,
- [3tr, ch2, 3tr] in next corner sp, ch1, [3tr, ch2, 3tr] in next corner sp,
- rep from ** to ** once more (see image J),
- slst in top of beginning ch3.
- Fasten off. (28 3tr-groups, 4 x ch1-sps, and 4 x ch2-sps).
Note: The ch1 at the centre point of each side is needed to create an odd number stitches along the sides for the following rounds.
Round 3:
Hold bookmark lengthways, with short edge at top, and join next colour with slst to right-hand corner ch2-sp. To make it easier to follow the pattern, I have separated the round into bullet points
- Ch1 (does not count as a st),
- **[1dc, ch2, 1dc] in corner sp, 1dc in each st and ch1-sp until you reach next corner, [1dc, ch2, 1dc] in corner ch2-sp (see image K),
- now working along the long edge, 1dc in each st to centre ch1-sp, 1dc in ch1-sp, 1dc in each st to next corner**;
- rep from ** to ** once more (see image L),
- slst in top of first dc, slst in next st, slst into corner ch2-sp.
- Do not fasten off (9 dc along each short edge, 39 dc along each long edge, and 4 x ch2-sps for corners).
Round 4:
Change to 3.5mm (US E/4) hook for this round because the stitch is a tighter stitch. To make it easier to follow the pattern, I have separated the round into bullet points:
- Ch1 (does not count as a st),
- **[2dc, ch2, 2dc] into corner space, [ch1, skip 1 st, 1dc in next st] 4 times, ch1, skip next st [2dc, ch2, 2dc] in corner space, [ch1, skip 1 st, 1dc in next st] to last st before next corner, ch1, skip next st**;
- rep from ** to ** once more, then slst in first dc to join.
- Fasten off then weave in all ends.
- Pin flat to a towel or ironing board, with right side uppermost, then steam with a hand-held steamer or iron. Leave to dry then remove pins.
- If desired, add thin tassels to one short edge.
- I used 3 strands of yarn for each of my tassels. Fold at centre and use hook to pull folded end through corner stitch, to make a loop. Thread the cut ends of yarn through the loop made, and knot.
- I then took a spare strand and wrap it tightly, and neatly, around the knot to secure it. Tie ends tightly, and weave into the tassel.
Share your crochet bookmark creations
If you love this pattern and make lots of bookmarks, then I’d love to see your finished bookmarks! Tag me on Instagram [@knitcrochetcreate] so I can admire your colour combinations and see what you make with them.
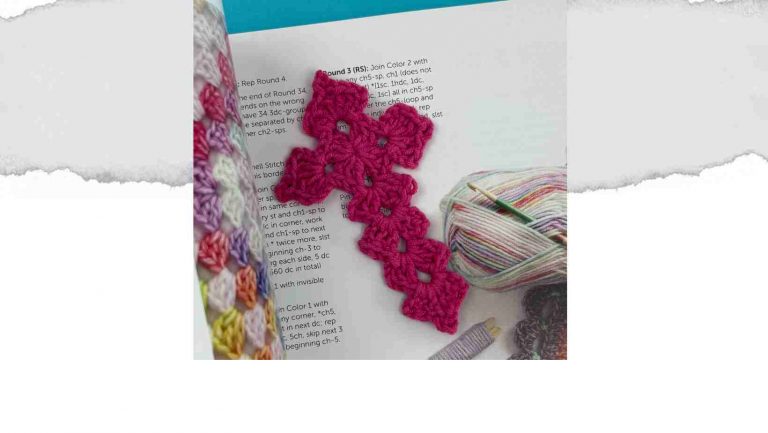
If you enjoyed this easy crochet bookmark, check out my other stash-busting projects like the Easy Crochet Cross Bookmark Pattern – or my Easy Scarf Crochet Pattern – both free on the blog.

Explore more yarn stash ideas over on my Pinterest board here.
Let's keep in touch!
I'd love to chat more.
Sign up for my newsletter and receive a weekly dose of crafting inspiration, featuring the latest trends, tips, and projects to fuel your creativity.


I'm so sorry, I'm really stupid. I'm completely wrong in what I said. Please delete the comment I made about the wrong stitch terminology. I was completely wrong and misread it. I do apologise. Sarah
Thanks Sarah - I appreciate this - I did panic but then saw your second email, so that was a relief. It's really hard work writing these free blog posts, but I do everything in my power to make sure they are 100% correct so that they are easy for you to follow and make. I do hope you enjoy crocheting your bookmarks. They're a little bit addictive but so much fun. Lynne x