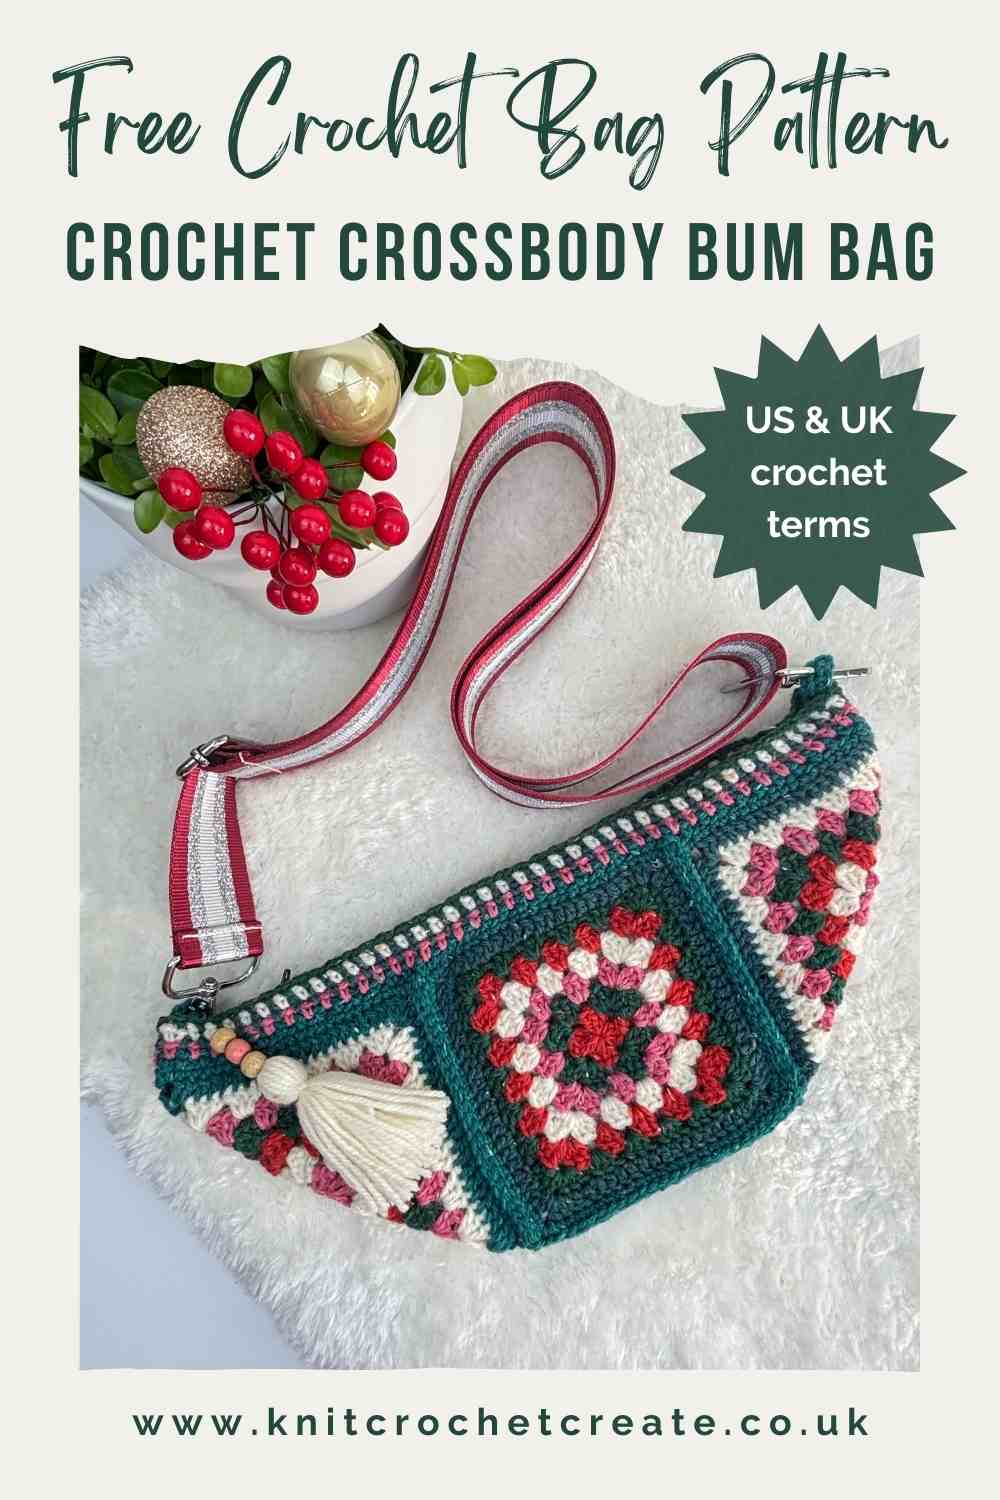
Crochet Crossbody Bag Pattern
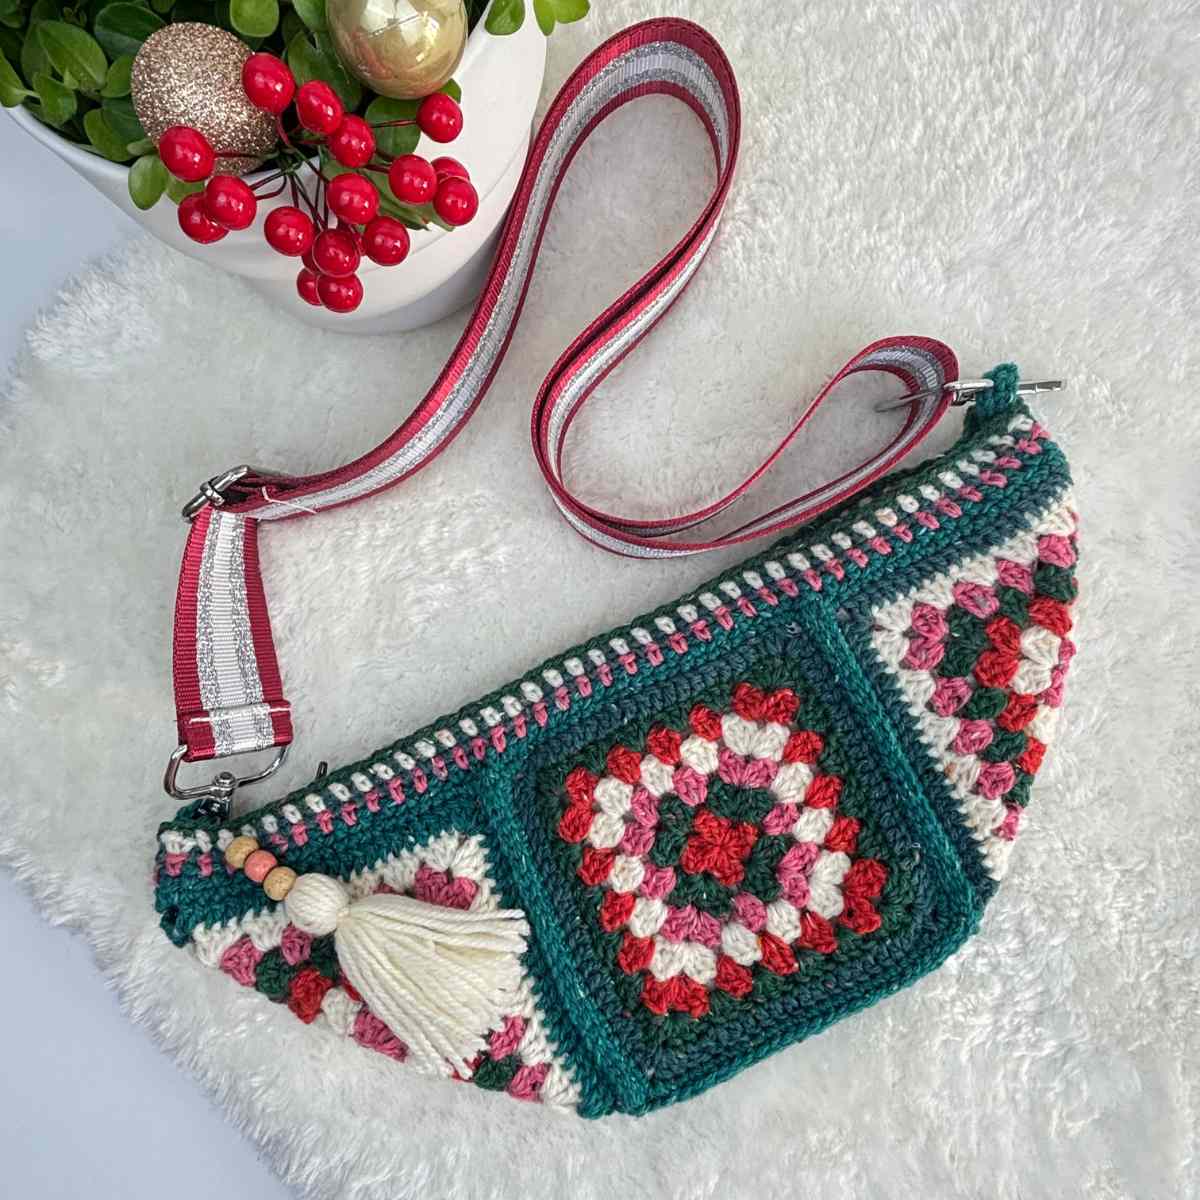
With this Granny Square Crochet Crossbody Bum Bag Pattern you can make a simple but useful over-the-shoulder bag. Often called a Granny Square Bum Bag, or Granny Square Fanny Pack, my crochet crossbody bag is a quick make, and perfect for using up stash yarn. If you love granny squares as much as I do, then this free crochet pattern is perfect for you.
You can wear it as an everyday bag, use it for small essentials, or gift it to someone who loves handmade accessories. It’s lightweight, practical, and a great way to turn leftover yarn stash into something you’ll use again and again. I've even included a simple method for a lining too.
About My Crochet Crossbody Bag Pattern
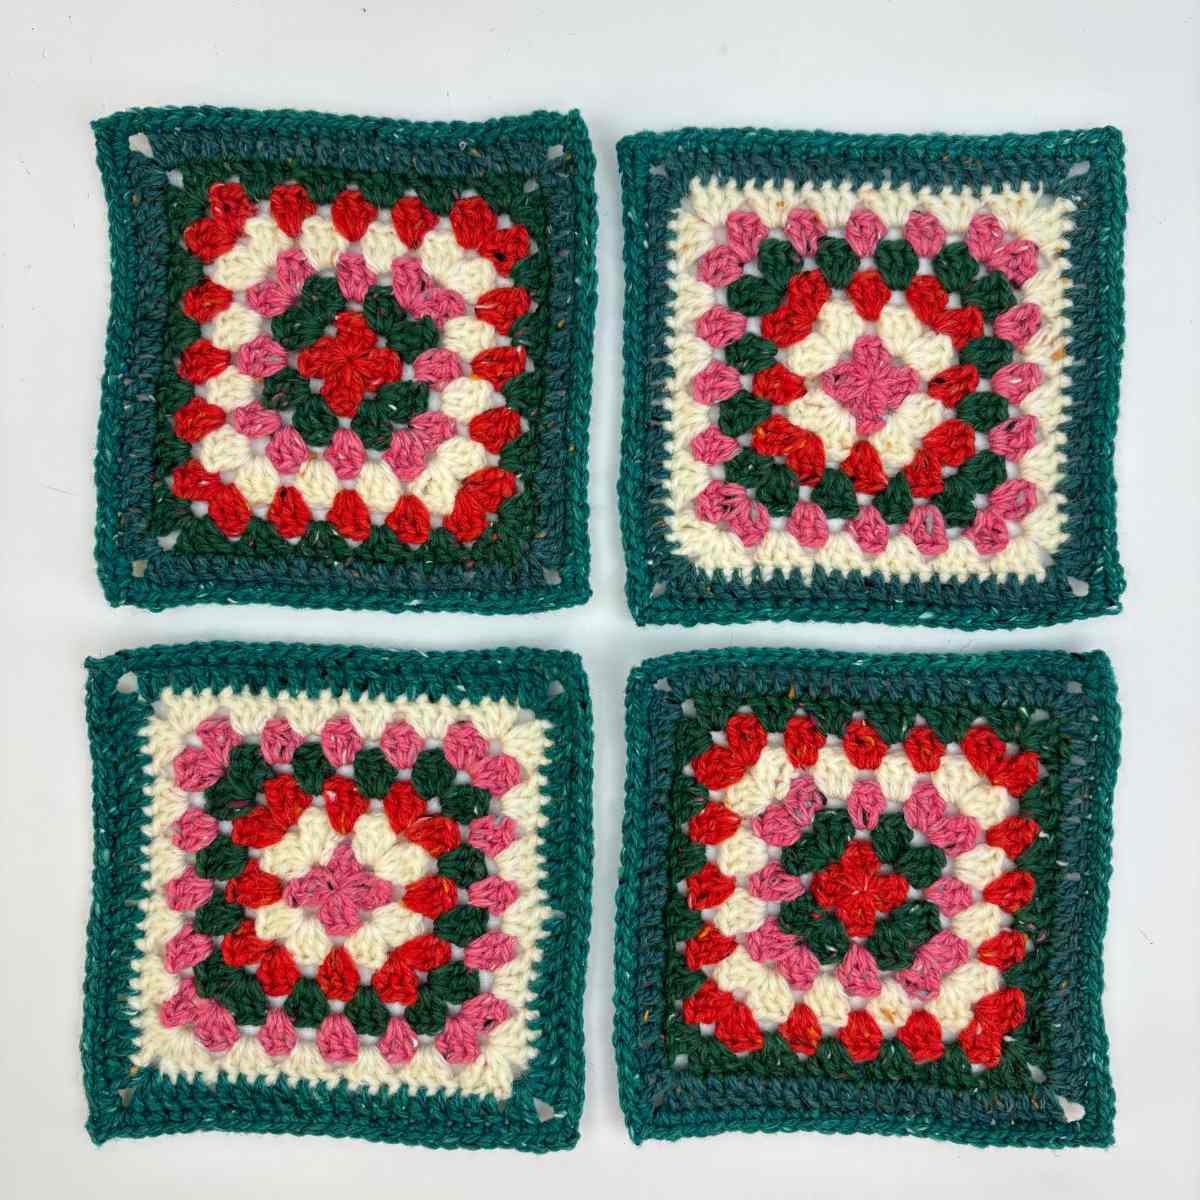
This festive boho-style bum bag is the final project in the Stash to Sparkle CAL Blog Hop (see below for blog hop details). First you make four crochet granny squares, then you join them together in a clever way to form a crescent-shaped bag.
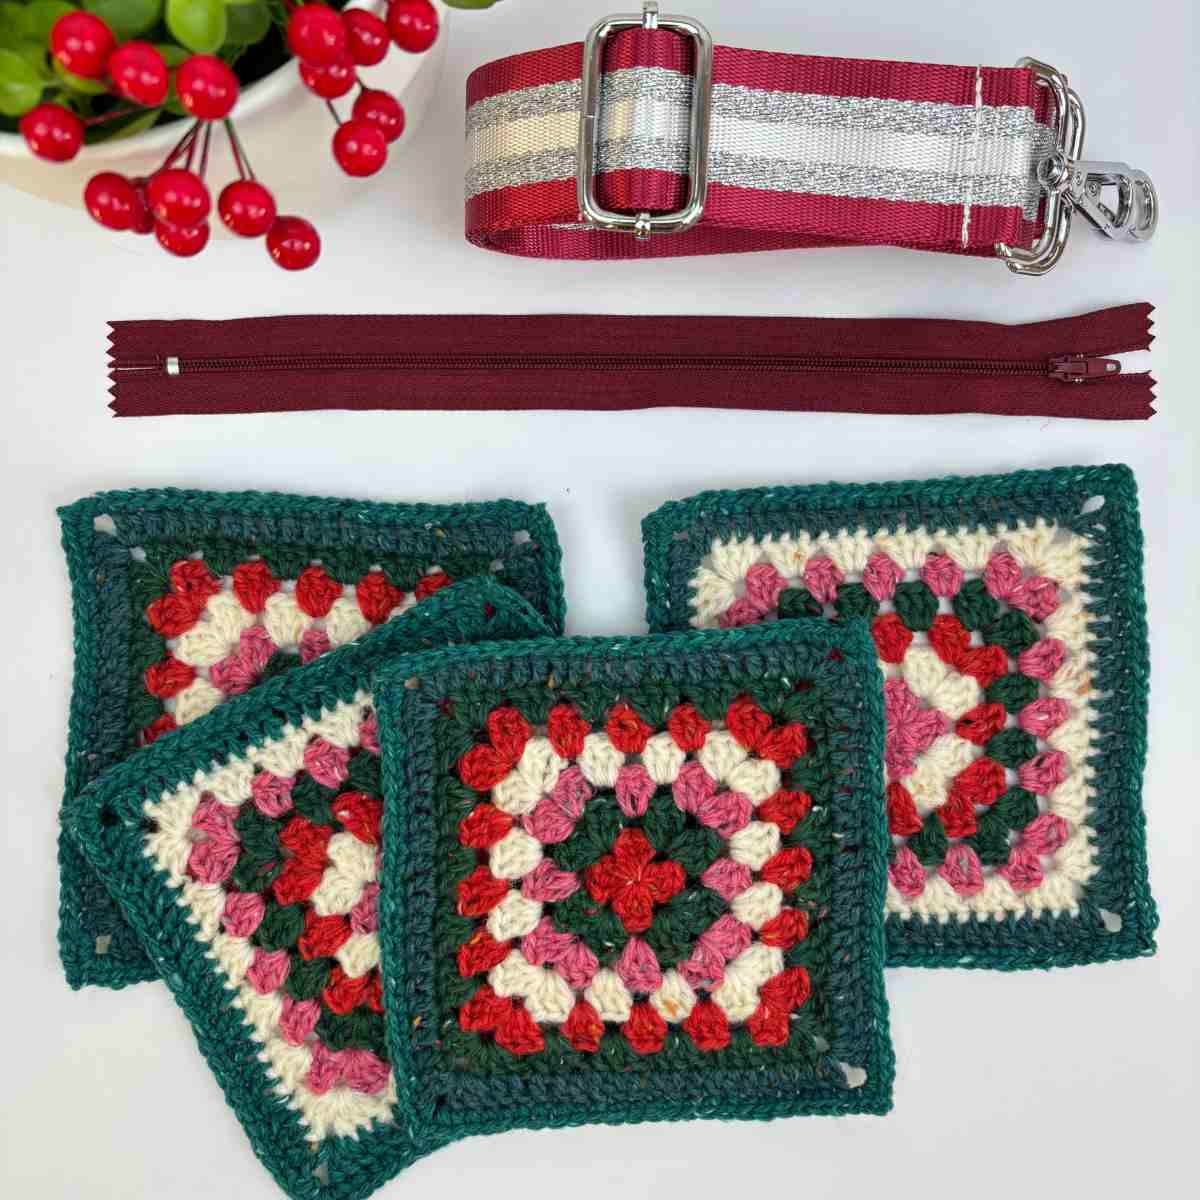
Once the squares are made and joined, a zip is sewn into the top for a neat finish, and finally, a shop-bought strap is attached. The strap gives the bag a professional feel without needing specialist hardware, but you can also crochet a strap if preferred (instructions are included). If desired you can also line it, which I recommend. Sewing is done by hand.
I already had a few shop-bought bag handles in my stash, which were inexpensive (this one cost £1.50 from Matalan). I also found a zip in my stash, and these are inexpensive too, should you need to buy one. You also recycle zips from unwanted items that too worn out to be donated to charity or thrift shops.
The simple construction makes it a beginner-friendly project, but it’s still satisfying for experienced crocheters who enjoy a fast and relaxing make.
Colours I've used
I’ve taken inspiration from this week's colour palette, Winterberry Frost, to create a festive accessory in dark greens, deep teal, red, off-white and a pop of pink. But you can use any colours you like — go bright and cheerful, choose neutrals, or mix up all those leftover mini balls you’ve been saving.

The Stash To Sparkle CAL Blog Hop
The Stash to Sparkle CAL is a 4-week blog hop running through November, with 8 free stash-busting crochet projects shared between Annie Design Crochet and myself. You can read all about it in the blog post here: Stash To Sparkle CAL.

Share Your Makes!
I’d love to see your version of the Crochet Crossbody Bag Pattern! Share your finished bag on Instagram, and tag me @knitcrochetcreate. Don’t forget to use the hashtag #StashToSparkleCAL so I can admire your creations.
Copyright
Please read the copyright terms, which apply globally, before downloading your pattern:
The contents of this page, including the pattern instructions and images, are published under copyright to me ©Lynne Rowe 2021 under my brand Knit Crochet Create®. Contents are for your own personal use only. Feel free to sell items made from this pattern for charity fundraising purposes, or to gift to family and friends. But selling small numbers for profit is only allowed with permission. Please email lynne@knitcrochetcreate.com for permission to sell in small numbers. By downloading or using this pattern, you therefore agree to these terms.
Materials Needed For Your Crochet Crossbody Bag
Yarn
- Oddments of double knitting (light worsted weight) yarn in seven different colours of choice: approximately 70-80g in total. It's the perfect project for using up yarn stash oddments.
- 3.5mm (US E/4) crochet hook.
- Yarn needle for weaving in ends.
- Optional shop-bought strap (you can crochet one instead with stash yarn).
- 8-inch or 10-inch zipper.
- Sewing needle and thread.
- Optional lining material — 18-inch square of fabric.
Measurements For Finished Bag
- Approximately 34cm (13.5inch) wide at top, and 15cm (6inch) deep.
Tension
- Note that tension is not critical for this project, as it doesn't matter if your bag turns out a different size.
CROCHET CROSSBODY BAG PATTERN BEGINS
For the individual squares, the US pattern is given first, followed by UK pattern (scroll down the page).
Crochet Crossbody Bag Pattern in US crochet terms
Colours for motifs
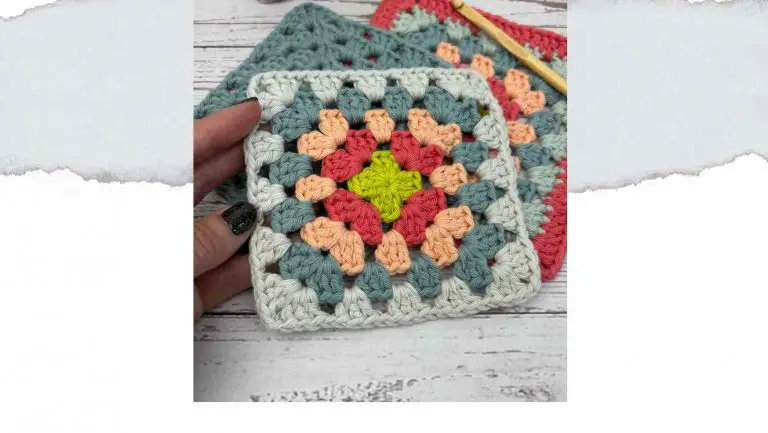
Make 4 Granny Squares using any combinations of colours for Rounds 1-6. For Final Edging Round use the same colour for all 4 squares, so that your joining is invisible.
Granny Square Motif (make 4)
With chosen colour for each round, ch5, then slst in first of these 5ch to form a ring. Or you can start with a magic ring.
Granny Square Rounds 1-6
Round 1 (right side): Ch3 (counts as 1dc), 2dc in ring, ch2, [3dc in ring, ch2] 3 times, insert hook under two loops of the third ch of beginning ch3, then slst to join the round. Fasten off. (4 x 3dc-group and 4 x corner ch2-sps)
Round 2: Join next colour with slst to any corner sp. Ch3 (counts as 1dc), [2dc, ch2, 3dc] in same corner sp, *[3dc, ch2, 3dc] in next corner sp; repeat from * twice more, slst in third ch of beginning ch3, then fasten off. (8 x 3dc-groups, 4 x corner ch2-sps)
Round 3: Join next colour with slst to any corner sp. Ch3 (counts as 1dc), [2dc, ch2, 3dc] in same corner sp, 3dc in next sp between 3dc-groups, *[3dc, ch2, 3dc] in next corner sp, 3dc in next sp between 3dc-groups; repeat from * twice more, slst in third ch of beginning ch3, then fasten off. (12 x 3dc-groups (3 along each side), 4 x corner ch2-sps)
Round 4: Join next colour with slst to any corner sp. Ch3 (counts as 1dc), [2dc, ch2, 3dc] in same corner sp, [3dc in next sp between 3dc-groups] to next corner, *[3dc ch2, 3dc] into next corner sp, [3dc in next sp between 3dc-groups] to next corner; repeat from * twice more, slst in third ch of beginning ch3, then fasten off. (16 3dc-groups (4 along each side), 4 x corner ch2-sps)
Round 5: With next colour, work as Round 4. (20 3dc-groups (5 along each side), 4 x corner ch2-sps)
Round 6: With next colour, work as Round 4. (24 3dc-groups (6 along each side), 4 x corner ch2-sps)

Solid Granny Round
Round 7: Join next colour with slst to any corner. Ch3 (counts as 1dc), [1dc, ch2, 2dc] in same corner sp, 1dc in every dc to next corner, *[2dc, ch2, 2dc] in next corner sp, 1dc in every dc to next corner; repeat from * twice more, slst in third ch of beginning ch3, then fasten off. (22 dc along each side, 4 x corner ch2-sps)
Final Edging Round
Edging Round: Join edging colour with slst to any corner. Ch1 (does not count as a st), [2sc, ch2, 2sc] in same corner sp, 1sc in every dc to next corner, *[2sc, ch2, 2sc] in next corner sp, 1sc in every dc to next corner; repeat from * twice more, slst in first st, then fasten off. (26 sc along each side, 4 x corner ch2-sps). Weave in all ends on wrong side of work.
NOW SCROLL DOWN TO JOINING MOTIFS SECTION
Crochet Crossbody Bag Pattern in UK crochet terms
Colours for motifs
Make 4 Granny Squares using any combinations of colours for Rounds 1-6. For Final Edging Round use the same colour for all 4 squares, so that your joining is invisible.
Granny Square Motif (make 4)
With chosen colour for each round, ch5, then slst in first of these 5ch to form a ring. Or you can start with a magic ring.
Granny Square Rounds 1-6
Round 1 (right side): Ch3 (counts as 1tr), 2tr in ring, ch2, [3tr in ring, ch2] 3 times, insert hook under two loops of the third ch of beginning ch3, then slst to join the round. Fasten off. (4 x 3tr-group and 4 x corner ch2-sps)
Round 2: Join next colour with slst to any corner sp. Ch3 (counts as 1tr), [2tr, ch2, 3tr] in same corner sp, *[3tr, ch2, 3tr] in next corner sp; repeat from * twice more, slst in third ch of beginning ch3, then fasten off. (8 x 3tr-groups, 4 x corner ch2-sps)
Round 3: Join next colour with slst to any corner sp. Ch3 (counts as 1tr), [2tr, ch2, 3tr] in same corner sp, 3tr in next sp between 3tr-groups, *[3tr, ch2, 3tr] in next corner sp, 3tr in next sp between 3tr-groups; repeat from * twice more, slst in third ch of beginning ch3, then fasten off. (12 x 3tr-groups (3 along each side), 4 x corner ch2-sps)
Round 4: Join next colour with slst to any corner sp. Ch3 (counts as 1tr), [2tr, ch2, 3tr] in same corner sp, [3tr in next sp between 3tr-groups] to next corner, *[3tr, ch2, 3tr] into next corner sp, [3tr in next sp between 3tr-groups] to next corner; repeat from * twice more, slst in third ch of beginning ch3, then fasten off. (16 3tr-groups (4 along each side), 4 x corner ch2-sps)
Round 5: With next colour, work as Round 4. (20 3tr-groups (5 along each side), 4 x corner ch2-sps)
Round 6: With next colour, work as Round 4. (24 3tr-groups (6 along each side), 4 x corner ch2-sps)
Solid Granny Round
Round 7: Join next colour with slst to any corner. Ch3 (counts as 1tr), [1tr, ch2, 2tr] in same corner sp, 1tr in every tr to next corner, *[2tr, ch2, 2tr] in next corner sp, 1tr in every tr to next corner; repeat from * twice more, slst in third ch of beginning ch3, then fasten off. (22 tr along each side, 4 x corner ch2-sps)
Final Edging Round
Edging Round: Join edging colour with slst to any corner. Ch1 (does not count as a st), [2dc, ch2, 2dc] in same corner sp, 1dc in every tr to next corner, *[2dc, ch2, 2dc] in next corner sp, 1dc in every tr to next corner; repeat from * twice more, slst in first st, then fasten off. (26 dc along each side, 4 x corner ch2-sps). Weave in all ends on wrong side of work.
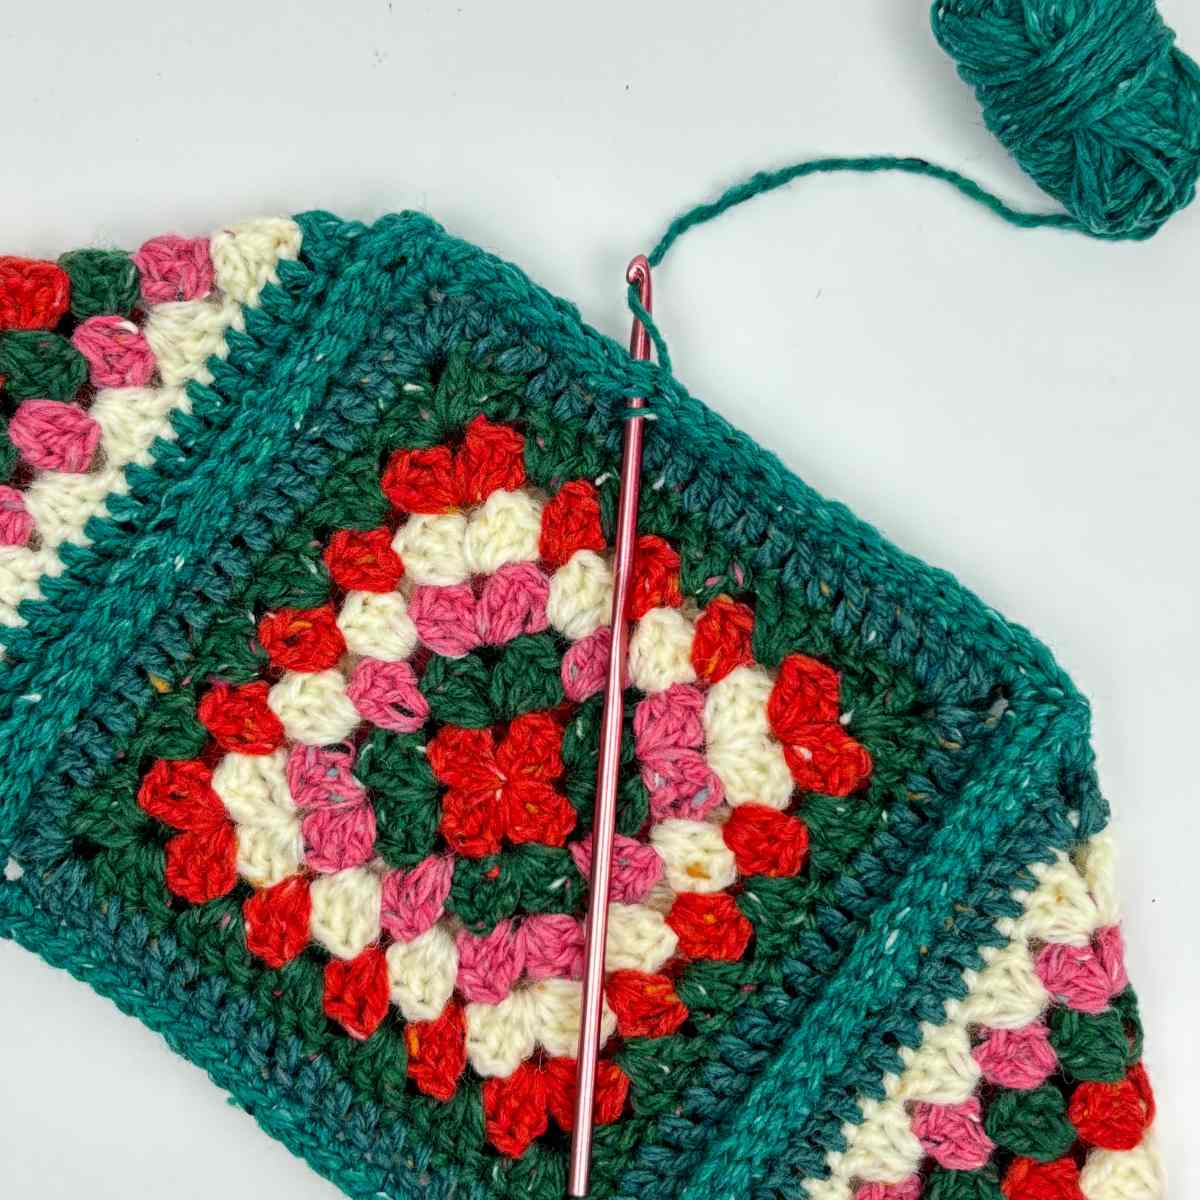
Joining square motifs to create your crochet crossbody bag shape
Using either the whip stitch method or crochet slip stitch, join the squares as below. Note if joining with crochet slip stitch, work through both loops of both stitches, to create a flat join.

- Place front centre square flat with a side square at each side. Join side seams to create a row of 3 squares.
- Flip your row of joined squares the wrong side up.
- Fold up the side squares diagonally, taking bottom right or bottom left corner of each square at fold it to opposite corner to form a triangle.

- Place final square in the centre then join the side seams as before.
- Finally, join the bottom seam in the same way, then weave in all ends.
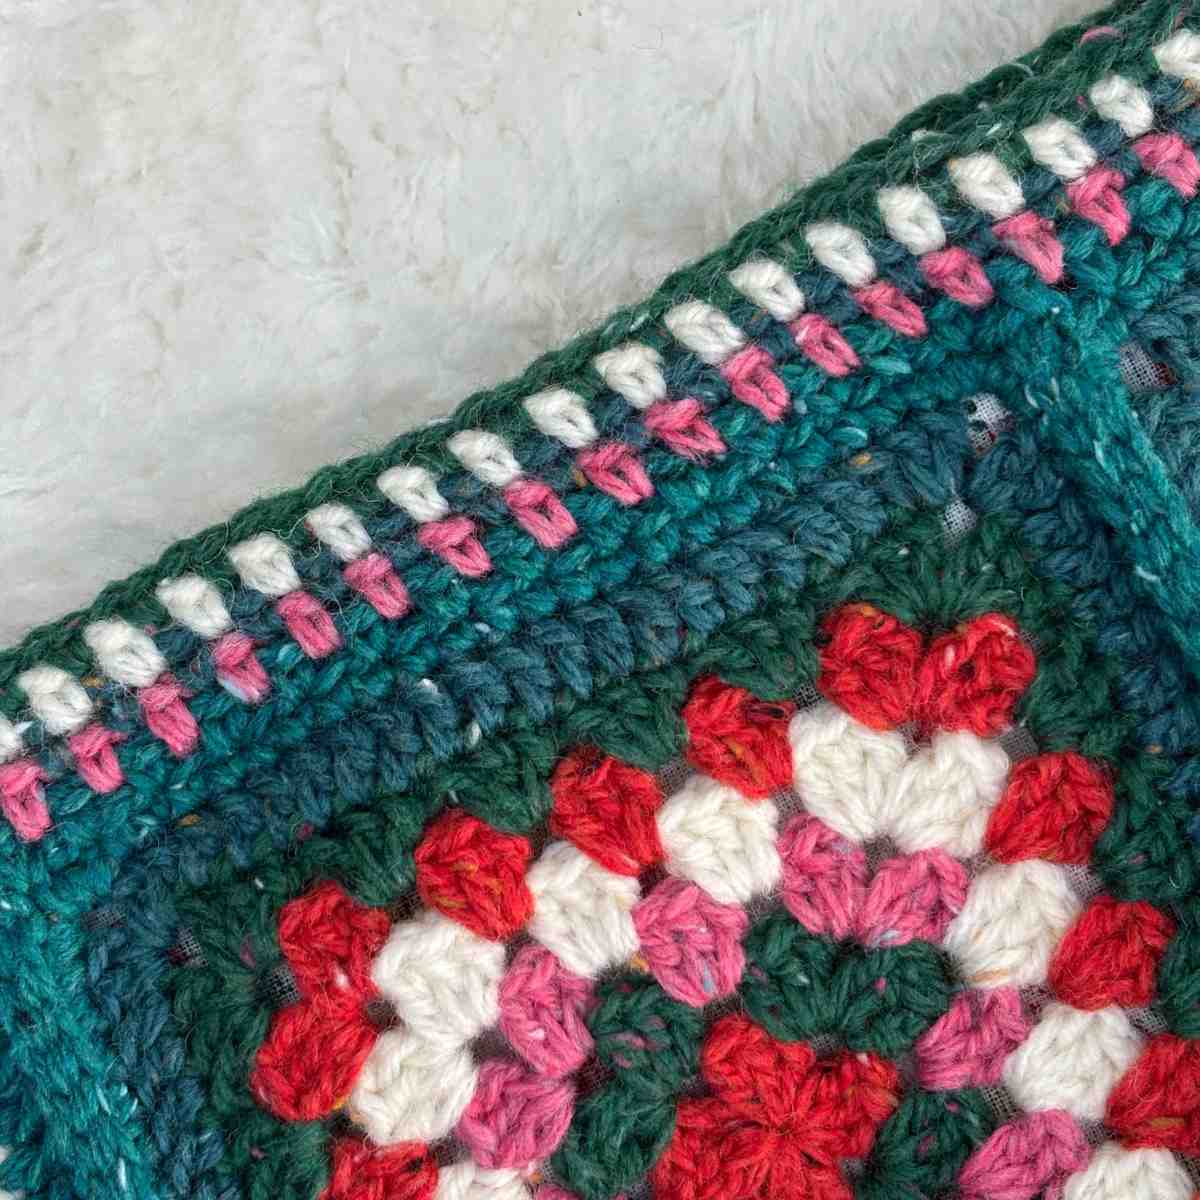
Top Border
The border is worked in moss stitch along the straight edge at top of bag. Join first Edging Colour with a slst to any stitch at one side of top edge.
Round 1 (right side): Ch2 (counts as 1 st and 1 ch), skip 1 st, [1sc (UKdc) in next st, ch1, skip 1 st] to end, slst in first of beginning ch2 then fasten off.
Rounds 2-5: Join next colour in any ch1-sp, then repeat Round 2.
Strap loops (make 2)
NOTE: If you prefer to crochet a strap, do not make 2 straps loops, instead, work as given for strap loop, repeating Row 2 for length desired of strap. Stitch ends of strap to sides of bag.
Row 1: With any colour, ch9, 1sc (UKdc) in second ch from hook, 1sc (UKdc) in each remaining ch to end, then turn. (8 sts)
Row 2: Ch1 (does not count as a st), 1sc (UKdc) in each st to end, then turn. Fasten off and put to one side.
To Finish Your Crochet Crossbody Bag
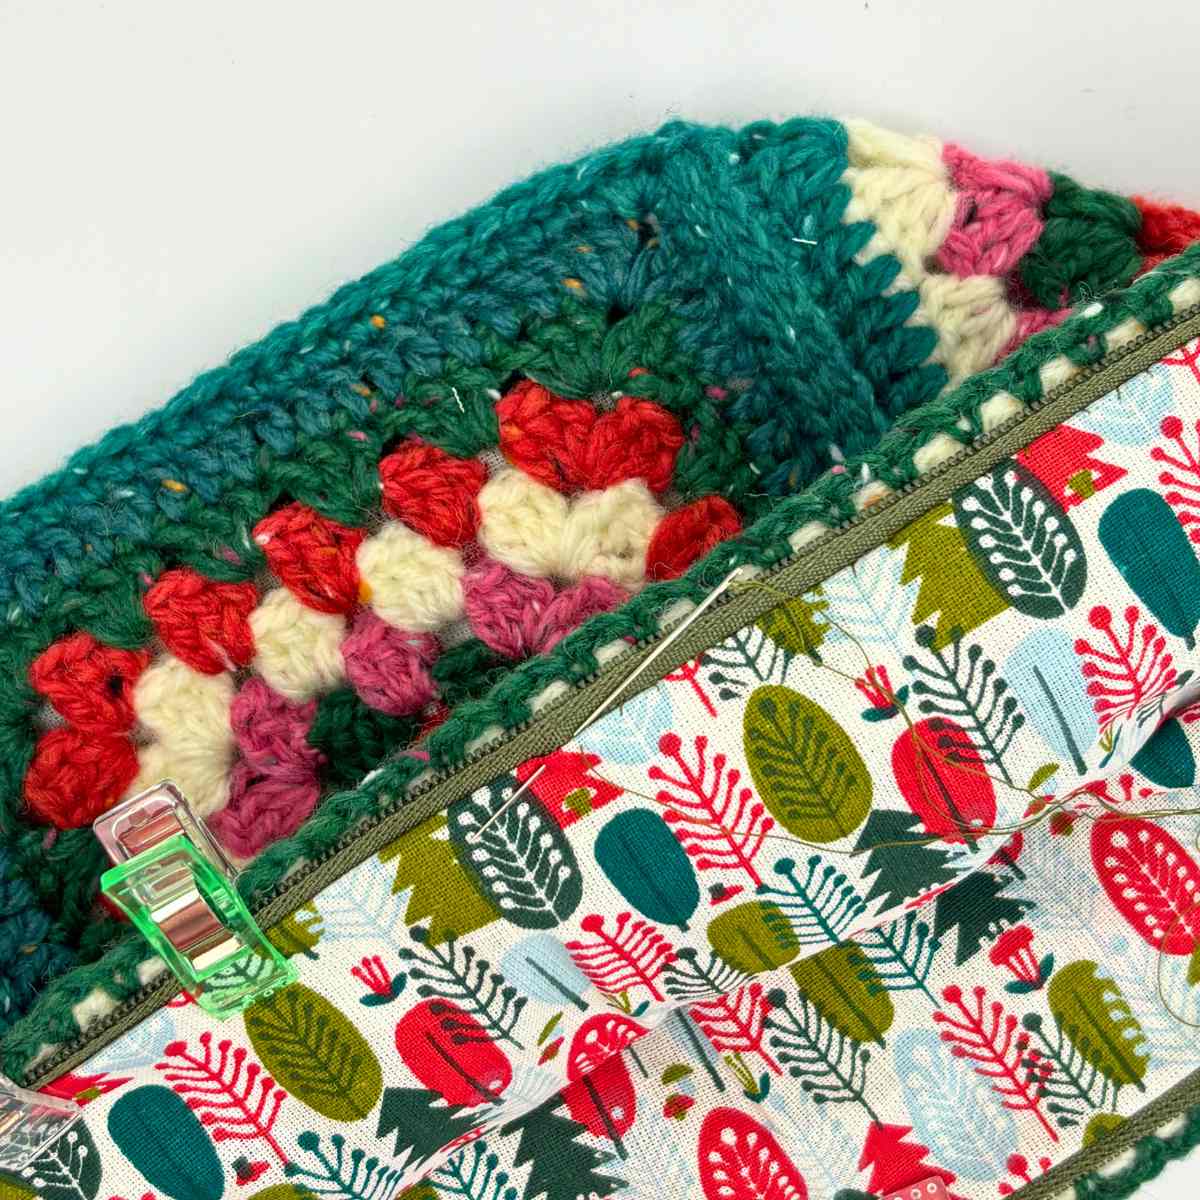
Sew the zip to the inside edge of bag opening. The easiest method is with a sewing needle and small running stitches or back stitch. If desired you can line your bag for a professional finish. Simply use the bag as a template and sew the shaped edges together with wrong sides of fabric outer-most. Fold down the top edge of lining to wrong side and slip stitch the folded edge to the inside edge of the zipper so that the right side of fabric shows inside the bag.
Fold strap loops in half and stitch to inner corner sides of bag. Clip the ends of strap through the loops. Finally, make a little tassel if desired and attached it securely to the border edge.
What Next?
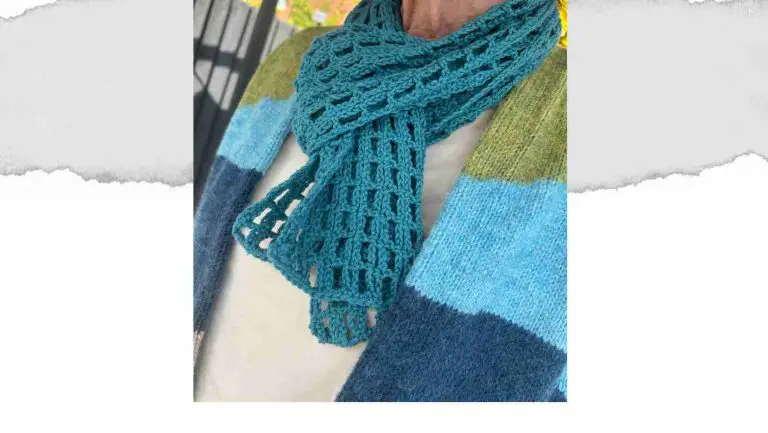
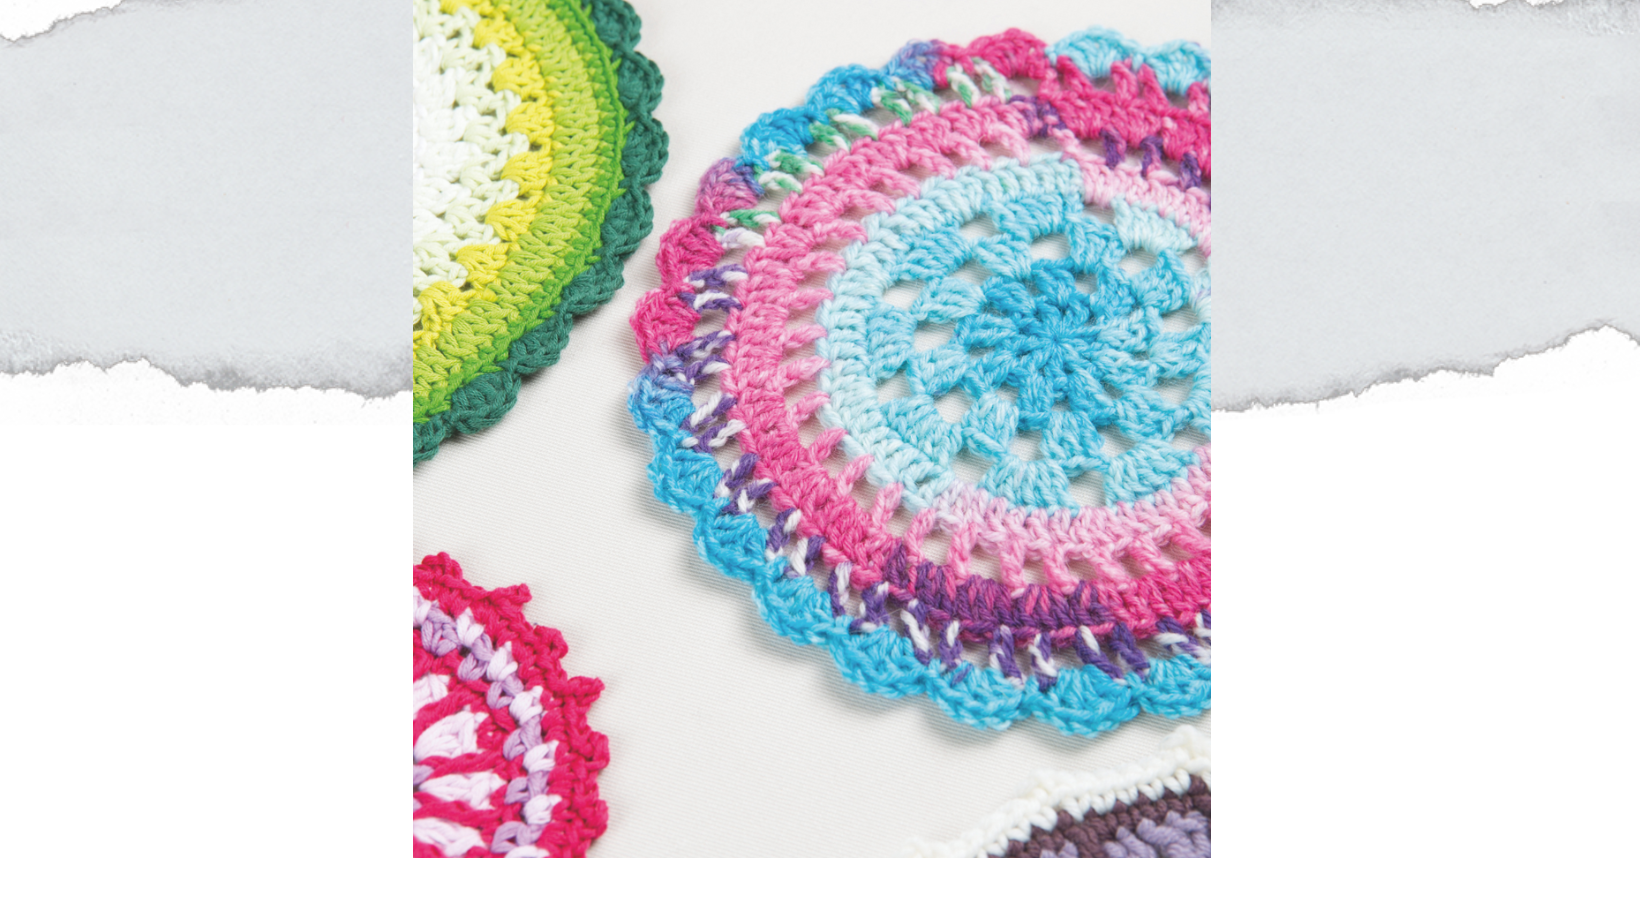
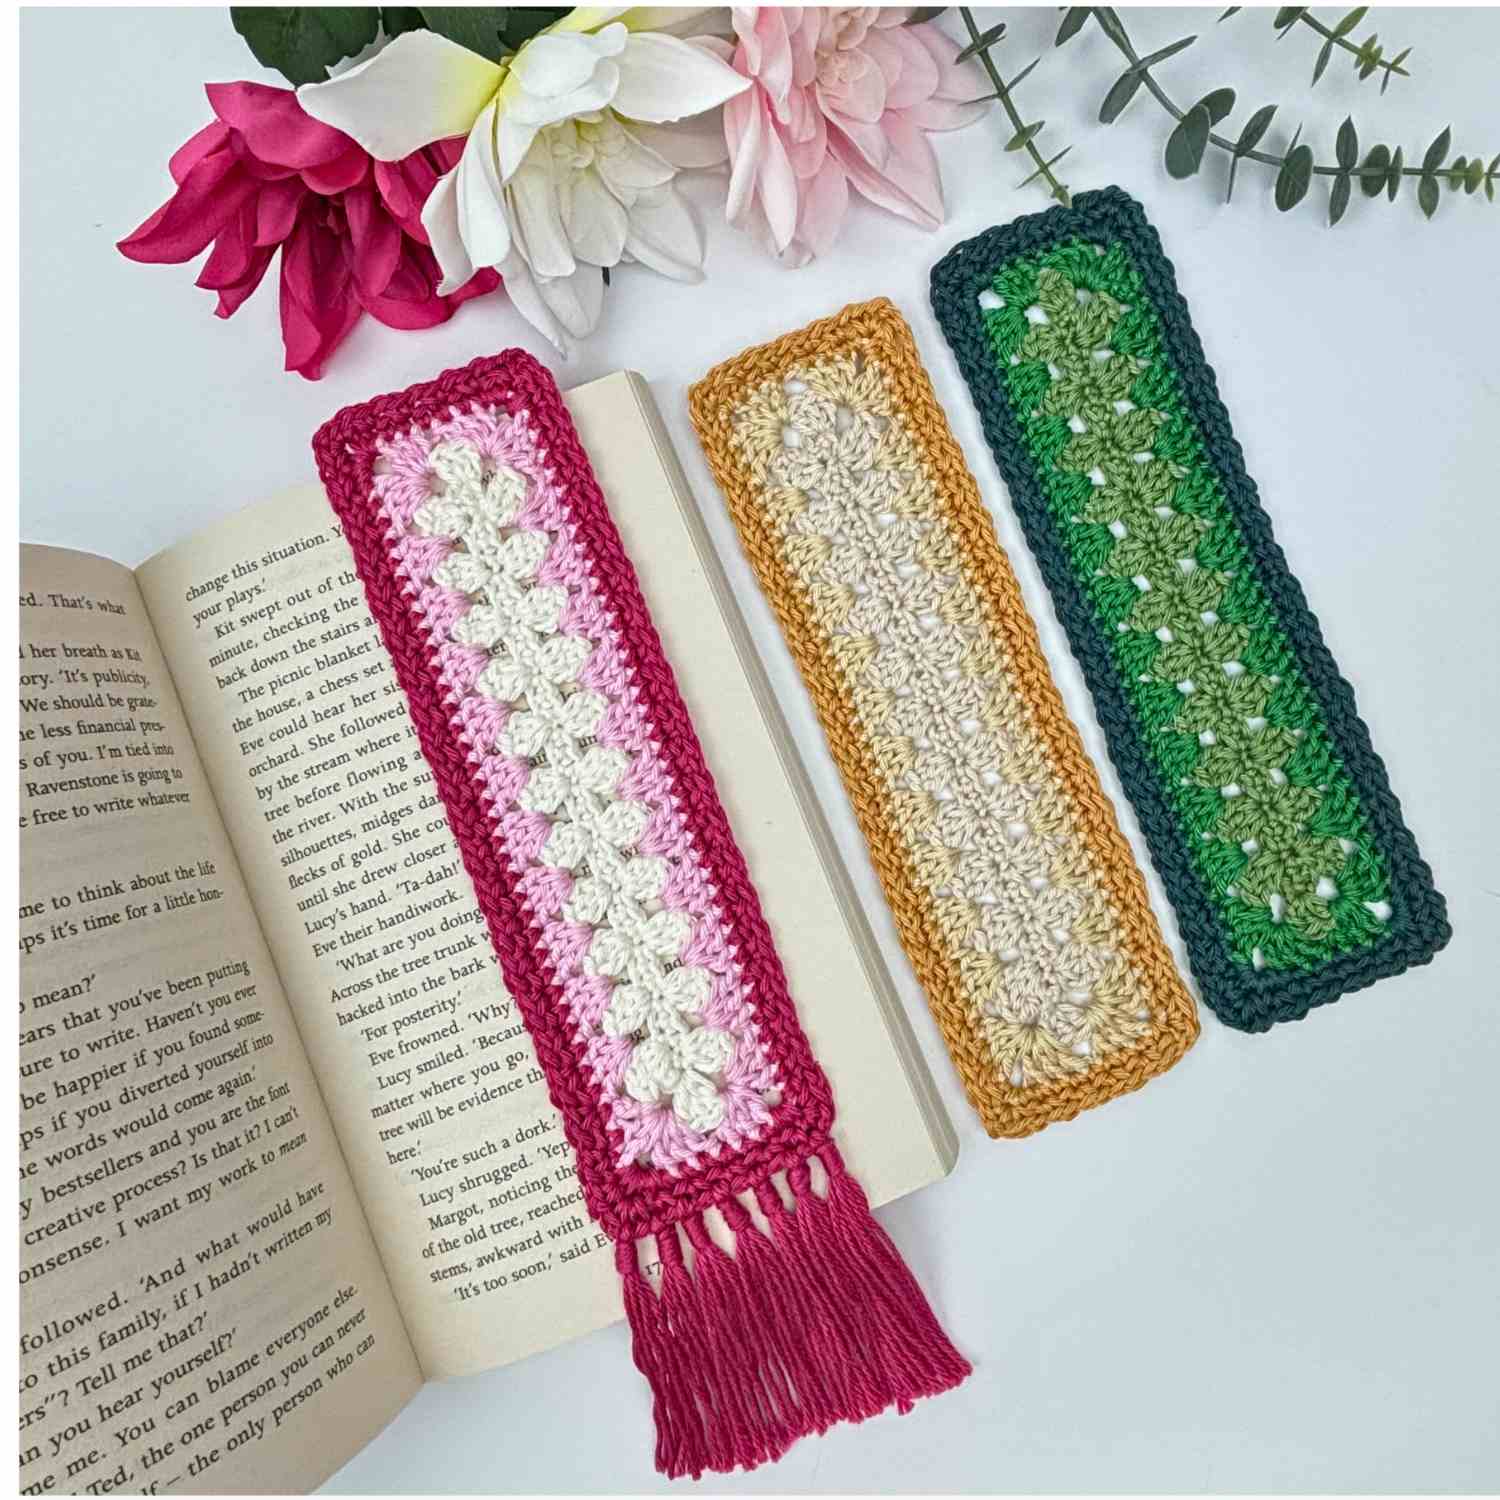
Check out my other stash-busting projects like the Granny Rectangle Cosy Reads Crochet Bookmark Pattern – or my Easy Scarf Crochet Pattern – both free on the blog.
Let's keep in touch!
I'd love to chat more.
Sign up for my newsletter and receive a weekly dose of crafting inspiration, featuring the latest trends, tips, and projects to fuel your creativity.